Here is my take on sourdough croissant bread, with layers of buttery, flaky dough that comes together using your active sourdough starter, quality bread flour, and plenty of European-style butter.
This sourdough croissant bread has become a weekend favorite in my house. It takes a bit of time and patience, but the smell of it baking and those crispy, golden layers make it totally worth the effort. Perfect with just a smear of butter and your morning coffee.

Why You’ll Love This Sourdough Croissant Bread
- Best of both worlds – This recipe combines the tangy flavor of sourdough with the buttery, flaky layers of a croissant, giving you two beloved baked goods in one.
- Simple ingredient list – You only need basic baking staples like flour, water, salt, and butter, plus your sourdough starter.
- Impressive results – While it does take time, the process is straightforward and the final product looks and tastes like something from a fancy bakery.
- Perfect weekend project – The long fermentation time means you can work on it in stages, making it a fun baking project that fits around your schedule without constant attention.
What Kind of Flour Should I Use?
For sourdough croissant bread, you’ll want to use a good quality bread flour with a protein content of around 12-13%. This higher protein level helps develop the gluten structure you need to support all those buttery layers. All-purpose flour can work in a pinch, but your bread won’t have quite the same chewy texture and might not hold up as well during the lamination process. If you’re feeling adventurous, you can even swap out about 10-20% of the bread flour for whole wheat to add a bit of nutty flavor, just keep in mind this will make your dough slightly denser.

Options for Substitutions
While this recipe has some key ingredients that shouldn’t be swapped, here are a few options where you have some flexibility:
- Bread flour: Bread flour is really important here because its high protein content gives the dough structure and chew. You can use all-purpose flour if that’s all you have, but your bread won’t have quite the same texture and rise.
- Butter: European-style butter with higher fat content works great, but regular unsalted butter is perfectly fine. Don’t substitute with margarine or oil – the butter is what gives this bread its signature croissant flavor and flaky layers.
- Sourdough starter: You really need an active sourdough starter for this recipe – there’s no good substitute. If your starter isn’t quite ready, just wait until it’s bubbly and active before beginning.
- Water: If your tap water is heavily chlorinated, use filtered or bottled water instead. Chlorine can slow down fermentation and affect how your dough rises.
Watch Out for These Mistakes While Baking
The biggest mistake with sourdough croissant bread is rushing through the multiple rest periods – each 30-minute rest is crucial for gluten development and allows the butter to incorporate properly without melting, so resist the urge to skip them even if you’re short on time. Temperature control matters more than you might think, especially when mixing in the grated butter – if your dough gets too warm (above 80°F), the butter will melt instead of creating those flaky layers, so work quickly and consider chilling your bowl if your kitchen is hot. Another common error is under-proofing during that 6-7 hour rise, which can leave you with a dense loaf – look for the dough to nearly double in size and feel puffy to the touch before moving to the shaping step. Finally, don’t skip preheating your pot for the full 20 minutes, as that initial blast of heat creates the steam needed for a crispy crust and good oven spring.

What to Serve With Sourdough Croissant Bread?
This bread is rich and buttery, so it pairs beautifully with both sweet and savory options depending on your mood. For breakfast, I love slathering it with good quality jam, honey, or even Nutella – the flaky layers soak up spreads perfectly. If you’re going the savory route, try it with scrambled eggs, smoked salmon and cream cheese, or use it to make an amazing sandwich with deli meats and cheese. The bread is also fantastic on its own alongside a bowl of soup or a fresh salad for lunch or dinner.
Storage Instructions
Store: Keep your sourdough croissant bread in a paper bag or bread box at room temperature for 2-3 days. The crust will stay crispy this way, though it might soften a bit over time. Avoid plastic bags if you want to maintain that nice exterior texture.
Freeze: This bread freezes really well for up to 3 months. Slice it before freezing so you can grab just what you need. Wrap it tightly in plastic wrap, then put it in a freezer bag to prevent freezer burn.
Refresh: To bring back that fresh-baked feel, warm slices in a 350°F oven for about 5-7 minutes. If you’re working with frozen bread, let it thaw at room temperature first, then give it a quick toast or warm-up in the oven to crisp up the outside again.
| Preparation Time | 20-25 hours |
| Cooking Time | 45-50 minutes |
| Total Time | 20-26 hours |
| Level of Difficulty | Hard |
| Servings | 12 slices |
Estimated Nutrition
Estimated nutrition for the whole recipe (without optional ingredients):
- Calories: 2200-2400
- Protein: 50-60 g
- Fat: 90-105 g
- Carbohydrates: 305-325 g
Ingredients
For the levain:
- 0.25 oz sourdough starter (active and bubbly)
- 2.12 oz flour (I always use King Arthur all-purpose flour)
- 2.15 oz water (filtered and lukewarm, roughly 85-90°F)
For the dough:
- 4.23 oz levain
- 12.5 oz water
- 0.38 oz salt
- 17.64 oz bread flour
- 4 oz butter (I like Kerrygold unsalted butter for this)
- 0.1 oz granulated sugar
Step 1: Build the Levain (Sourdough Starter Culture)
- 0.25 oz sourdough starter
- 2.12 oz flour
- 2.15 oz water
Mix the active sourdough starter with flour and lukewarm water in a small bowl, stirring until no dry flour remains.
Cover loosely and let sit at room temperature (around 78-80°F) for 10-12 hours until the mixture is bubbly, doubled in volume, and shows signs of fermentation.
This creates the levain—the living culture that will leaven your bread and give it that distinctive sourdough flavor.
I’ve found that using filtered water helps prevent any chlorine from interfering with fermentation.
Step 2: Mix the Dough Base and Begin Autolyse
- 4.23 oz levain from Step 1
- 17.64 oz bread flour
- 12.5 oz water
- 0.38 oz salt
- 0.1 oz granulated sugar
In a large bowl, combine the levain from Step 1 with bread flour, water, salt, and granulated sugar.
Mix with your hands or a wooden spoon until all flour is hydrated and a shaggy dough forms—there should be no dry flour visible, but the dough doesn’t need to be fully smooth yet.
Cover the bowl and let it rest for 30 minutes at room temperature.
This autolyse period allows the flour to fully absorb water and begins gluten development before you start folding.
Step 3: Laminate Dough with Butter in Two Stages
- dough from Step 2
- 4 oz butter
Grate the cold butter into thin shards using a box grater or food processor—cold butter distributes more evenly and creates the lamination essential for croissant texture.
Perform a series of gentle stretching folds on the dough, sprinkling the first half of the grated butter across the surface as you fold, then rest for 30 minutes.
Repeat the folding process with the remaining butter, incorporating it fully through another set of folds, and rest another 30 minutes.
Perform one final set of folds without any additions to build tension.
The gradual incorporation of butter creates thin, distinct layers that give sourdough croissant its signature flaky structure.
I recommend working with the dough in the bowl rather than on the counter—it’s less messy and you keep everything contained.
Step 4: Bulk Fermentation with Stretch and Fold
- laminated dough from Step 3
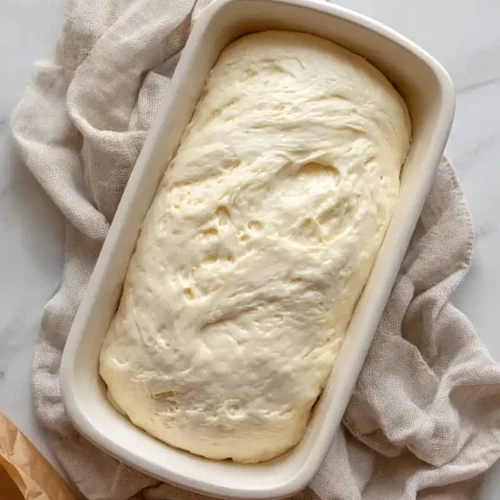
Cover the dough from Step 3 and let it rise at room temperature for 6-7 hours.
During this time, the dough will increase in volume and develop flavor from the long, slow fermentation.
No additional stretching or folding is needed during bulk fermentation—the gluten is already well-developed from Step 3, and the dough just needs time to rise gently.
Step 5: Shape and Cold Proof
- fermented dough from Step 4
Turn the dough from Step 4 onto a lightly floured work surface and gently pre-shape it into a round, then let it rest for 30 minutes.
This resting period relaxes the gluten.
After 30 minutes, perform a final shaping by gently pulling the dough toward you to build surface tension, then place it seam-side up in a floured bowl or banneton basket.
Cover and refrigerate for 12-18 hours.
The cold proof is crucial—it stops fermentation, develops more sour flavor, and makes the dough easier to score and bake.
The extended chill also helps the laminated layers set properly, giving you better oven spring and flakiness.
Step 6: Bake with Covered Steam, Then Finish Uncovered
- shaped and cold-proofed dough from Step 5
Preheat your oven and a Dutch oven (or covered baking vessel) to 450°F for at least 20 minutes.
Remove the chilled dough from the refrigerator and flip it onto a piece of parchment paper, then score the top with a sharp blade using one confident slash or your preferred pattern.
Carefully place the dough (on parchment) into the preheated Dutch oven, lower the heat to 425°F, cover with the lid, and bake for 25 minutes.
The trapped steam in the covered pot allows the crust to expand and brown beautifully.
Remove the lid and bake for another 20 minutes until the crust is deep golden brown and the internal temperature reaches 195-200°F when measured with a thermometer in the center.
Let the finished bread cool on a wire rack for at least 1 hour before slicing—this allows the interior crumb to set properly and makes for cleaner slices.
Tender Sourdough Croissant Bread
Ingredients
For the levain
- 0.25 oz sourdough starter (active and bubbly)
- 2.12 oz flour (I always use King Arthur all-purpose flour)
- 2.15 oz water (filtered and lukewarm, roughly 85-90°F)
For the dough
- 4.23 oz levain
- 12.5 oz water
- 0.38 oz salt
- 17.64 oz bread flour
- 4 oz butter (I like Kerrygold unsalted butter for this)
- 0.1 oz granulated sugar
Instructions
- Mix the active sourdough starter with flour and lukewarm water in a small bowl, stirring until no dry flour remains. Cover loosely and let sit at room temperature (around 78-80°F) for 10-12 hours until the mixture is bubbly, doubled in volume, and shows signs of fermentation. This creates the levain—the living culture that will leaven your bread and give it that distinctive sourdough flavor. I've found that using filtered water helps prevent any chlorine from interfering with fermentation.
- In a large bowl, combine the levain from Step 1 with bread flour, water, salt, and granulated sugar. Mix with your hands or a wooden spoon until all flour is hydrated and a shaggy dough forms—there should be no dry flour visible, but the dough doesn't need to be fully smooth yet. Cover the bowl and let it rest for 30 minutes at room temperature. This autolyse period allows the flour to fully absorb water and begins gluten development before you start folding.
- Grate the cold butter into thin shards using a box grater or food processor—cold butter distributes more evenly and creates the lamination essential for croissant texture. Perform a series of gentle stretching folds on the dough, sprinkling the first half of the grated butter across the surface as you fold, then rest for 30 minutes. Repeat the folding process with the remaining butter, incorporating it fully through another set of folds, and rest another 30 minutes. Perform one final set of folds without any additions to build tension. The gradual incorporation of butter creates thin, distinct layers that give sourdough croissant its signature flaky structure. I recommend working with the dough in the bowl rather than on the counter—it's less messy and you keep everything contained.
- Cover the dough from Step 3 and let it rise at room temperature for 6-7 hours. During this time, the dough will increase in volume and develop flavor from the long, slow fermentation. No additional stretching or folding is needed during bulk fermentation—the gluten is already well-developed from Step 3, and the dough just needs time to rise gently.
- Turn the dough from Step 4 onto a lightly floured work surface and gently pre-shape it into a round, then let it rest for 30 minutes. This resting period relaxes the gluten. After 30 minutes, perform a final shaping by gently pulling the dough toward you to build surface tension, then place it seam-side up in a floured bowl or banneton basket. Cover and refrigerate for 12-18 hours. The cold proof is crucial—it stops fermentation, develops more sour flavor, and makes the dough easier to score and bake. The extended chill also helps the laminated layers set properly, giving you better oven spring and flakiness.
- Preheat your oven and a Dutch oven (or covered baking vessel) to 450°F for at least 20 minutes. Remove the chilled dough from the refrigerator and flip it onto a piece of parchment paper, then score the top with a sharp blade using one confident slash or your preferred pattern. Carefully place the dough (on parchment) into the preheated Dutch oven, lower the heat to 425°F, cover with the lid, and bake for 25 minutes. The trapped steam in the covered pot allows the crust to expand and brown beautifully. Remove the lid and bake for another 20 minutes until the crust is deep golden brown and the internal temperature reaches 195-200°F when measured with a thermometer in the center. Let the finished bread cool on a wire rack for at least 1 hour before slicing—this allows the interior crumb to set properly and makes for cleaner slices.

So easy and now my favorite bread to make! I’ve been wanting to try this for awhile. So happy I finally did 😋 thank you for your great instructions💞