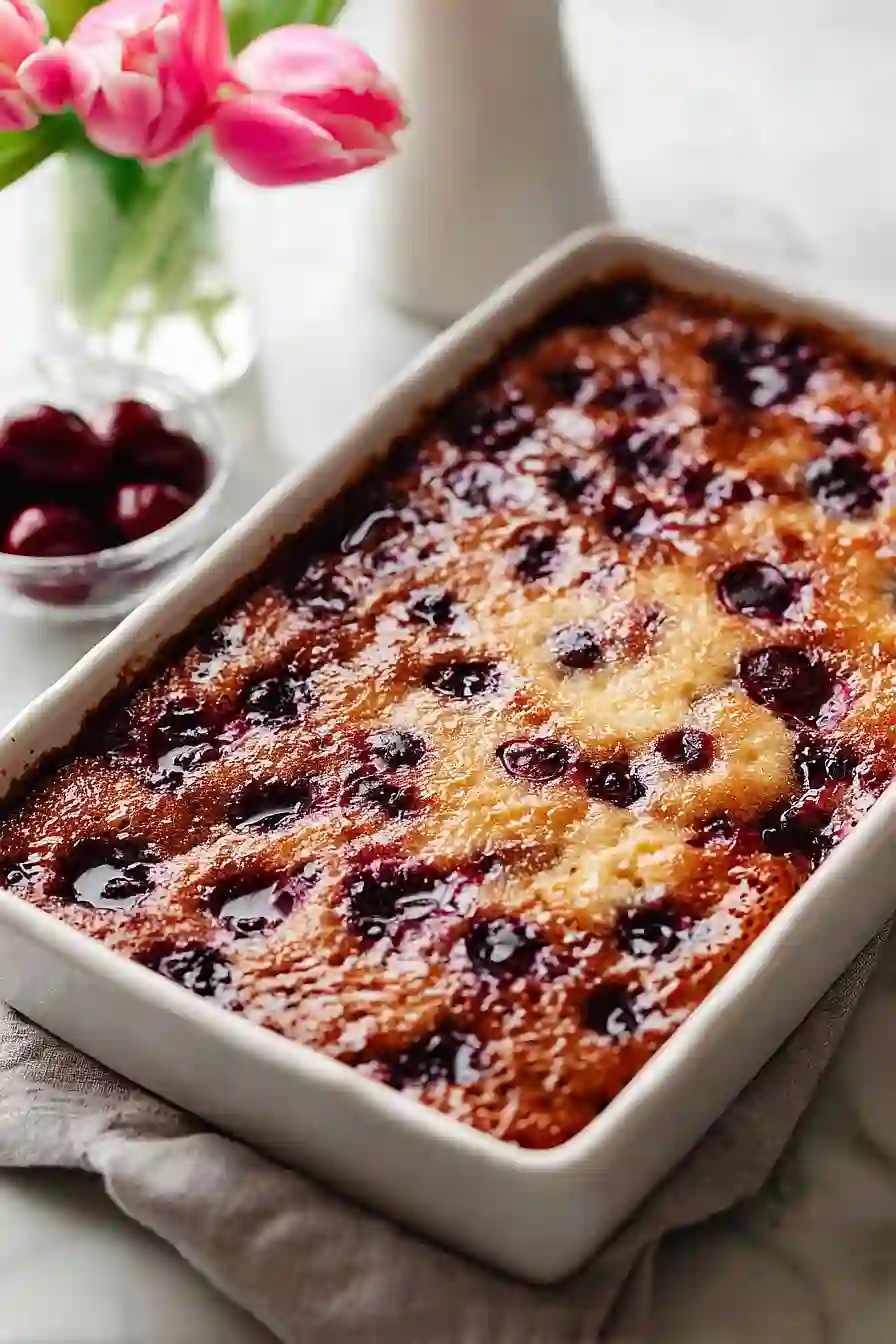
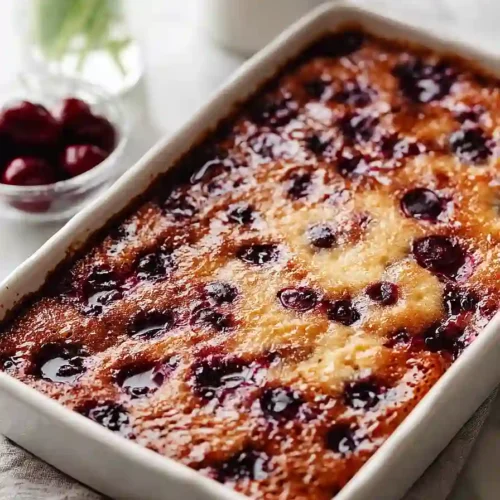
Finding a dessert that feels special but doesn’t require hours in the kitchen can be tough, especially when you’re craving something homemade that goes beyond the usual brownies or cookies. You want something that tastes like you put in real effort, but realistically, you’ve got dinner to clean up and probably a dozen other things on your to-do list.
That’s where this cherry pudding comes in clutch. It’s got that cozy, old-fashioned appeal with its cake-like texture and sweet cherry topping, it comes together in about an hour from start to finish, and you can even use canned cherries to make it even easier. Plus, the combination of cherries, pecans, and a hint of almond extract makes it taste way fancier than the effort you actually put in.
Why You’ll Love This Cherry Pudding
- Simple pantry ingredients – You probably have most of these basics in your kitchen already, and a can of cherries is all you need for the fruit component.
- Easy homemade dessert – This old-fashioned pudding cake comes together quickly without any fancy techniques or equipment.
- Built-in sauce – The cherry syrup transforms into a sweet sauce that bakes right alongside the cake, so you don’t need to make anything extra.
- Comforting and nostalgic – This warm, cozy dessert tastes like something your grandmother would make, perfect for family dinners or potlucks.
What Kind of Cherries Should I Use?
For this recipe, you’ll want to grab a can of cherries in syrup – not cherry pie filling, which is too thick and gummy for what we’re doing here. Most grocery stores carry both tart and sweet cherries in syrup, and either one will work depending on your taste preference. Tart cherries will give you a more traditional, slightly tangy flavor that pairs nicely with the sweet cake, while sweet cherries create a dessert that’s a bit more mellow. Make sure to drain the cherries but save that juice, since you’ll need it for the sauce that brings the whole dish together.
Options for Substitutions
This old-fashioned pudding cake is pretty forgiving when it comes to swaps:
- Canned cherries in syrup: Fresh or frozen cherries work great too. If using fresh, pit about 2 cups of cherries and simmer them with ½ cup sugar and ½ cup water for 10 minutes to create your own syrup. For frozen cherries, thaw them completely and use the liquid they release.
- Pecans: Walnuts or almonds make good substitutes, or you can leave the nuts out completely if you prefer or have allergies.
- Whole milk: 2% milk works fine here, or you can use half-and-half for a richer cake. In a pinch, even almond or oat milk will do the job.
- Butter: You can swap butter with vegetable oil or melted coconut oil. Use the same amount, though the flavor will be slightly different.
- All-purpose flour: A 1:1 gluten-free baking flour blend can replace regular flour if needed. The texture might be slightly different but it’ll still taste good.
- Whipped cream: Vanilla ice cream or even a dollop of Greek yogurt sweetened with a bit of honey makes a nice topping alternative.
Watch Out for These Mistakes While Baking
The biggest mistake people make with cherry pudding is using cherry pie filling instead of canned cherries in syrup, which will make your dessert way too thick and overly sweet instead of having that perfect cake-meets-pudding texture.
Don’t skip draining and reserving the cherry juice – you need that liquid to create the sauce that soaks into the cake while baking, and if you pour everything in at once without measuring, you might end up with either a dry cake or a soupy mess.
Make sure your baking dish isn’t too large or the batter will spread too thin and overbake around the edges while the center stays undercooked – a 9×9 inch pan usually works perfectly for this recipe.
For extra flavor, toast your pecans in a dry skillet for a few minutes before chopping them, and always serve this warm with freshly whipped cream since it’s meant to be a comforting, spoonable dessert rather than a firm cake.
What to Serve With Cherry Pudding?
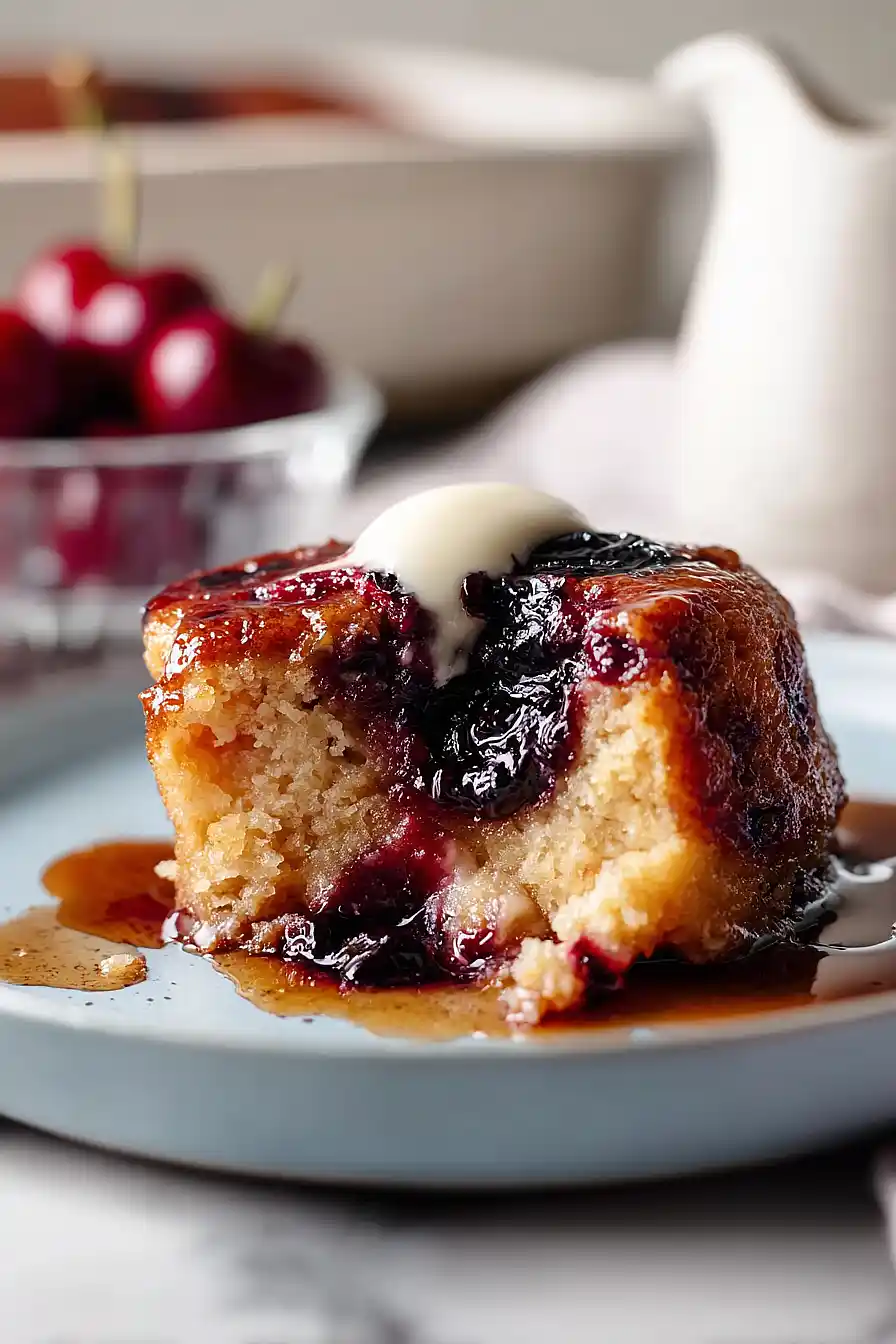
This cherry pudding is pretty rich and sweet on its own, so I like to keep things simple and let it be the star of the show. A big dollop of unsweetened whipped cream or even vanilla ice cream is really all you need to balance out the sweetness and add a cool, creamy contrast. If you’re serving this for a dinner party, a hot cup of coffee or black tea alongside makes for a nice pairing that cuts through the richness. You could also serve it with a small scoop of vanilla bean ice cream instead of whipped cream if you want something a bit more indulgent.
Storage Instructions
Store: Keep your cherry pudding covered in the fridge for up to 3 days. I like to store it right in the baking dish with plastic wrap or foil on top. The sauce will soak into the cake a bit more as it sits, which honestly makes it even better the next day.
Freeze: This pudding freezes pretty well for up to 2 months. Just wrap it tightly in plastic wrap and then foil before freezing. Thaw it overnight in the fridge when you’re ready to eat it.
Serve: You can enjoy this straight from the fridge if you like it cold, or warm it up in the microwave for about 30-45 seconds per serving. Either way, don’t forget to top it with fresh whipped cream right before serving since the cream doesn’t store well on top of the pudding.
| Preparation Time | 0-0 minutes |
| Cooking Time | 0-0 minutes |
| Total Time | 0-0 minutes |
| Level of Difficulty | Easy |
| Servings | 8 slices |
Estimated Nutrition
Estimated nutrition for the whole recipe (without optional ingredients):
- Calories: 1750-1950
- Protein: 20-25 g
- Fat: 55-65 g
- Carbohydrates: 315-340 g
Ingredients
For the batter:
- 3/4 cup sugar
- 2 1/2 tbsp Kerrygold unsalted butter
- 1 egg (room temperature, about 70°F)
- 1 cup King Arthur all-purpose flour
- 1 tsp baking powder
- 1/4 tsp salt
- 1/2 cup milk
- 15 oz cherries (drained and halved)
- 1/2 cup pecans (chopped into 1/4-inch pieces)
- 1/4 tsp almond extract
For the sauce and serving:
- 1 cup cherry juice (reserved from the canned cherries)
- 1 tbsp flour
- 1 1/2 tbsp butter
- 3/4 tsp vanilla
- 1/2 cup heavy whipping cream (for a richer finish)
Step 1: Prepare Your Mise en Place and Preheat
- 1 egg
- 15 oz cherries
- 1 cup cherry juice
- 1/2 cup pecans
Preheat your oven to 350°F.
While it heats, gather all ingredients and ensure your egg is at room temperature—this helps it blend smoothly into the batter for a tender crumb.
Drain the canned cherries, reserving 1 cup of the juice, and halve the cherries.
Chop the pecans into 1/4-inch pieces and set everything within reach.
Step 2: Build the Batter Base
- 1 cup King Arthur all-purpose flour
- 3/4 cup sugar
- 1 tsp baking powder
- 1/4 tsp salt
In a medium bowl, whisk together the flour, sugar, baking powder, and salt.
These dry ingredients are your foundation—whisking them together distributes the baking powder evenly for consistent rise throughout the pudding.
I like to sift these dry ingredients together for a lighter, more tender final texture.
Step 3: Create the Wet Batter with Cherries and Nuts
- dry ingredient mixture from Step 2
- 1/2 cup milk
- 2 1/2 tbsp Kerrygold unsalted butter
- 1/4 tsp almond extract
- 1 egg
- 15 oz cherries
- 1/2 cup pecans
In a separate small bowl, whisk together the milk, melted butter, almond extract, and room-temperature egg until well combined.
Pour this wet mixture into your dry ingredient mixture and stir just until combined—don’t overmix, as this keeps the batter tender.
Fold in the halved cherries and chopped pecans gently so they’re distributed throughout without crushing them.
Step 4: Set Up the Pudding Dish and Build Layers
- batter from Step 3
- 1 cup cherry juice
- 1 1/2 tbsp butter
- 1 tbsp flour
- 3/4 tsp vanilla
Pour the batter into a 9×13 inch baking dish or similar size, spreading it evenly across the bottom.
In a small saucepan, combine the reserved cherry juice with 1 1/2 tablespoons butter, 1 tablespoon flour, and 3/4 teaspoon vanilla, stirring until the flour dissolves.
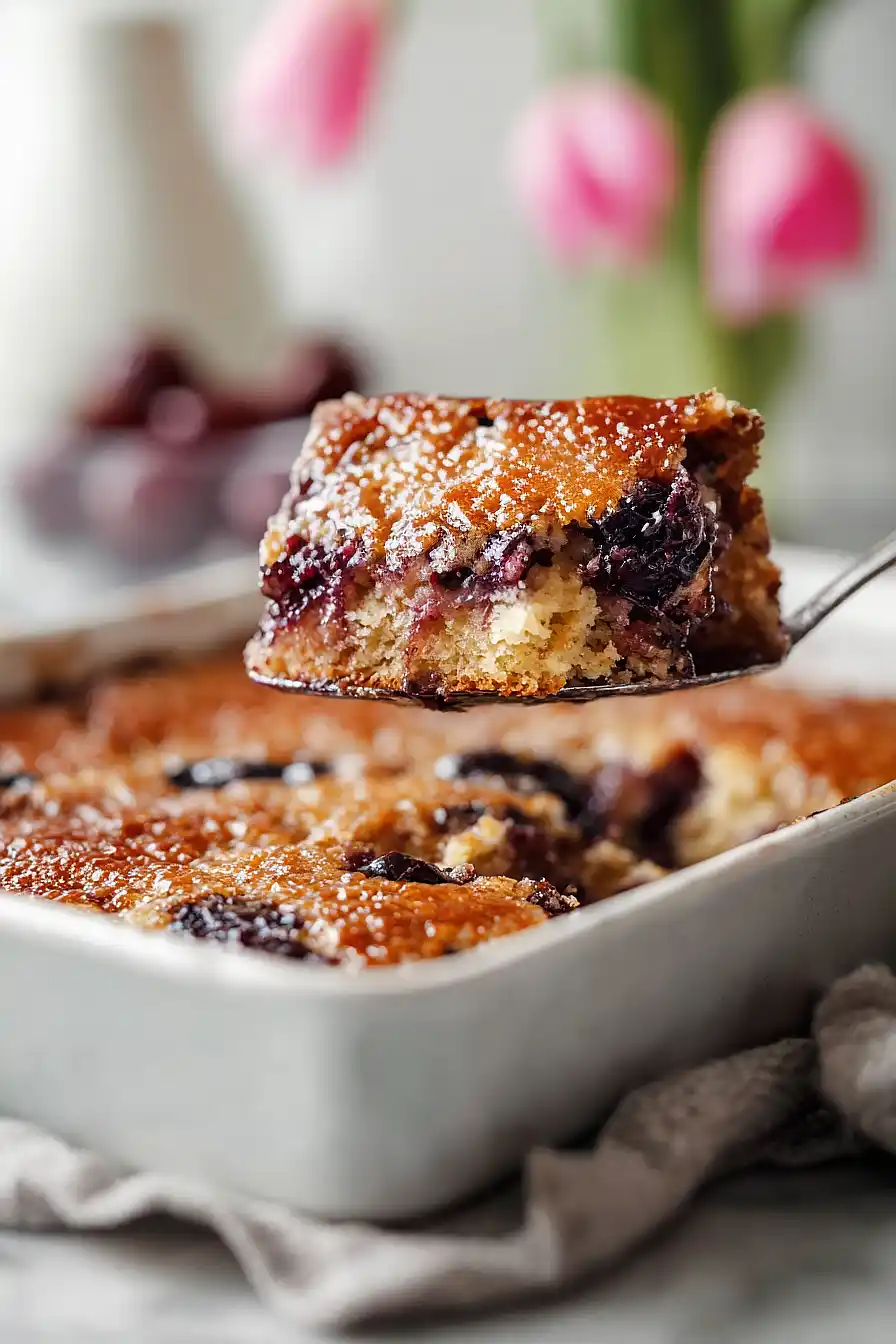
This creates a sauce that will seep down into the cake during baking, creating the signature pudding texture with a saucy bottom.
Carefully pour this cherry juice mixture over the batter without stirring—it will sink as it bakes.
Step 5: Bake Until Golden and Set
Bake for 45 minutes until the cake layer on top is golden brown and springs back when lightly touched, while the bottom remains saucy.
The pudding should jiggle slightly in the center but not be liquid—this indicates the batter is cooked through while the cherry sauce remains rich and thick underneath.
Step 6: Cool and Serve with Cream
- 1/2 cup heavy whipping cream
Let the pudding cool for 10-15 minutes—I find this resting time allows the sauce to set slightly while keeping that luscious pudding consistency.
Serve warm in bowls or spoon into dishes, and top each serving with a generous dollop of heavy whipping cream for richness.
The cream melts slightly into the warm pudding and cherry sauce, creating an indulgent finish.
Tasty Cherry Pudding
Ingredients
For the batter
- 3/4 cup sugar
- 2 1/2 tbsp Kerrygold unsalted butter
- 1 egg (room temperature, about 70°F)
- 1 cup King Arthur all-purpose flour
- 1 tsp baking powder
- 1/4 tsp salt
- 1/2 cup milk
- 15 oz cherries (drained and halved)
- 1/2 cup pecans (chopped into 1/4-inch pieces)
- 1/4 tsp almond extract
For the sauce and serving
- 1 cup cherry juice (reserved from the canned cherries)
- 1 tbsp flour
- 1 1/2 tbsp butter
- 3/4 tsp vanilla
- 1/2 cup heavy whipping cream (for a richer finish)
Instructions
- Preheat your oven to 350°F. While it heats, gather all ingredients and ensure your egg is at room temperature—this helps it blend smoothly into the batter for a tender crumb. Drain the canned cherries, reserving 1 cup of the juice, and halve the cherries. Chop the pecans into 1/4-inch pieces and set everything within reach.
- In a medium bowl, whisk together the flour, sugar, baking powder, and salt. These dry ingredients are your foundation—whisking them together distributes the baking powder evenly for consistent rise throughout the pudding. I like to sift these dry ingredients together for a lighter, more tender final texture.
- In a separate small bowl, whisk together the milk, melted butter, almond extract, and room-temperature egg until well combined. Pour this wet mixture into your dry ingredient mixture and stir just until combined—don't overmix, as this keeps the batter tender. Fold in the halved cherries and chopped pecans gently so they're distributed throughout without crushing them.
- Pour the batter into a 9x13 inch baking dish or similar size, spreading it evenly across the bottom. In a small saucepan, combine the reserved cherry juice with 1 1/2 tablespoons butter, 1 tablespoon flour, and 3/4 teaspoon vanilla, stirring until the flour dissolves. This creates a sauce that will seep down into the cake during baking, creating the signature pudding texture with a saucy bottom. Carefully pour this cherry juice mixture over the batter without stirring—it will sink as it bakes.
- Bake for 45 minutes until the cake layer on top is golden brown and springs back when lightly touched, while the bottom remains saucy. The pudding should jiggle slightly in the center but not be liquid—this indicates the batter is cooked through while the cherry sauce remains rich and thick underneath.
- Let the pudding cool for 10-15 minutes—I find this resting time allows the sauce to set slightly while keeping that luscious pudding consistency. Serve warm in bowls or spoon into dishes, and top each serving with a generous dollop of heavy whipping cream for richness. The cream melts slightly into the warm pudding and cherry sauce, creating an indulgent finish.
