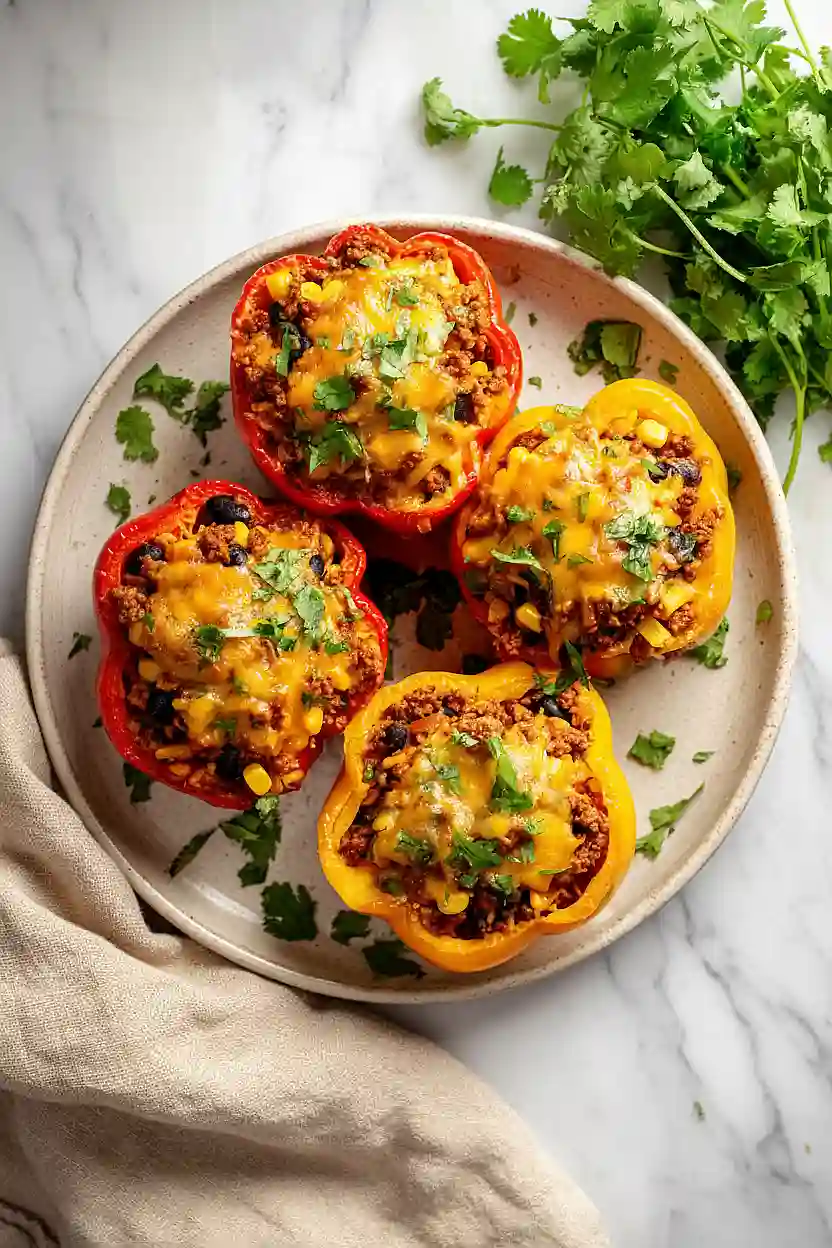
Here is my favorite Mexican stuffed bell peppers recipe, with seasoned ground beef, rice, salsa, and melted cheese all baked together in sweet bell pepper halves.
These stuffed peppers are a weeknight dinner staple in our house. I love that I can prep them ahead of time and just pop them in the oven when we’re ready to eat. Plus, the leftovers taste even better the next day!

Why You’ll Love These Mexican Stuffed Bell Peppers
- Complete one-dish meal – These stuffed peppers pack protein, veggies, and rice all in one colorful package, so you don’t need to worry about making side dishes.
- Ready in under an hour – From prep to table in just 45-55 minutes, making this perfect for busy weeknights when you want something homemade without spending hours in the kitchen.
- Customizable heat level – You can easily adjust the spice by choosing mild or spicy salsa and controlling the amount of chile powder to suit your family’s taste.
- Great for meal prep – These peppers reheat beautifully, so you can make a batch on Sunday and enjoy them throughout the week for easy lunches or dinners.
- Kid-friendly – The familiar flavors of taco night in a fun, edible bowl make this a hit with children and adults alike.
What Kind of Bell Peppers Should I Use?
Any color of bell pepper will work great for this recipe, so feel free to pick your favorites or mix and match for a colorful presentation. Green peppers tend to have a slightly more bitter, vegetal flavor, while red, yellow, and orange peppers are sweeter and milder. If you’re feeding picky eaters or kids, the sweeter varieties might be your best bet. When shopping, look for peppers that are firm, heavy for their size, and have smooth skin without any soft spots or wrinkles. You’ll want to choose peppers that can stand upright on their own, which makes stuffing and baking them much easier.

Options for Substitutions
This recipe is pretty forgiving and works well with a few swaps if you need to make changes:
- Ground beef: Ground turkey, ground chicken, or even ground pork work great here. For a vegetarian version, try black beans or a mix of black beans and corn – just drain and rinse them well before using.
- Bell peppers: Any color bell pepper works fine. Red, yellow, and orange tend to be sweeter, while green has a slightly more bitter taste. You can also use poblano peppers for a spicier kick, though you might want to reduce the chili powder a bit.
- Rice: White rice, brown rice, or even cauliflower rice can work. Keep in mind that brown rice takes longer to cook, so you may need to pre-cook it or add extra water and cooking time.
- Salsa: Use whatever salsa you like – mild, medium, or hot. You can also substitute with canned diced tomatoes mixed with some taco seasoning if that’s what you have on hand.
- Cheese: Cheddar, Monterey Jack, pepper jack, or a Mexican blend all work well. Use whatever melts nicely and fits your taste preference.
- Sour cream: Greek yogurt makes a great substitute and adds some extra protein. You can also use Mexican crema for a more authentic touch.
Watch Out for These Mistakes While Cooking
The biggest mistake people make with stuffed peppers is not pre-cooking them enough, which leaves you with crunchy peppers and overcooked filling – make sure those peppers are tender after microwaving by testing them with a fork before stuffing.
Another common error is forgetting to cook the rice fully in step 5, so check that all the water is absorbed and the rice is tender before filling your peppers, otherwise you’ll end up with hard, crunchy grains.
Don’t skip salting the inside of the peppers after removing the seeds, as this small step adds flavor from the inside out and prevents bland results.
Finally, resist the urge to overstuff the peppers – leave about a quarter inch of space at the top so the filling doesn’t spill over during baking, and if you have extra meat mixture, it makes a great side dish on its own.
What to Serve With Mexican Stuffed Bell Peppers?
These stuffed peppers are pretty filling on their own, but I love serving them with a simple side of refried beans or black beans topped with a little cheese and cilantro. A fresh corn salad with lime juice and cotija cheese makes a great pairing too, adding a nice crunch and brightness to balance out the hearty peppers. If you want something lighter, try some tortilla chips with guacamole or a crisp romaine salad with a lime-cilantro dressing. You could also warm up some flour tortillas on the side for scooping up any extra filling that falls out while you’re eating.
Storage Instructions
Store: These stuffed peppers keep really well in the fridge for up to 4 days in an airtight container. They actually taste even better the next day once all the flavors have had time to hang out together. I like to make a big batch on Sunday and have them ready for easy weeknight dinners.
Freeze: You can totally freeze these for up to 3 months! I recommend wrapping each pepper individually in plastic wrap, then placing them all in a freezer-safe container or bag. Just skip adding the sour cream and cheese on top until after you reheat them so they stay fresh and creamy.
Reheat: Pop them in the microwave for 2-3 minutes until heated through, or warm them up in the oven at 350°F for about 20 minutes covered with foil. If they’re frozen, let them thaw in the fridge overnight first for best results.
| Preparation Time | 25-30 minutes |
| Cooking Time | 20-25 minutes |
| Total Time | 45-55 minutes |
| Level of Difficulty | Medium |
| Servings | 6 servings |
Estimated Nutrition
Estimated nutrition for the whole recipe (without optional ingredients):
- Calories: 2050-2250
- Protein: 95-110 g
- Fat: 90-105 g
- Carbohydrates: 210-230 g
Ingredients
For the filling:
- 1 lb ground beef
- 1.75 cups onion (finely diced into 1/4-inch pieces)
- 24 oz salsa (I prefer Pace Chunky Salsa for the right consistency)
- 1.5 tsp chile powder
- 1.25 tsp cumin
- 2 cloves garlic (minced)
- 1 cup rice
- 2.25 cups water
- 0.75 tsp salt
For the peppers:
- 6 bell peppers (halved lengthwise and seeds removed)
For the assembly and topping:
- 1.25 cups cheese (I always use Tillamook Sharp Cheddar for better melting)
- 3 tbsp cilantro
- 0.25 cup sour cream (use full-fat for a richer, creamy finish)
Step 1: Prepare the Peppers and Preheat the Oven
- 6 bell peppers
- 0.25 cup water
- salt
Preheat your oven to 350°F.
While it heats, halve the bell peppers lengthwise and remove all seeds and membranes.
Lightly salt the inside of each pepper half and arrange them cut-side up in a 9×13 inch baking dish.
Add 1/4 cup water to the bottom of the dish, cover tightly with foil or a lid, and place in the preheated oven.
This head start softens the peppers while you prepare the filling, ensuring they’ll be perfectly tender by the time you assemble everything.
Step 2: Brown the Beef and Build the Filling Base
- 1 lb ground beef
- 1.75 cups onion
- 2 cloves garlic
Heat a large skillet over medium-high heat and add the ground beef, breaking it apart with a spoon as it cooks.
After about 5 minutes, when the beef is mostly browned, add the finely diced onion and minced garlic.
Cook for another 5 minutes, stirring occasionally, until the onion softens and becomes translucent—this creates the aromatic foundation for all the flavors to come.
Step 3: Create the Seasoned Rice and Meat Mixture
- 1.5 tsp chile powder
- 1.25 tsp cumin
- 24 oz salsa
- 1 cup rice
- 2.25 cups water
- 0.75 tsp salt
- 3 tbsp cilantro
Stir the chile powder and cumin into the beef mixture and cook for 1 minute to toast the spices—this develops their depth.
Pour in the salsa, rice, water, and salt, stirring until everything is evenly combined.
Bring to a boil, then reduce heat to low, cover, and simmer for 20 minutes until the rice absorbs the liquid and becomes tender.
I like to use Pace Chunky Salsa because its texture keeps the filling hearty without making it watery.
Just before the rice finishes cooking, stir in the fresh cilantro so it maintains its bright flavor.
Step 4: Fill the Peppers and Bake
- peppers from Step 1
- seasoned rice and meat mixture from Step 3
Remove the peppers from the oven—they should be slightly softened but still hold their shape.
Carefully spoon the filling from Step 3 into each pepper half, dividing it evenly and packing it gently so the peppers hold together.
Return the filled peppers to the baking dish (they can be snug together) and bake uncovered for 18-20 minutes until the peppers are tender and the filling is heated through.
Step 5: Top with Cheese and Finish
- 1.25 cups cheese
Remove the peppers from the oven and immediately sprinkle the shredded cheese evenly over each pepper half.
For a richer, creamier finish, I always use Tillamook Sharp Cheddar because it melts beautifully and adds real flavor depth.
Return to the oven for just 1-2 minutes until the cheese melts and gets slightly bubbly.
Step 6: Serve with Garnishes
- 0.25 cup sour cream
- cilantro
Transfer the peppers to a serving platter or individual plates while they’re still warm.
Serve each pepper topped with a dollop of full-fat sour cream, which adds a cool, tangy contrast to the warm, savory filling.
Garnish with extra fresh cilantro if desired for a pop of color and fresh flavor.

Rice Stuffed Bell Peppers
Ingredients
For the filling
- 1 lb ground beef
- 1.75 cups onion (finely diced into 1/4-inch pieces)
- 24 oz salsa (I prefer Pace Chunky Salsa for the right consistency)
- 1.5 tsp chile powder
- 1.25 tsp cumin
- 2 cloves garlic (minced)
- 1 cup rice
- 2.25 cups water
- 0.75 tsp salt
For the peppers
- 6 bell peppers (halved lengthwise and seeds removed)
For the assembly and topping
- 1.25 cups cheese (I always use Tillamook Sharp Cheddar for better melting)
- 3 tbsp cilantro
- 0.25 cup sour cream (use full-fat for a richer, creamy finish)
Instructions
- Preheat your oven to 350°F. While it heats, halve the bell peppers lengthwise and remove all seeds and membranes. Lightly salt the inside of each pepper half and arrange them cut-side up in a 9x13 inch baking dish. Add 1/4 cup water to the bottom of the dish, cover tightly with foil or a lid, and place in the preheated oven. This head start softens the peppers while you prepare the filling, ensuring they'll be perfectly tender by the time you assemble everything.
- Heat a large skillet over medium-high heat and add the ground beef, breaking it apart with a spoon as it cooks. After about 5 minutes, when the beef is mostly browned, add the finely diced onion and minced garlic. Cook for another 5 minutes, stirring occasionally, until the onion softens and becomes translucent—this creates the aromatic foundation for all the flavors to come.
- Stir the chile powder and cumin into the beef mixture and cook for 1 minute to toast the spices—this develops their depth. Pour in the salsa, rice, water, and salt, stirring until everything is evenly combined. Bring to a boil, then reduce heat to low, cover, and simmer for 20 minutes until the rice absorbs the liquid and becomes tender. I like to use Pace Chunky Salsa because its texture keeps the filling hearty without making it watery. Just before the rice finishes cooking, stir in the fresh cilantro so it maintains its bright flavor.
- Remove the peppers from the oven—they should be slightly softened but still hold their shape. Carefully spoon the filling from Step 3 into each pepper half, dividing it evenly and packing it gently so the peppers hold together. Return the filled peppers to the baking dish (they can be snug together) and bake uncovered for 18-20 minutes until the peppers are tender and the filling is heated through.
- Remove the peppers from the oven and immediately sprinkle the shredded cheese evenly over each pepper half. For a richer, creamier finish, I always use Tillamook Sharp Cheddar because it melts beautifully and adds real flavor depth. Return to the oven for just 1-2 minutes until the cheese melts and gets slightly bubbly.
- Transfer the peppers to a serving platter or individual plates while they're still warm. Serve each pepper topped with a dollop of full-fat sour cream, which adds a cool, tangy contrast to the warm, savory filling. Garnish with extra fresh cilantro if desired for a pop of color and fresh flavor.
