Here is my favorite Soviet shortcrust peaches recipe, with a simple, tender shortcrust pastry base and sweet, juicy peaches that create a comforting dessert that’s perfect for any occasion.
This recipe has become a real hit in my house during peach season. My kids love helping me arrange the peach slices on top, and my husband always asks for seconds. There’s something so satisfying about a homemade dessert that looks fancy but is actually pretty easy to make.

Why You’ll Love This Soviet Shortcrust Peaches
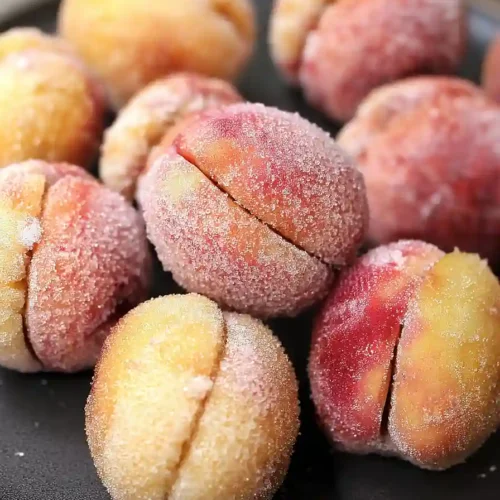
- Fun and creative baking project – These adorable peach-shaped cookies are as fun to make as they are to eat, perfect for impressing friends and family with your baking skills.
- Natural coloring from vegetables – Using carrot and beet juice to create the beautiful peachy color makes this recipe healthier than using artificial food coloring.
- Simple pantry ingredients – Most of these ingredients are things you probably already have in your kitchen, making it easy to whip up whenever the craving strikes.
- Sweet dulce de leche filling – The rich, creamy boiled condensed milk filling adds the perfect amount of sweetness and makes each bite absolutely delicious.
- Ready in about an hour – From start to finish, you can have these charming treats ready to serve in just 45-65 minutes, making them perfect for last-minute entertaining.
What Kind of Flour Should I Use?
For this Soviet shortcrust peach recipe, regular all-purpose flour (also called plain flour) is your best bet and will give you that perfect tender, crumbly texture you’re looking for. You don’t need anything fancy here – just grab whatever all-purpose flour you have in your pantry. If you’re outside the US, plain flour works exactly the same way. The key is to measure your flour properly, so either weigh it if you have a kitchen scale or use the spoon-and-level method to avoid packing too much into your measuring cup. Too much flour can make your shortcrust tough instead of that lovely crumbly texture that makes these treats so good.

Options for Substitutions
This unique recipe has some room for swaps, though a few ingredients are pretty important to keep:
- Boiled condensed milk: If you can’t find boiled condensed milk, dulce de leche works perfectly as mentioned. You can also make your own by simmering a can of sweetened condensed milk in a water bath for 2-3 hours, or use caramel sauce as a quicker option.
- Sour cream: Greek yogurt or crème fraîche can replace sour cream in the dough. If using Greek yogurt, make sure it’s full-fat to maintain the right texture.
- Plain flour: All-purpose flour is your best bet here – don’t substitute with other types as the dough needs to hold its shape for forming the ‘peaches.’
- Butter: You can use margarine or vegetable shortening instead of butter, but butter gives the best flavor and texture for this pastry.
- Carrot and beet: These vegetables are essential for creating the natural orange and pink colors that make these look like real peaches – there’s no good substitute for this coloring method.
- Baking powder: If you’re out, you can make your own with ¼ tsp baking soda plus ½ tsp cream of tartar, or just use ¼ tsp baking soda (the texture will be slightly different but still work).
Watch Out for These Mistakes While Baking
The biggest mistake when making these peach-shaped cookies is overworking the dough, which can make your cookies tough instead of tender – mix just until the ingredients come together and chill the dough for at least 30 minutes to make it easier to handle.
Another common error is not cooking your vegetables long enough before grating them for the natural coloring – both the carrot and beet need to be fully tender when boiled, or they won’t blend smoothly and could create lumps in your dough.
When shaping the cookies, avoid making them too thick since they won’t bake evenly, and be sure to seal the edges properly around the dulce de leche filling to prevent leaking during baking.
Finally, don’t skip the sugar dipping step while the cookies are still slightly warm – this gives them their signature sweet coating and authentic appearance.

What to Serve With Soviet Shortcrust Peaches?
These adorable little peach cookies are perfect with a hot cup of tea or coffee – the sweet, buttery flavor pairs beautifully with something warm to sip. I love serving them alongside other Russian tea cookies or simple butter cookies to create a nice variety on a dessert plate. Since they’re already quite sweet with that dulce de leche filling, they go great with unsweetened black tea or even a strong espresso to balance things out. You could also serve them with some fresh berries or a light fruit salad if you want to add something fresh to the mix.
Storage Instructions
Keep Fresh: These sweet little peach cookies are best stored in an airtight container at room temperature for up to 5 days. Layer them between parchment paper so they don’t stick together, and they’ll stay nice and tender. I like to keep mine in a tin box – it makes them feel extra special!
Freeze: You can freeze these cookies for up to 3 months in a freezer-safe container with parchment between layers. They thaw beautifully at room temperature in about 30 minutes, and honestly taste just as good as fresh. Perfect for making ahead for special occasions or when you want a taste of nostalgia.
Make Ahead: The dough can be made a day ahead and wrapped tightly in plastic wrap in the fridge. Let it come to room temperature for about 20 minutes before rolling and shaping. You can also prep the dulce de leche filling ahead of time and store it covered in the fridge for up to a week.
| Preparation Time | 30-45 minutes |
| Cooking Time | 15-20 minutes |
| Total Time | 45-65 minutes |
| Level of Difficulty | Medium |
Estimated Nutrition
Estimated nutrition for the whole recipe (without optional ingredients):
- Calories: 2200-2400
- Protein: 40-50 g
- Fat: 70-80 g
- Carbohydrates: 350-380 g
Ingredients
For the cookie dough:
- 2 eggs
- 1/2 cup sugar (100g)
- 1/4 cup unsalted butter (50g)
- 1/4 cup sour cream (50g)
- 2 1/2 to 2 3/4 cups plain flour (300–350g)
- 1/2 tsp baking powder
- Small pinch salt
For the filling:
- 1 cup dulce de leche or cooked sweetened condensed milk (250g)
- 1/3 tsp salt
For the natural dye & finish:
- 1 medium carrot
- 1 medium beet
- Granulated sugar for rolling
Step 1: Prepare and Bake the Cookie Dough
- 2 eggs
- 1/2 cup sugar (100g)
- 1/4 cup unsalted butter (50g)
- 1/4 cup sour cream (50g)
- 2 1/2 to 2 3/4 cups plain flour (300–350g)
- 1/2 tsp baking powder
- small pinch salt
Preheat your oven to 190°C (375°F).
In a large bowl, whisk the eggs and sugar together with a mixer until the sugar dissolves.
Add the softened butter and sour cream to the mixture, whisking again until combined.
Sift together 2 1/2 cups flour (300g), baking powder, and a pinch of salt; gradually add this to the wet ingredients, mixing until incorporated.
If the dough seems too runny, add up to 1/4 cup (50g) more flour as needed—the dough may be sticky, which is normal.
Using a tablespoon, form equal-sized balls of dough, greasing your hands lightly with oil if the dough sticks.
Arrange the dough balls on a parchment-lined baking sheet and bake for 15-17 minutes, until the cookies are set but not browned.
Step 2: Shape, Core, and Pair the Cookies
Allow the cookies to cool slightly after baking.
Using a small knife or a special mold, cut a small circle from the bottom of each cookie to create a cavity for the filling.
Pair the cookies by matching halves of similar size.
This will make assembly neater and ensure the cookie ‘sandwiches’ are even.
Step 3: Make and Pipe the Dulce de Leche Filling
- 1 cup dulce de leche or cooked sweetened condensed milk (250g)
- 1/3 tsp salt
In a bowl, whisk the dulce de leche (or boiled sweetened condensed milk) with the measured salt until smooth and creamy.
If desired, you can add a spoonful of butter, a touch of mascarpone, or a bit of apricot jam for more depth of flavor.
Transfer the mixture to a piping bag.
Pipe the filling into the cavity of each cookie half, slightly overfilling so the filling will stick to the paired half when pressed together.
Step 4: Assemble Sandwich Cookies and Chill
Press the paired cookie halves together gently so the filling joins them securely.
Arrange the assembled cookies on a tray and place them in the fridge for about 30 minutes to allow the filling to set.
I like to chill the cookies a little longer for a firmer center, but 30 minutes is usually enough.
Step 5: Prepare Vegetable Juices for Coloring
- 1 medium carrot
- 1 medium beet
While the cookies chill, grate the carrot and beetroot separately.
Place the grated carrot and beet each in their own bowl, then use a sieve or clean cloth to strain and extract the juices into separate bowls.
These vibrant juices will be used to color the cookies naturally.
Step 6: Color and Coat Cookies with Sugar
- carrot juice (from Step 5)
- beetroot juice (from Step 5)
- granulated sugar for rolling
Take each chilled sandwich cookie and dip one half into the carrot juice and the other half into the beet juice, letting the excess drip off.
While the cookie is still wet, generously roll it in granulated sugar, ensuring even coverage.
Repeat with all cookies for a playful, vibrant look.
For a brighter color, I sometimes dip each half twice, letting excess juice drip off between dips.
Step 7: Set and Serve the Decorated Cookies
Place the sugar-coated, colored cookies on a tray and allow them to set at room temperature for about an hour—this helps the sugar coating adhere and the colors become more pronounced.
For a charming touch when serving, decorate each cookie with fresh or dried mint leaves to resemble real fruit or vegetables.
Irresistible Soviet Shortcrust Peaches
Ingredients
For the cookie dough:
- 2 eggs
- 1/2 cup sugar (100g)
- 1/4 cup unsalted butter (50g)
- 1/4 cup sour cream (50g)
- 2 1/2 to 2 3/4 cups plain flour (300–350g)
- 1/2 tsp baking powder
- small pinch salt
For the filling:
- 1 cup dulce de leche or cooked sweetened condensed milk (250g)
- 1/3 tsp salt
For the natural dye & finish:
- 1 medium carrot
- 1 medium beet
- granulated sugar for rolling
Instructions
- Preheat your oven to 190°C (375°F). In a large bowl, whisk the eggs and sugar together with a mixer until the sugar dissolves. Add the softened butter and sour cream to the mixture, whisking again until combined. Sift together 2 1/2 cups flour (300g), baking powder, and a pinch of salt; gradually add this to the wet ingredients, mixing until incorporated. If the dough seems too runny, add up to 1/4 cup (50g) more flour as needed—the dough may be sticky, which is normal. Using a tablespoon, form equal-sized balls of dough, greasing your hands lightly with oil if the dough sticks. Arrange the dough balls on a parchment-lined baking sheet and bake for 15-17 minutes, until the cookies are set but not browned.
- Allow the cookies to cool slightly after baking. Using a small knife or a special mold, cut a small circle from the bottom of each cookie to create a cavity for the filling. Pair the cookies by matching halves of similar size. This will make assembly neater and ensure the cookie 'sandwiches' are even.
- In a bowl, whisk the dulce de leche (or boiled sweetened condensed milk) with the measured salt until smooth and creamy. If desired, you can add a spoonful of butter, a touch of mascarpone, or a bit of apricot jam for more depth of flavor. Transfer the mixture to a piping bag. Pipe the filling into the cavity of each cookie half, slightly overfilling so the filling will stick to the paired half when pressed together.
- Press the paired cookie halves together gently so the filling joins them securely. Arrange the assembled cookies on a tray and place them in the fridge for about 30 minutes to allow the filling to set. I like to chill the cookies a little longer for a firmer center, but 30 minutes is usually enough.
- While the cookies chill, grate the carrot and beetroot separately. Place the grated carrot and beet each in their own bowl, then use a sieve or clean cloth to strain and extract the juices into separate bowls. These vibrant juices will be used to color the cookies naturally.
- Take each chilled sandwich cookie and dip one half into the carrot juice and the other half into the beet juice, letting the excess drip off. While the cookie is still wet, generously roll it in granulated sugar, ensuring even coverage. Repeat with all cookies for a playful, vibrant look. For a brighter color, I sometimes dip each half twice, letting excess juice drip off between dips.
- Place the sugar-coated, colored cookies on a tray and allow them to set at room temperature for about an hour—this helps the sugar coating adhere and the colors become more pronounced. For a charming touch when serving, decorate each cookie with fresh or dried mint leaves to resemble real fruit or vegetables.
