Finding a satisfying weeknight dinner that works for the whole family—especially when you’re dealing with gluten sensitivities—can feel like an impossible task. Between making sure the meal is actually filling, keeping it interesting enough that everyone will eat it, and avoiding all those hidden gluten ingredients, dinner prep can quickly become overwhelming.
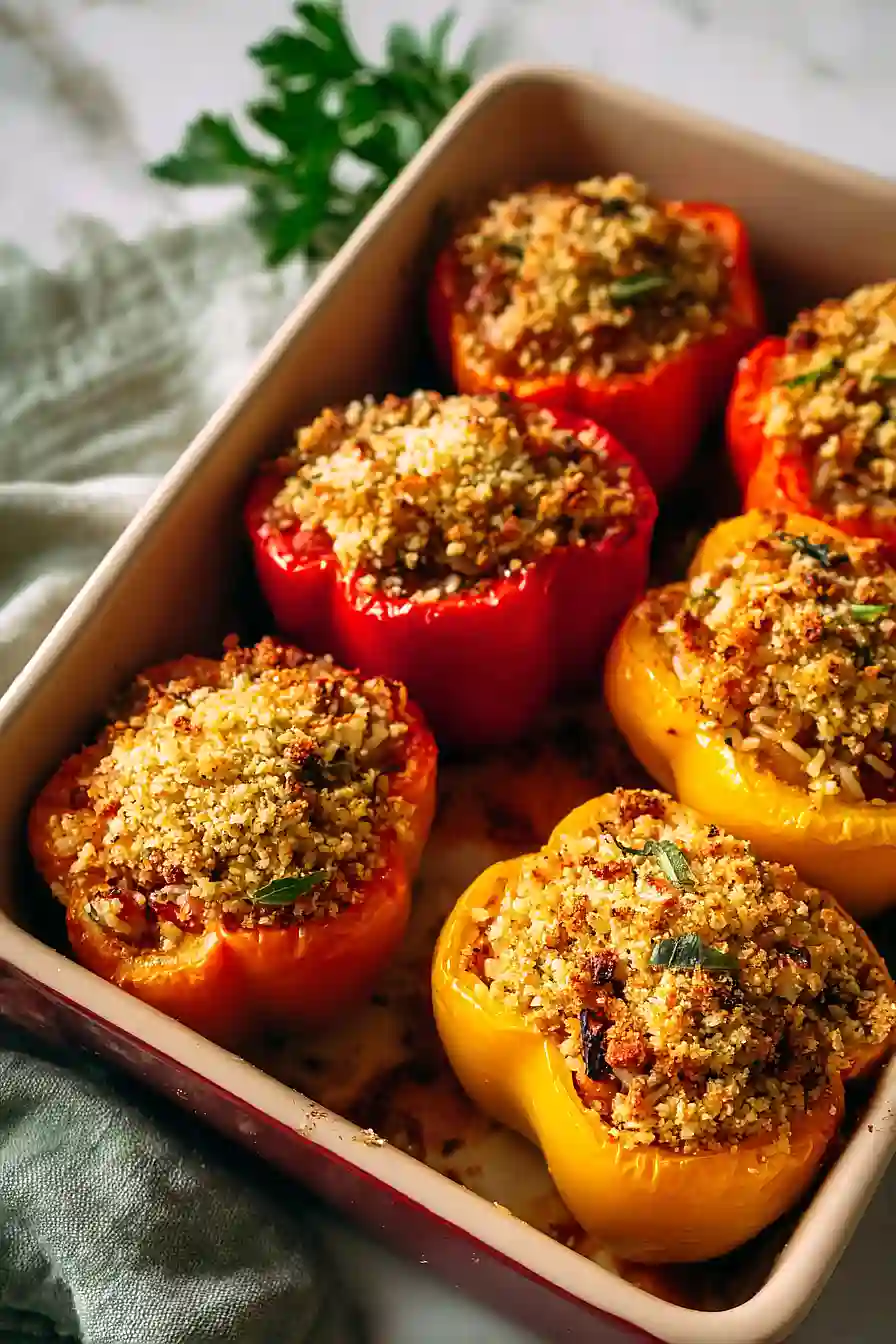
That’s where these gluten-free stuffed bell peppers come in clutch: they’re hearty and flavorful thanks to the Italian sausage and riced cauliflower filling, naturally gluten-free without any complicated substitutions, and easy to customize based on what’s already in your fridge.
Why You’ll Love These Stuffed Bell Peppers
- Gluten-free friendly – This recipe uses riced cauliflower instead of traditional rice, making it perfect for anyone avoiding gluten while still delivering that satisfying, hearty texture.
- Quick weeknight dinner – Ready in about an hour from start to finish, these stuffed peppers are faster than you might think and perfect for busy evenings.
- Low-carb option – With cauliflower rice as the base, you get all the comfort of stuffed peppers without the heavy carbs, making it a lighter choice that still fills you up.
- Meal prep ready – These peppers reheat beautifully, so you can make a batch on Sunday and have easy lunches or dinners ready throughout the week.
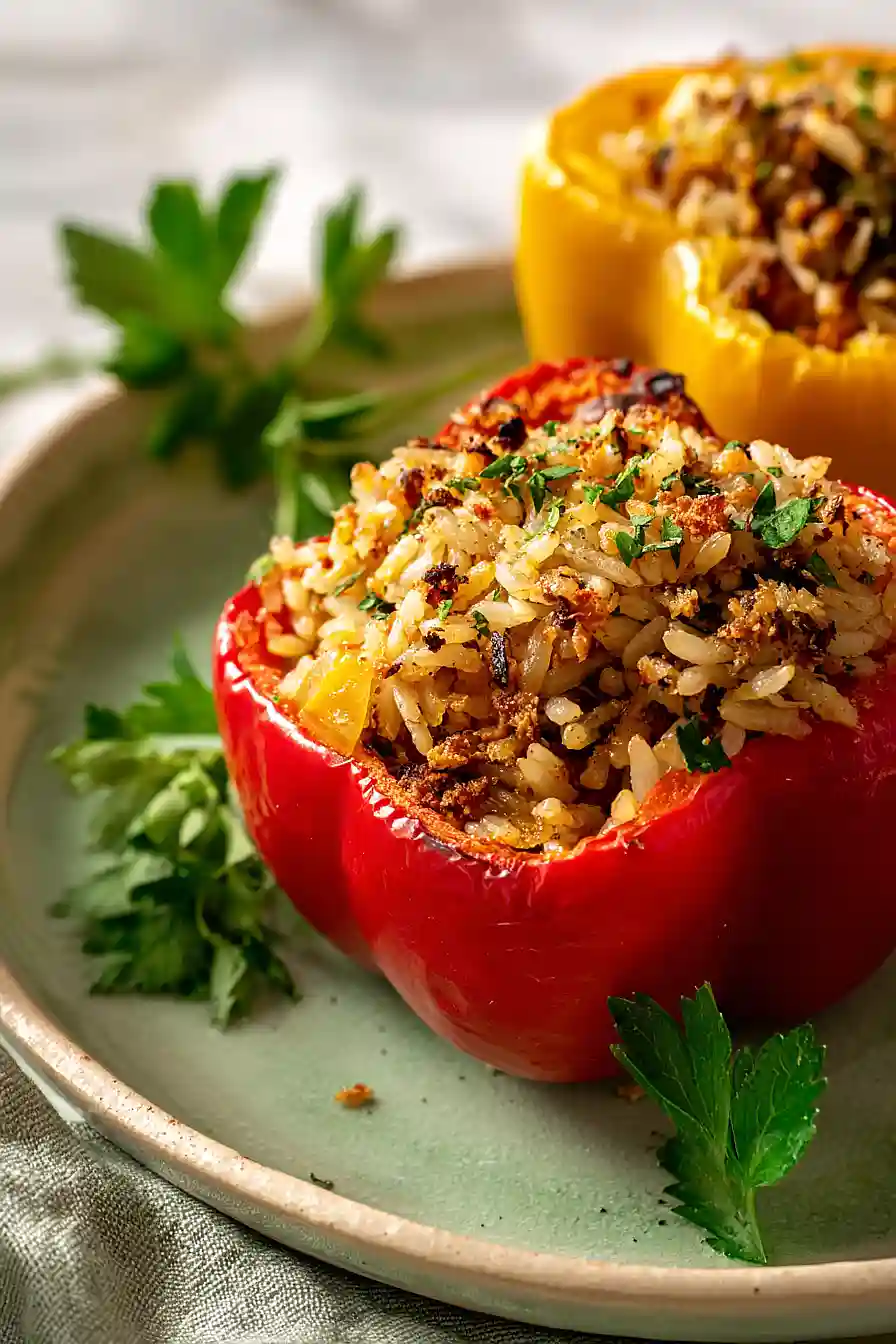
- Flavorful and satisfying – The combination of Italian sausage, olives, and fresh parsley creates a Mediterranean-inspired filling that’s anything but boring.
What Kind of Bell Peppers Should I Use?
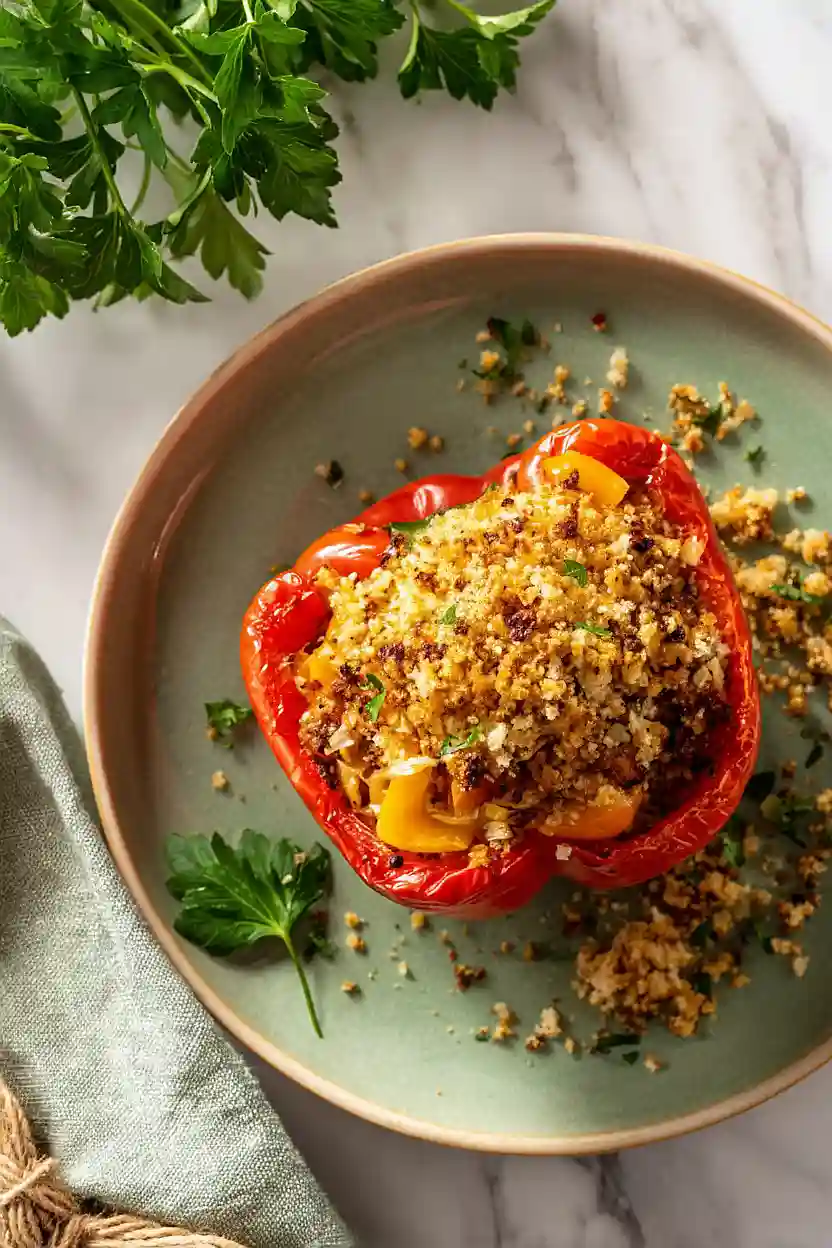
You can use any color bell pepper for this recipe, and honestly, it’s fun to mix and match for a colorful presentation. Red, yellow, and orange peppers tend to be a bit sweeter, while green peppers have a slightly more bitter, earthy flavor. When picking out your peppers at the store, look for ones that can stand upright on their own and have a flat bottom – this makes stuffing them so much easier. Size-wise, aim for medium to large peppers so you have plenty of room for all that delicious filling.
Options for Substitutions
This recipe is pretty forgiving when it comes to swaps, so feel free to work with what you have:
- Italian sausage: Ground beef, ground turkey, or ground chicken all work great here. If using plain ground meat, add 1 teaspoon of Italian seasoning to get that similar flavor profile.
- Riced cauliflower: You can use regular rice instead – just cook it according to package directions before mixing it into the filling. White rice, brown rice, or even quinoa would work well.
- Olives: Not a fan of olives? Leave them out or swap them for sun-dried tomatoes, capers, or even diced mushrooms for that savory element.
- Crackers: Since this is a gluten-free recipe, make sure you’re using certified gluten-free crackers. You can also substitute with gluten-free breadcrumbs, crushed gluten-free cornflakes, or almond meal.
- Bell peppers: Any color bell pepper works – red, yellow, orange, or green. Just pick whichever ones look good at the store or use a mix for variety.
- Parsley: Fresh basil or cilantro can replace parsley if that’s what you have on hand, or use 1 tablespoon of dried parsley in a pinch.
Watch Out for These Mistakes While Cooking
The biggest mistake when making stuffed peppers is choosing peppers that don’t sit flat in the baking dish, which causes them to tip over and spill their filling – trim a thin slice off the bottom of each pepper to create a stable base without cutting through to the inside.
Undercooking the cauliflower rice is another common error that leaves you with crunchy, unpleasant bits in your filling, so make sure it’s tender before mixing it with the other ingredients.
Don’t skip salting the inside of the peppers before stuffing them, as this step seasons the pepper itself and draws out excess moisture that could make your filling watery.
Finally, if your peppers are browning too quickly on top but aren’t cooked through, tent them loosely with foil for the remaining baking time to prevent burning while the peppers finish softening.
What to Serve With Stuffed Bell Peppers?
These stuffed peppers are pretty filling on their own, but I love serving them with a simple side salad tossed with olive oil and lemon juice to keep things light and fresh. A crusty piece of bread (or gluten-free bread if you’re sticking with the theme) is perfect for soaking up any juices that collect on the plate. If you want to make it more of a complete meal, try adding a side of roasted vegetables like zucchini or asparagus, or even some garlic butter green beans. For a heartier option, serve them over a bed of mixed greens or alongside some creamy mashed potatoes.
Storage Instructions
Store: These stuffed peppers keep really well in the fridge for up to 4 days. Just let them cool down, then store them in an airtight container. They make great leftovers for lunch or a quick dinner when you don’t feel like cooking.
Freeze: You can freeze these peppers either before or after baking. If freezing unbaked, wrap each pepper individually in plastic wrap, then place in a freezer bag for up to 3 months. For already baked peppers, let them cool completely before freezing the same way.
Reheat: For refrigerated peppers, warm them in the oven at 350°F for about 15-20 minutes until heated through. If reheating from frozen, thaw overnight in the fridge first, or add an extra 10-15 minutes to the baking time. The microwave works too, but the oven keeps them from getting mushy.
| Preparation Time | 25-35 minutes |
| Cooking Time | 30 minutes |
| Total Time | 55-65 minutes |
| Level of Difficulty | Medium |
| Servings | 12 halves |
Estimated Nutrition
Estimated nutrition for the whole recipe (without optional ingredients):
- Calories: 1700-1900
- Protein: 70-85 g
- Fat: 120-135 g
- Carbohydrates: 80-95 g
Ingredients
For the filling:
- 3 tbsp olive oil
- 1 lb italian sausage (I use Johnsonville mild for better seasoning balance)
- 1/2 onion
- 3 garlic cloves (freshly minced for best flavor)
- 1 tsp salt
- 1/2 tsp pepper
- 1 tbsp tomato paste (I prefer Hunt’s for its deep color and richness)
- 2 cups riced cauliflower
- 1/2 cup olives
- 1/4 cup parsley
- 1/2 tsp dried oregano
- 6 bell peppers (halved lengthwise and seeded to create deep vessels)
- 2 eggs (whisked before adding to bind the filling properly)
For the topping:
- 1/3 cup crackers (I always use Mary’s Gone Crackers for a sturdy GF crunch)
- 2 tsp olive oil
Step 1: Prepare Mise en Place and Preheat Oven
- 6 bell peppers
- 1 tsp salt
- 3 garlic cloves
- 1/2 onion
- 1/4 cup parsley
Preheat your oven to 375°F and lightly grease a baking dish large enough to hold 12 pepper halves in a single layer.
While the oven heats, prepare your mise en place: mince the garlic, dice the onion into small pieces, and finely chop the parsley.
Halve the bell peppers lengthwise, remove the seeds and membranes to create deep vessels for filling, and lightly salt the insides of each pepper half.
This prep work ensures everything moves smoothly once you start cooking the filling.
Step 2: Build the Flavor Base with Sausage and Aromatics
- 3 tbsp olive oil
- 1 lb italian sausage
- 1/2 onion
- 3 garlic cloves
- 1 tsp salt
- 1/2 tsp pepper
Heat 3 tablespoons of olive oil in a large skillet over medium-high heat.
Add the Italian sausage, breaking it into small pieces as it cooks.
Once the sausage is mostly cooked (about 5 minutes), add the diced onion, minced garlic, salt, and pepper.
Continue cooking for 3-4 minutes until the onion becomes translucent and the aromatics are fragrant.
I like to use mild sausage here because it allows you to control the seasoning throughout the cooking process rather than fighting overpowering spice.
Step 3: Develop Depth with Tomato Paste and Cauliflower
- 1 tbsp tomato paste
- 2 cups riced cauliflower
Stir in the tomato paste and cook for 2-3 minutes, stirring frequently, until it darkens slightly and loses its raw taste—this caramelization builds deeper flavor.
Add the riced cauliflower and continue cooking for 3-5 minutes, stirring occasionally, until it softens slightly and absorbs the flavors from the sausage mixture.
I always prefer Hunt’s tomato paste because it has a rich color and concentrated flavor that really comes through in this filling.
Step 4: Finish the Filling and Bind with Eggs
- 1/4 cup parsley
- 1/2 cup olives
- 1/2 tsp dried oregano
- 2 eggs
Remove the skillet from heat and stir in the chopped parsley, olives, and dried oregano.
Let the mixture cool for 2-3 minutes, then add the whisked eggs, stirring gently and constantly to distribute them evenly throughout the filling.
The eggs act as a binder and create a more cohesive texture when baked.
Don’t add them while the mixture is piping hot, as they’ll scramble into chunks rather than creating a smooth custard-like binding.
Step 5: Assemble Peppers and Add Cracker Topping
- filling mixture from Step 4
- 1/3 cup crackers
- 2 tsp olive oil
Spoon the filling mixture evenly into each prepared pepper half, mounding slightly.
In a small bowl, crush the gluten-free crackers into coarse crumbs—not too fine, as you want some texture.
Toss the crumbs with 2 teaspoons of olive oil until evenly coated, then press this mixture firmly onto the top of each filled pepper.
This creates a golden, crunchy crust when baked.
I always use Mary’s Gone Crackers because they hold their structure when baked instead of turning to dust.
Step 6: Bake and Rest
Place the baking dish in the preheated 375°F oven and bake for 30 minutes, until the pepper skins begin to char slightly at the edges and the cracker topping turns golden brown.
Remove from the oven and let the stuffed peppers cool for 5 minutes before serving.
This resting time allows the eggs to fully set and makes the peppers easier to handle without breaking apart.
Irresistible Gluten Free Stuffed Bell Peppers
Ingredients
For the filling
- 3 tbsp olive oil
- 1 lb italian sausage (I use Johnsonville mild for better seasoning balance)
- 1/2 onion
- 3 garlic cloves (freshly minced for best flavor)
- 1 tsp salt
- 1/2 tsp pepper
- 1 tbsp tomato paste (I prefer Hunt's for its deep color and richness)
- 2 cups riced cauliflower
- 1/2 cup olives
- 1/4 cup parsley
- 1/2 tsp dried oregano
- 6 bell peppers (halved lengthwise and seeded to create deep vessels)
- 2 eggs (whisked before adding to bind the filling properly)
For the topping
- 1/3 cup crackers (I always use Mary's Gone Crackers for a sturdy GF crunch)
- 2 tsp olive oil
Instructions
- Preheat your oven to 375°F and lightly grease a baking dish large enough to hold 12 pepper halves in a single layer. While the oven heats, prepare your mise en place: mince the garlic, dice the onion into small pieces, and finely chop the parsley. Halve the bell peppers lengthwise, remove the seeds and membranes to create deep vessels for filling, and lightly salt the insides of each pepper half. This prep work ensures everything moves smoothly once you start cooking the filling.
- Heat 3 tablespoons of olive oil in a large skillet over medium-high heat. Add the Italian sausage, breaking it into small pieces as it cooks. Once the sausage is mostly cooked (about 5 minutes), add the diced onion, minced garlic, salt, and pepper. Continue cooking for 3-4 minutes until the onion becomes translucent and the aromatics are fragrant. I like to use mild sausage here because it allows you to control the seasoning throughout the cooking process rather than fighting overpowering spice.
- Stir in the tomato paste and cook for 2-3 minutes, stirring frequently, until it darkens slightly and loses its raw taste—this caramelization builds deeper flavor. Add the riced cauliflower and continue cooking for 3-5 minutes, stirring occasionally, until it softens slightly and absorbs the flavors from the sausage mixture. I always prefer Hunt's tomato paste because it has a rich color and concentrated flavor that really comes through in this filling.
- Remove the skillet from heat and stir in the chopped parsley, olives, and dried oregano. Let the mixture cool for 2-3 minutes, then add the whisked eggs, stirring gently and constantly to distribute them evenly throughout the filling. The eggs act as a binder and create a more cohesive texture when baked. Don't add them while the mixture is piping hot, as they'll scramble into chunks rather than creating a smooth custard-like binding.
- Spoon the filling mixture evenly into each prepared pepper half, mounding slightly. In a small bowl, crush the gluten-free crackers into coarse crumbs—not too fine, as you want some texture. Toss the crumbs with 2 teaspoons of olive oil until evenly coated, then press this mixture firmly onto the top of each filled pepper. This creates a golden, crunchy crust when baked. I always use Mary's Gone Crackers because they hold their structure when baked instead of turning to dust.
- Place the baking dish in the preheated 375°F oven and bake for 30 minutes, until the pepper skins begin to char slightly at the edges and the cracker topping turns golden brown. Remove from the oven and let the stuffed peppers cool for 5 minutes before serving. This resting time allows the eggs to fully set and makes the peppers easier to handle without breaking apart.
