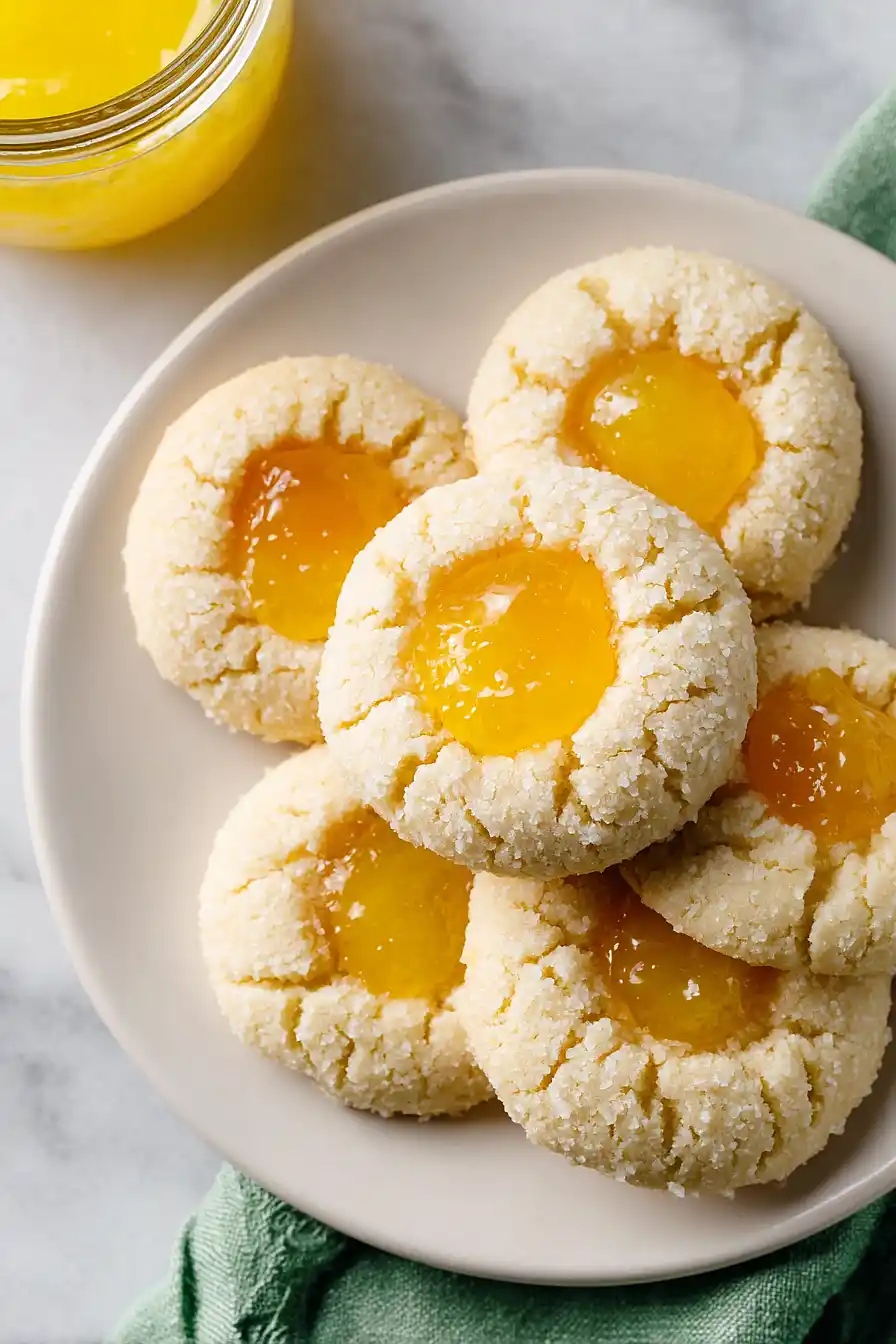
I’ve always been drawn to cookies that do double duty. You know the kind – they look pretty enough for a holiday party but are simple enough to make on a Tuesday night. Thumbprint cookies check both boxes, and when you fill them with bright, tangy lemon curd, they become something special without any extra work.
The best part about these cookies is how forgiving they are. The dough comes together quickly, and making the little thumbprints is actually fun. I usually get my kids involved with that part. You can use store-bought lemon curd to keep things easy, or if you’ve got homemade in the fridge, even better.
These cookies are buttery and slightly crisp on the outside, with that pop of lemon in the center. They’re not too sweet, which means I can justify eating three in one sitting. Four if no one’s counting.
Why You’ll Love These Lemon Curd Thumbprint Cookies
- Simple ingredients – You probably have most of these basic baking staples in your pantry already, making this an easy recipe to whip up on a whim.
- Quick and easy – These cookies come together in under an hour, perfect for when you need a homemade treat without spending all day in the kitchen.
- Bright, refreshing flavor – The tangy lemon curd paired with buttery cookie dough creates a perfect balance that’s not too sweet.
- Great for any occasion – Whether you’re making them for a casual afternoon snack or dressing up your holiday cookie platter, these thumbprints always impress.
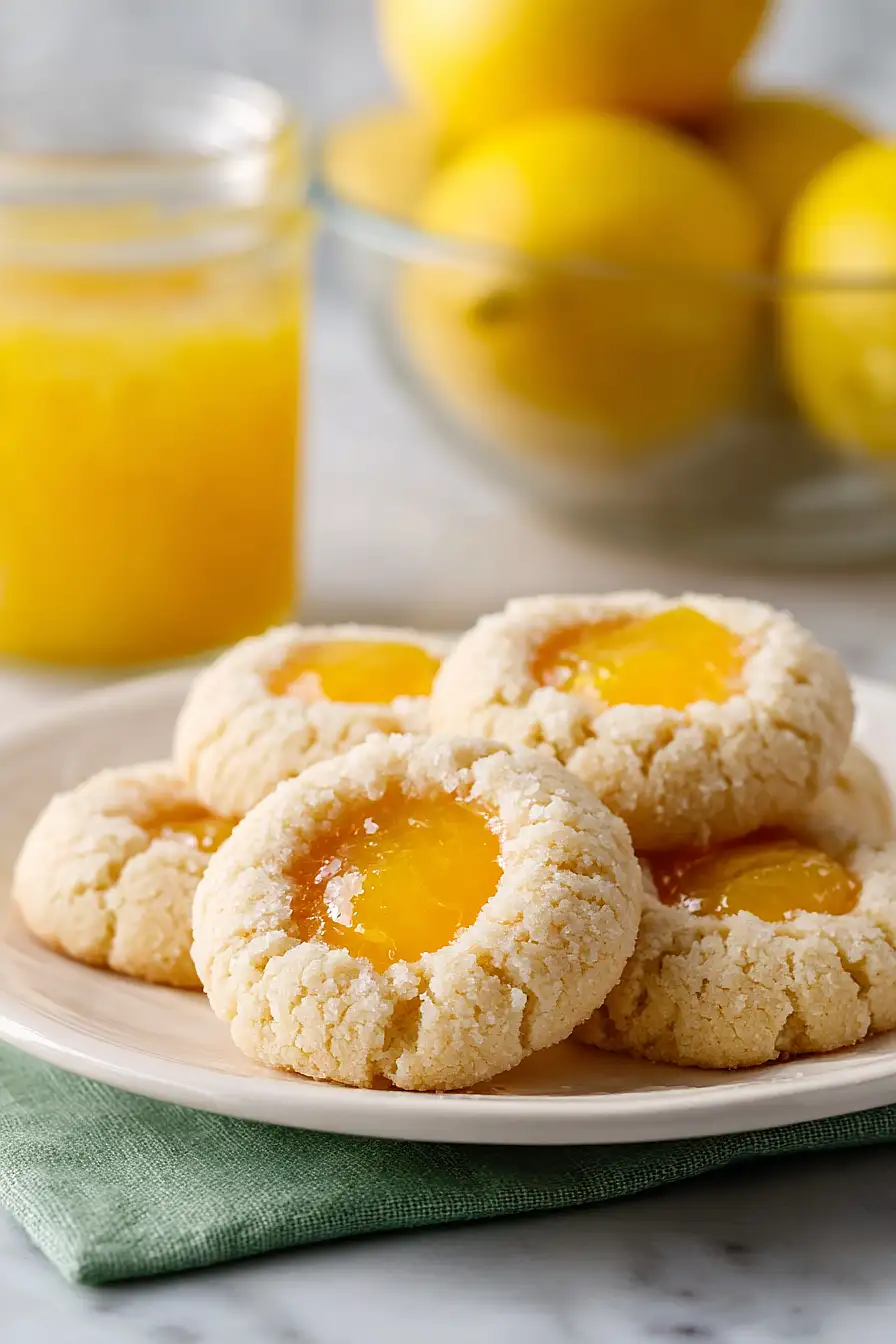
What Kind of Lemon Curd Should I Use?
You can absolutely use store-bought lemon curd for these thumbprint cookies, and it’ll save you a ton of time. Most grocery stores carry it near the jams and jellies, and brands like Dickinson’s or Wilkin & Sons make really good options. If you’re feeling ambitious, homemade lemon curd will give you a fresher, more tangy flavor that really stands out against the buttery cookie. Just make sure whatever lemon curd you use is thick enough to hold its shape in the cookie indent – if it’s too runny, it might spread out during baking or make your cookies soggy.
Options for Substitutions
These cookies are pretty straightforward, but here are some swaps you can make if needed:
- Unsalted butter: If you only have salted butter, go ahead and use it – just skip the pinch of salt in the recipe to avoid over-salting your dough.
- Almond flavoring: This is totally optional, so feel free to leave it out. You could also swap it with vanilla extract for a more classic flavor, or try lemon extract to complement the lemon curd filling.
- All-purpose flour: Stick with all-purpose flour for this recipe – it’s really important for getting the right cookie texture. Other flours like whole wheat or gluten-free blends will change the consistency and may not hold the thumbprint shape as well.
- Lemon curd: While lemon curd is traditional, you can fill these thumbprints with raspberry jam, apricot preserves, or even Nutella if you want to switch things up. Just make sure whatever filling you use is thick enough to stay in place.
- Granulated sugar: For the coating, you could use coarse sugar or sanding sugar for a bit of sparkle and crunch, though regular granulated sugar works perfectly fine.
Watch Out for These Mistakes While Baking
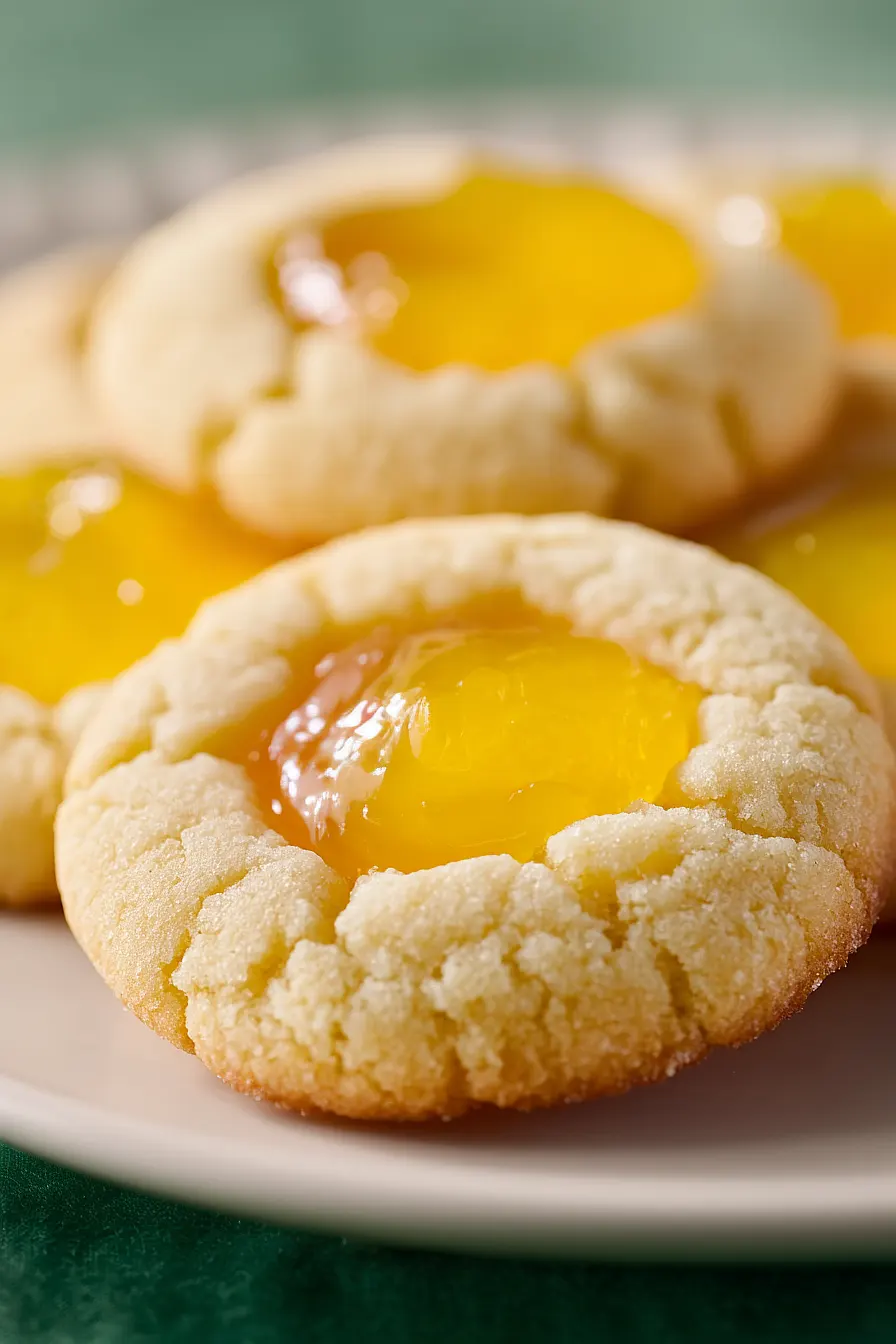
The biggest mistake with thumbprint cookies is making the indent too shallow, which causes the lemon curd to spill over during baking – press your thumb down firmly to create a deep well that’s about ½ inch deep and wide enough to hold a generous teaspoon of filling.
Another common error is adding the lemon curd before baking, which can cause it to bubble over or become runny, so always bake the cookies first and fill the thumbprints while they’re still warm from the oven.
If your dough feels too crumbly and won’t hold together, the butter might not have been soft enough when you mixed it – let it sit at room temperature for about an hour before starting, and don’t skip chilling the dough for 30 minutes if it seems too sticky to handle.
Finally, rolling the cookies in sugar before baking not only adds sweetness but helps prevent spreading, so don’t skip this step even though it might seem optional.
What to Serve With Lemon Curd Thumbprint Cookies?
These cookies are perfect for an afternoon tea party alongside a pot of Earl Grey or chamomile tea, which really brings out the bright lemon flavor. I love setting them out on a platter with other tea cookies like shortbread or butter cookies for a nice variety, and they also pair wonderfully with fresh berries like raspberries or blueberries on the side. If you’re serving them for dessert, a scoop of vanilla ice cream or a dollop of whipped cream makes them feel extra special. They’re also great packed up in a tin as a homemade gift for friends and family.
Storage Instructions
Store: Keep your thumbprint cookies in an airtight container at room temperature for up to 3 days. If you want them to last longer, store them in the fridge for up to a week, but let them sit out for a few minutes before eating so they’re not too firm.
Freeze: These cookies freeze really well! You can freeze them either before or after adding the lemon curd. If freezing with the curd already in them, place them in a single layer on a baking sheet first until solid, then transfer to a freezer bag. They’ll keep for up to 3 months.
Make Ahead: You can make the cookie dough a day or two ahead and keep it wrapped in the fridge until you’re ready to bake. Or bake the cookies without the lemon curd, store them, and add the curd right before serving for the freshest taste.
| Preparation Time | 15-30 minutes |
| Cooking Time | 10-15 minutes |
| Total Time | 55-75 minutes |
| Level of Difficulty | Medium |
Estimated Nutrition
Estimated nutrition for the whole recipe (without optional ingredients):
- Calories: 1600-1800
- Protein: 18-22 g
- Fat: 72-80 g
- Carbohydrates: 220-240 g
Ingredients
For the cookie dough:
- pinch of salt
- 1/4 cup sugar (I use C&H granulated)
- 1/4 lb unsalted butter (softened to room temperature)
- 1 egg
- 1/4 tsp almond extract
- 1/4 cup sugar for coating
- 1.75 cups all-purpose flour (I prefer King Arthur for consistent results)
For the filling:
- lemon curd (store-bought or homemade, about 1/3 cup)
Step 1: Cream Butter and Sugar
- 1/4 lb unsalted butter
- 1/4 cup sugar
In a medium bowl, beat the softened butter and 1/4 cup sugar together using an electric mixer or wooden spoon for 2-3 minutes until the mixture is light, fluffy, and pale in color.
This creaming process incorporates air into the dough, which helps create tender cookies with a delicate crumb.
Stop occasionally to scrape down the bowl to ensure even mixing.
Step 2: Add Egg and Flavorings
- 1 egg
- pinch of salt
- 1/4 tsp almond extract
Add the egg, pinch of salt, and almond extract to the creamed butter mixture.
Beat on medium speed for 1-2 minutes until fully incorporated and the mixture looks smooth and slightly lighter in color.
The egg acts as a binder and adds richness, while the almond extract complements the bright lemon flavor without being overpowering.
Step 3: Mix in Flour and Chill Dough
- 1.75 cups all-purpose flour
- wet ingredient mixture from Step 2
Add the flour to the wet ingredient mixture from Step 2, stirring on low speed or by hand with a wooden spoon until just combined—do not overmix, as this can develop gluten and make cookies tough.
Shape the dough into a ball, flatten it into a disk, wrap it tightly in plastic wrap, and refrigerate for at least 30 minutes.
Chilling firms up the dough so it’s easier to handle and helps the cookies maintain their shape during baking.
Step 4: Shape and Sugar-Coat the Dough Balls
- chilled dough from Step 3
- 1/4 cup sugar for coating
Remove the chilled dough from the refrigerator and pinch off small pieces (about the size of a marble) and roll each one between your palms into a smooth ball.
Pour the 1/4 cup sugar into a shallow dish and roll each dough ball in the sugar to coat all sides evenly.
This sugar coating adds a subtle crunch and sparkle to the finished cookies.
I like to place the sugared balls on a parchment-lined baking sheet as I work to keep them organized and ready for the next step.
Step 5: Create Thumbprint Indents and Fill with Lemon Curd
- sugar-coated dough balls from Step 4
- lemon curd
Using your thumb, press a shallow indent (about 1/2 inch deep) into the center of each sugar-coated dough ball—don’t press all the way through to the bottom.
Spoon about 1/2 teaspoon of lemon curd into each indent.
I find that slightly warming the lemon curd (just 10-15 seconds in the microwave) makes it easier to spoon into the indents without deflating the cookies.
Step 6: Bake and Cool
- filled cookies from Step 5
Preheat your oven to 350°F and bake the filled cookies for 10-12 minutes, until the edges are set and lightly golden but the centers still look slightly underbaked—they will continue to cook slightly on the hot baking sheet after removal.
Let the cookies cool on the baking sheet for 5 minutes, then transfer them to a wire rack to cool completely.
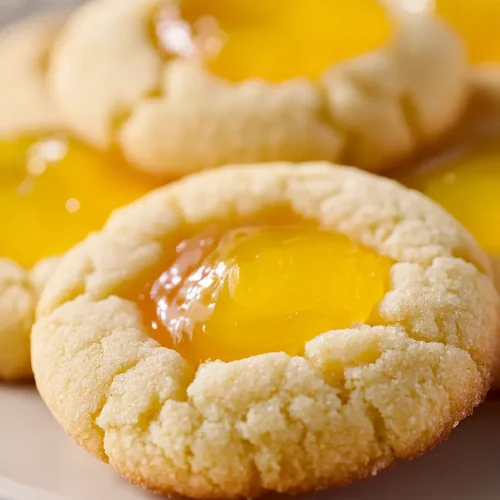
The lemon curd will set as the cookies cool, creating a delicious tart-sweet filling that complements the buttery, tender cookie base.
Homemade Lemon Curd Thumbprint Cookies
Ingredients
For the cookie dough:
- pinch of salt
- 1/4 cup sugar (I use C&H granulated)
- 1/4 lb unsalted butter (softened to room temperature)
- 1 egg
- 1/4 tsp almond extract
- 1/4 cup sugar for coating
- 1.75 cups all-purpose flour (I prefer King Arthur for consistent results)
For the filling:
- lemon curd (store-bought or homemade, about 1/3 cup)
Instructions
- In a medium bowl, beat the softened butter and 1/4 cup sugar together using an electric mixer or wooden spoon for 2-3 minutes until the mixture is light, fluffy, and pale in color. This creaming process incorporates air into the dough, which helps create tender cookies with a delicate crumb. Stop occasionally to scrape down the bowl to ensure even mixing.
- Add the egg, pinch of salt, and almond extract to the creamed butter mixture. Beat on medium speed for 1-2 minutes until fully incorporated and the mixture looks smooth and slightly lighter in color. The egg acts as a binder and adds richness, while the almond extract complements the bright lemon flavor without being overpowering.
- Add the flour to the wet ingredient mixture from Step 2, stirring on low speed or by hand with a wooden spoon until just combined—do not overmix, as this can develop gluten and make cookies tough. Shape the dough into a ball, flatten it into a disk, wrap it tightly in plastic wrap, and refrigerate for at least 30 minutes. Chilling firms up the dough so it's easier to handle and helps the cookies maintain their shape during baking.
- Remove the chilled dough from the refrigerator and pinch off small pieces (about the size of a marble) and roll each one between your palms into a smooth ball. Pour the 1/4 cup sugar into a shallow dish and roll each dough ball in the sugar to coat all sides evenly. This sugar coating adds a subtle crunch and sparkle to the finished cookies. I like to place the sugared balls on a parchment-lined baking sheet as I work to keep them organized and ready for the next step.
- Using your thumb, press a shallow indent (about 1/2 inch deep) into the center of each sugar-coated dough ball—don't press all the way through to the bottom. Spoon about 1/2 teaspoon of lemon curd into each indent. I find that slightly warming the lemon curd (just 10-15 seconds in the microwave) makes it easier to spoon into the indents without deflating the cookies.
- Preheat your oven to 350°F and bake the filled cookies for 10-12 minutes, until the edges are set and lightly golden but the centers still look slightly underbaked—they will continue to cook slightly on the hot baking sheet after removal. Let the cookies cool on the baking sheet for 5 minutes, then transfer them to a wire rack to cool completely. The lemon curd will set as the cookies cool, creating a delicious tart-sweet filling that complements the buttery, tender cookie base.
