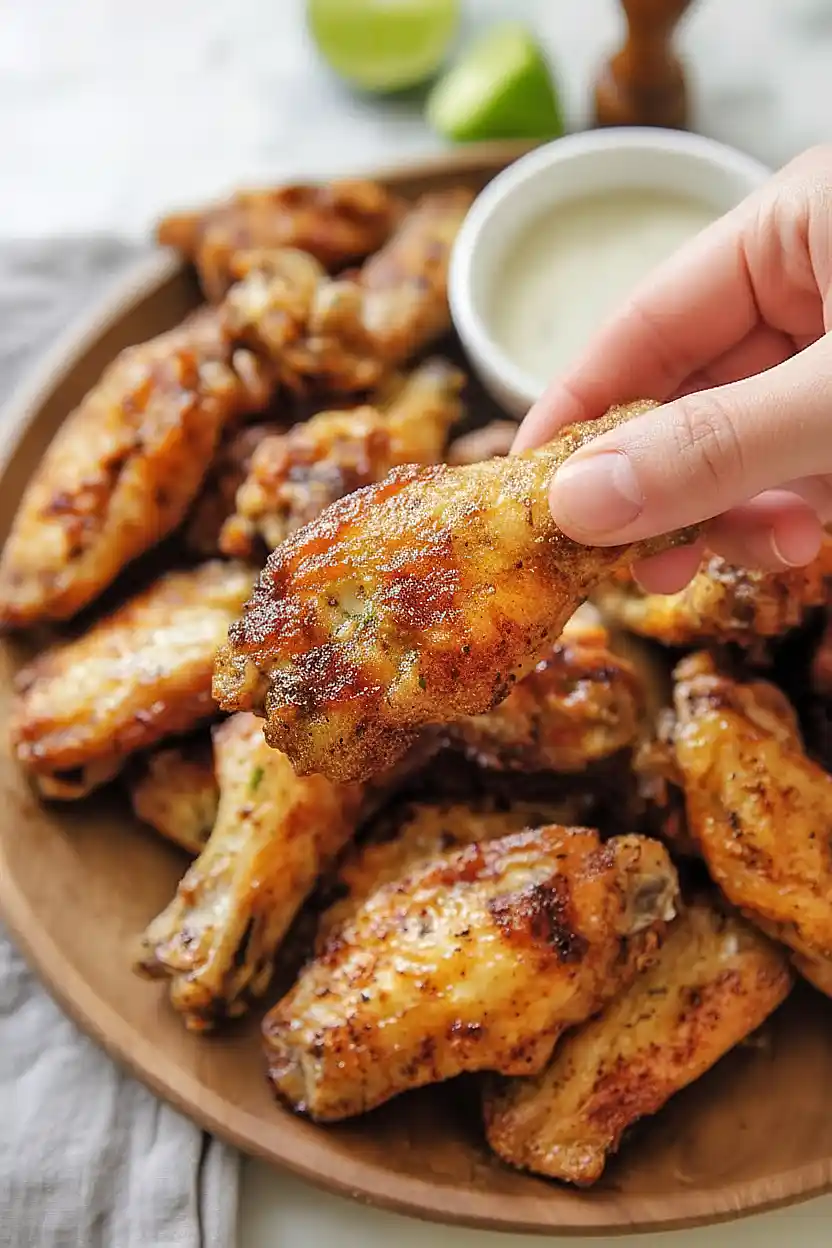
Here are my favorite oven baked chicken wings, with a simple seasoning blend of butter, garlic powder, paprika, and a few other spices that creates perfectly crispy wings without any deep frying.
These baked chicken wings are what I make whenever we have game day at our house or when the kids want something fun for dinner. They come out so crispy and flavorful that nobody ever guesses they’re made in the oven. Plus, cleanup is way easier than dealing with a pot of hot oil, right?

Why You’ll Love These Chicken Wings
- Crispy without frying – You get that perfect crispy skin everyone craves without the mess and hassle of deep frying.
- Simple seasoning – Just a handful of basic spices you probably already have in your pantry create tons of flavor.
- Healthier alternative – Baking these wings means less oil and fewer calories compared to traditional fried wings, but you’re not sacrificing any taste.
- Perfect for game day or weeknight dinners – Whether you’re hosting friends or just feeding the family, these wings are easy enough for any occasion.

Suggestions for Substitutions
- Chicken wings: You can use drumettes or wing flats separately if that’s what you have available. Just keep in mind that cooking times might vary slightly – drumettes may need a few extra minutes.
- Butter: Olive oil or melted coconut oil work great as substitutes. You could also use avocado oil if you want something with a higher smoke point for extra crispiness.
- Paprika: Regular paprika can be swapped with smoked paprika for a deeper, smokier flavor. You could also use cayenne pepper if you want some heat, but start with just 1/4 teaspoon since it’s much spicier.
- Garlic powder: Fresh minced garlic works too – use about 3 cloves. Just mix it with the melted butter before tossing with the wings.
- Salt: If you’re watching sodium, you can cut the salt in half or use a salt-free seasoning blend instead. The wings will still taste good, just less salty.
What to Serve With Chicken Wings?
Chicken wings are perfect party food, so I like to serve them with classic sides like celery and carrot sticks with ranch or blue cheese dressing for dipping.
A coleslaw adds a nice crunch and helps balance out the richness of the wings, plus it’s easy to make ahead if you’re feeding a crowd.
For something more filling, try serving them alongside french fries, potato wedges, or even mac and cheese if you’re going all-in on comfort food.
Storing Instructions
Store: Keep your leftover chicken wings in an airtight container in the fridge for up to 4 days.
Freeze: These wings freeze really well for up to 3 months. Let them cool completely, then pack them in a freezer-safe container or bag with as much air removed as possible.
Reheat: The best way to reheat these is in the oven at 350°F for about 10-15 minutes until warmed through and crispy again. You can also use an air fryer at 375°F for 5-7 minutes if you want that freshly baked crunch back.
| Preparation Time | 10-15 minutes |
| Cooking Time | 40-60 minutes |
| Total Time | 50-75 minutes |
| Level of Difficulty | Easy |
| Servings | 4 servings |
Estimated Nutrition
Estimated nutrition for the whole recipe (without optional ingredients):
- Calories: 2700-3000
- Protein: 210-230 g
- Fat: 190-210 g
- Carbohydrates: 3-5 g
Ingredients
- 3 lb chicken wings
- 3 tbsp unsalted butter
- 2.5 tsp salt
- 3/4 tsp black pepper
- 1 tsp garlic powder
- 1.5 tsp paprika
- 1/2 tsp onion powder
Step 1: Prepare the Oven and Baking Sheets
Preheat your oven to 400°F and position racks in the upper and lower thirds of the oven—this allows hot air to circulate around both baking sheets for even cooking.
Line two large baking sheets with foil and place oven-safe racks or crumpled foil balls on top to elevate the wings.
Elevating the wings is crucial because it allows hot air to flow underneath, creating crispy skin all around rather than a soggy bottom.
Step 2: Season and Prepare the Wings
- 3 lb chicken wings
- 3 tbsp unsalted butter
- 2.5 tsp salt
- 3/4 tsp black pepper
- 1 tsp garlic powder
- 1.5 tsp paprika
- 1/2 tsp onion powder
Pat the chicken wings dry with paper towels—this is essential for crispy skin, as excess moisture creates steam instead of browning.
In a small bowl, combine the salt, black pepper, garlic powder, paprika, and onion powder.
Melt the butter in a large bowl, then add the dried wings and toss to coat evenly.
Sprinkle the spice mixture over the wings and toss again until every piece is well coated.
I prefer to season the wings after coating them in butter rather than before, as this helps the seasonings stick and distribute more evenly.
Step 3: Arrange Wings for Optimal Cooking
- seasoned wings from Step 2
Divide the seasoned wings evenly between the two prepared baking sheets, arranging them in a single layer without crowding—the wings should not touch each other if possible.
This spacing allows heat to circulate around each wing for even, crispy browning.
Place one sheet on the upper rack and one on the lower rack.
Step 4: Bake the Wings Until Golden
- wings from Step 3
Bake at 400°F for 40 minutes, switching the baking sheets between racks halfway through (upper to lower and vice versa) to ensure even browning.
The wings should turn golden and start to crisp up.
At this point, they’re technically ready to eat with a tender, juicy interior and golden skin.
Step 5: Finish for Extra Crispy Skin (Optional)
- partially cooked wings from Step 4
For wings with extra-crispy, shatteringly crunchy skin, lower the oven temperature to 170°F and continue baking for 30 to 60 more minutes, depending on how much crispness you want.
The low temperature slowly renders out remaining fat and dries the skin without burning it.
I recommend checking at 30 minutes and deciding if you want them even crispier—this step is entirely optional but worth the extra time if you love ultra-crispy wings.

Golden Oven Baked Chicken Wings
Ingredients
- 3 lb chicken wings
- 3 tbsp unsalted butter
- 2.5 tsp salt
- 3/4 tsp black pepper
- 1 tsp garlic powder
- 1.5 tsp paprika
- 1/2 tsp onion powder
Instructions
- Preheat your oven to 400°F and position racks in the upper and lower thirds of the oven—this allows hot air to circulate around both baking sheets for even cooking. Line two large baking sheets with foil and place oven-safe racks or crumpled foil balls on top to elevate the wings. Elevating the wings is crucial because it allows hot air to flow underneath, creating crispy skin all around rather than a soggy bottom.
- Pat the chicken wings dry with paper towels—this is essential for crispy skin, as excess moisture creates steam instead of browning. In a small bowl, combine the salt, black pepper, garlic powder, paprika, and onion powder. Melt the butter in a large bowl, then add the dried wings and toss to coat evenly. Sprinkle the spice mixture over the wings and toss again until every piece is well coated. I prefer to season the wings after coating them in butter rather than before, as this helps the seasonings stick and distribute more evenly.
- Divide the seasoned wings evenly between the two prepared baking sheets, arranging them in a single layer without crowding—the wings should not touch each other if possible. This spacing allows heat to circulate around each wing for even, crispy browning. Place one sheet on the upper rack and one on the lower rack.
- Bake at 400°F for 40 minutes, switching the baking sheets between racks halfway through (upper to lower and vice versa) to ensure even browning. The wings should turn golden and start to crisp up. At this point, they’re technically ready to eat with a tender, juicy interior and golden skin.
- For wings with extra-crispy, shatteringly crunchy skin, lower the oven temperature to 170°F and continue baking for 30 to 60 more minutes, depending on how much crispness you want. The low temperature slowly renders out remaining fat and dries the skin without burning it. I recommend checking at 30 minutes and deciding if you want them even crispier—this step is entirely optional but worth the extra time if you love ultra-crispy wings.
