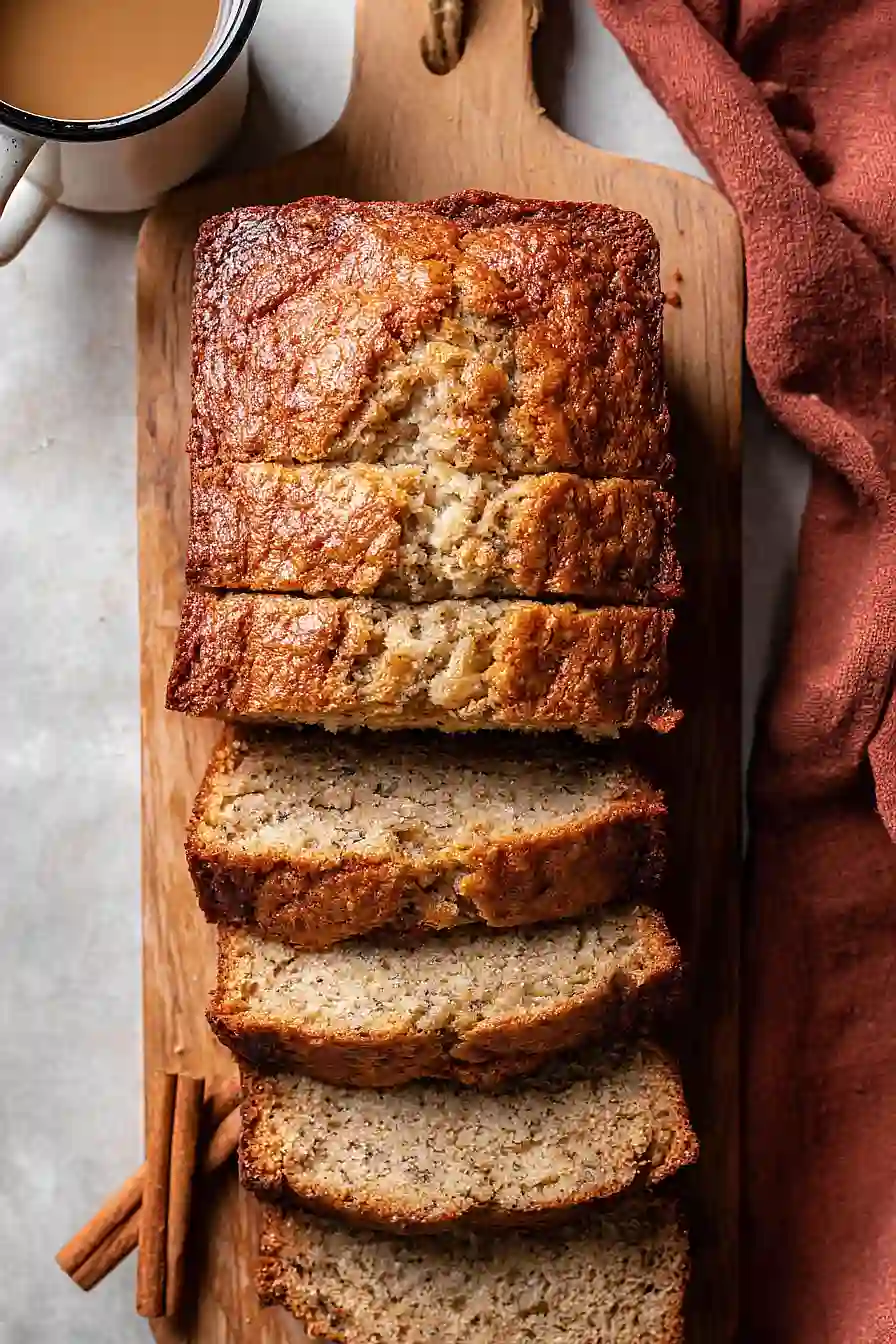
Living at high altitude can make baking banana bread feel like an impossible puzzle. The lower air pressure throws off all your usual measurements, leaving you with loaves that sink in the middle, turn out dry and crumbly, or just refuse to bake through properly no matter how long you leave them in the oven.
That’s exactly why I developed this high altitude banana bread recipe—it’s specifically adjusted to work beautifully in mountain kitchens. The secret is in the careful balance of leavening agents and the addition of sour cream for moisture, plus a blend of warm spices that bring out the natural sweetness of the bananas without overpowering them.
Why You’ll Love This Banana Bread
- High-altitude tested – This recipe is specifically designed to work perfectly at higher elevations, so you don’t have to worry about dense or sunken banana bread anymore.
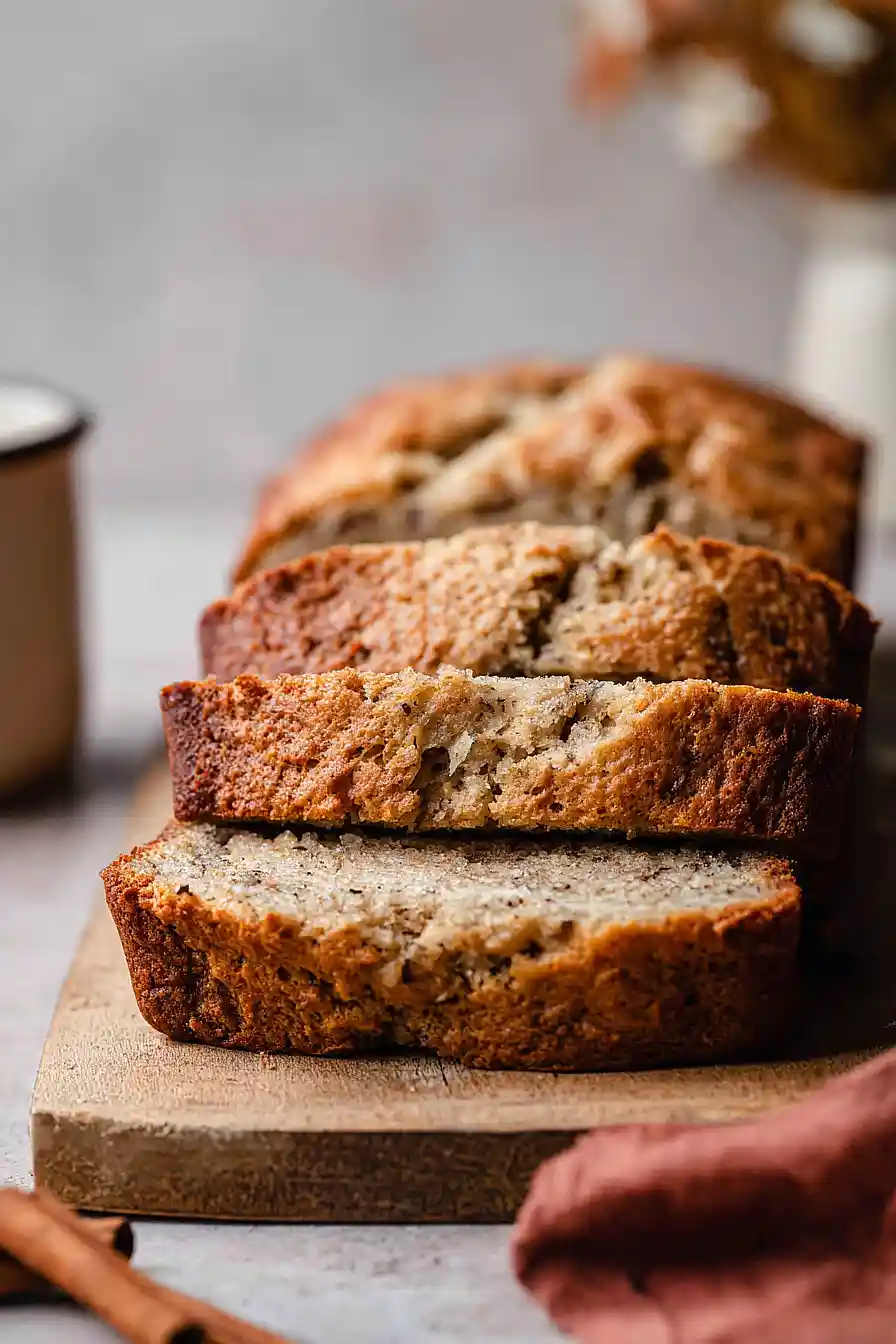
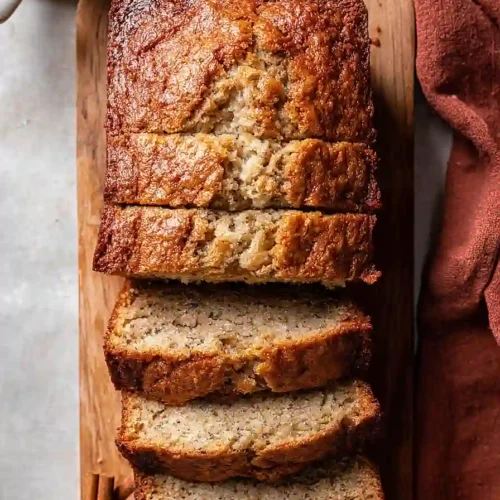
- Moist and tender crumb – The combination of sour cream and ripe bananas keeps this bread incredibly soft and prevents it from drying out, even a few days after baking.
- Warm spice blend – Cinnamon, nutmeg, and cardamom add a cozy flavor that makes this banana bread taste extra special without being overwhelming.
- Simple pantry ingredients – You probably have most of these items in your kitchen already, making it easy to whip up whenever you have overripe bananas sitting on the counter.
- Perfect for breakfast or snacking – Whether you enjoy a slice with your morning coffee or as an afternoon treat, this banana bread fits any time of day.
What Kind of Bananas Should I Use?
The best bananas for banana bread are the ones sitting on your counter that have turned brown and spotty – you know, the ones that are too ripe to eat on their own. Those overripe bananas are actually perfect because they’re sweeter and mash up more easily, giving your bread better flavor and moisture. If your bananas aren’t quite ripe enough yet, you can speed up the process by placing them in a paper bag for a day or two, or if you’re in a pinch, bake them in their peels at 300°F for about 15 minutes until they turn black. Just make sure to let them cool before mashing, and don’t worry if they look a little ugly – that’s exactly what you want for the best banana bread.
Options for Substitutions
This banana bread recipe is pretty forgiving, so here are some swaps you can make:
- Sour cream: Greek yogurt works great as a substitute and gives you the same moist texture. You can also use regular plain yogurt or buttermilk in the same amount.
- Butter: You can swap butter for vegetable oil or melted coconut oil (use the same amount). The texture will be slightly different but still delicious.
- Brown sugar: If you’re out of brown sugar, just use all white sugar instead. Or make your own by mixing 1/4 cup white sugar with 1 teaspoon of molasses.
- Spices: Don’t have cardamom? That’s totally fine – just leave it out or add a pinch more cinnamon. You can also skip the nutmeg if needed, though the spices do add nice warmth to the bread.
- Baking soda and baking powder: These are essential for proper rise at high altitude, so try not to substitute these. Make sure they’re fresh for best results.
- All-purpose flour: Stick with all-purpose flour for this recipe. Whole wheat flour can make the bread too dense, especially at high altitude where baking is already tricky.
Watch Out for These Mistakes While Baking
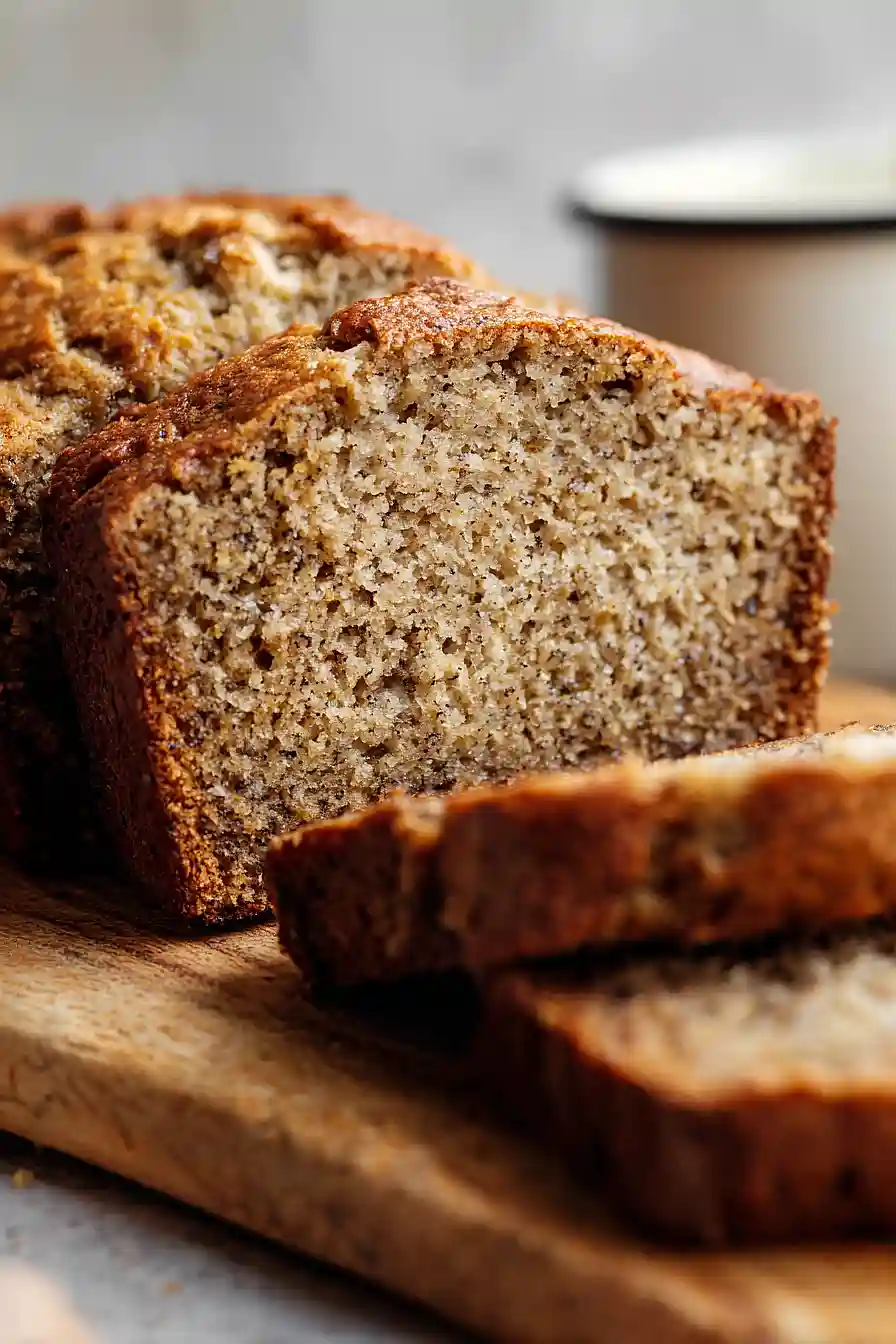
The biggest mistake when baking banana bread at high altitude is overmixing the batter once you add the flour, which develops too much gluten and creates a tough, dense loaf instead of a tender one – mix just until the dry ingredients are incorporated and you still see a few streaks of flour.
Another common error is using bananas that aren’t ripe enough, so make sure your bananas have plenty of brown spots and are soft to the touch for the best flavor and moisture.
To prevent a raw center with burnt edges, tent your loaf with foil after 30-35 minutes of baking, and always check for doneness with a toothpick inserted in the center rather than relying solely on the timer since high altitude baking can be unpredictable.
For extra insurance against dryness, don’t skip the sour cream in this recipe – it’s what keeps your banana bread moist even at higher elevations where baked goods tend to dry out faster.
What to Serve With Banana Bread?
Banana bread is perfect for breakfast or an afternoon snack, and it pairs really well with a hot cup of coffee or tea. I love spreading a little butter or cream cheese on a warm slice, which adds extra richness and makes it feel like a real treat. If you’re serving it for brunch, it goes nicely alongside scrambled eggs and fresh fruit like berries or sliced oranges. For a dessert option, try warming up a slice and topping it with a scoop of vanilla ice cream or a dollop of whipped cream.
Storage Instructions
Store: Once your banana bread has cooled completely, wrap it tightly in plastic wrap or aluminum foil and keep it at room temperature for up to 3 days. If you want it to last longer, store it in the fridge for up to a week—just know it might dry out a bit faster in there.
Freeze: Banana bread freezes really well, which is great if you want to bake ahead. Wrap individual slices or the whole loaf in plastic wrap, then again in foil or a freezer bag, and it’ll keep for up to 3 months. I like slicing it before freezing so I can grab just what I need.
Serve: Thaw frozen slices at room temperature for about 30 minutes, or warm them in the microwave for 15-20 seconds. If you’re thawing the whole loaf, let it sit on the counter for a few hours. A quick toast in the oven or toaster brings back that fresh-baked taste and makes it extra cozy with a little butter!
| Preparation Time | 15-30 minutes |
| Cooking Time | 55-65 minutes |
| Total Time | 70-95 minutes |
| Level of Difficulty | Medium |
| Servings | 12 slices |
Estimated Nutrition
Estimated nutrition for the whole recipe (without optional ingredients):
- Calories: 1850-2000
- Protein: 24-28 g
- Fat: 65-75 g
- Carbohydrates: 295-315 g
Ingredients
For the wet ingredients:
- 1.75 cups bananas (mashed thoroughly until smooth)
- 1/2 cup sour cream (I prefer Daisy for the best moisture and tang)
- 7 tbsp butter (melted and cooled to room temperature)
- 1/2 cup sugar
- 1/3 cup brown sugar
- 2 tsp vanilla
- 2 eggs (large, at room temperature)
For the dry ingredients:
- 2 cups flour (I always use King Arthur all-purpose flour)
- 3/4 tsp baking soda
- 1 tsp baking powder
- 1/2 tsp salt
- 1/2 tsp cinnamon
- 1/4 tsp nutmeg (freshly grated for a more intense aroma)
- 1/8 tsp cardamom
- 1/8 tsp allspice
Step 1: Prepare Pan and Preheat Oven
Heat your oven to 350°F—this lower temperature is crucial for high altitude baking as it prevents the bread from rising too quickly and collapsing.
While the oven preheats, grease a 9×5 inch loaf pan generously with butter or cooking spray, making sure to coat the bottom and all sides evenly.
Step 2: Combine Wet Ingredients
- 1.75 cups mashed bananas
- 1/2 cup sour cream
- 7 tbsp melted butter
- 1/2 cup sugar
- 1/3 cup brown sugar
- 2 tsp vanilla
- 2 large eggs
In a large mixing bowl, combine the thoroughly mashed bananas with the sour cream, melted and cooled butter, both sugars, vanilla, and eggs.
Whisk everything together until well combined and smooth—the sour cream will add moisture and tang that’s especially important at high altitude.
I like to use quality sour cream like Daisy; it makes a noticeable difference in the final texture.
Step 3: Mix Dry Ingredients Separately
- 2 cups flour
- 3/4 tsp baking soda
- 1 tsp baking powder
- 1/2 tsp salt
- 1/2 tsp cinnamon
- 1/4 tsp nutmeg
- 1/8 tsp cardamom
- 1/8 tsp allspice
In a separate bowl, whisk together the flour, baking soda, baking powder, salt, cinnamon, freshly grated nutmeg, cardamom, and allspice.
Whisking the dry ingredients together ensures even distribution of the leavening agents and spices throughout the bread—this is especially important at high altitude where uneven rising can be an issue.
Step 4: Combine Wet and Dry Mixtures
- wet ingredient mixture from Step 2
- dry ingredient mixture from Step 3
Add the dry ingredient mixture from Step 3 to the wet ingredients from Step 2, folding gently with a spatula until just combined—don’t overmix.
Some lumps are okay; overmixing develops gluten and can make the bread tough.
I stop mixing as soon as I don’t see streaks of flour, which keeps the crumb tender and delicate.
Step 5: Bake the Bread
- batter from Step 4
- prepared pan from Step 1
Pour the batter into the prepared pan from Step 1 and smooth the top gently with a spatula.
Bake for 55 minutes at 350°F.
The bread is done when a toothpick inserted into the center comes out with just a few moist crumbs (not wet batter).
At high altitude, the reduced air pressure means breads bake faster, so check a few minutes early if needed.
Step 6: Cool and Turn Out
Let the bread cool in the pan for 10 minutes—this allows the structure to set so it won’t fall apart when you remove it.
Then invert the loaf onto a wire cooling rack and let it cool completely.
This prevents the bottom from becoming soggy from condensation.
Best High Altitude Banana Bread
Ingredients
For the wet ingredients::
- 1.75 cups bananas (mashed thoroughly until smooth)
- 1/2 cup sour cream (I prefer Daisy for the best moisture and tang)
- 7 tbsp butter (melted and cooled to room temperature)
- 1/2 cup sugar
- 1/3 cup brown sugar
- 2 tsp vanilla
- 2 eggs (large, at room temperature)
For the dry ingredients::
- 2 cups flour (I always use King Arthur all-purpose flour)
- 3/4 tsp baking soda
- 1 tsp baking powder
- 1/2 tsp salt
- 1/2 tsp cinnamon
- 1/4 tsp nutmeg (freshly grated for a more intense aroma)
- 1/8 tsp cardamom
- 1/8 tsp allspice
Instructions
- Heat your oven to 350°F—this lower temperature is crucial for high altitude baking as it prevents the bread from rising too quickly and collapsing. While the oven preheats, grease a 9x5 inch loaf pan generously with butter or cooking spray, making sure to coat the bottom and all sides evenly.
- In a large mixing bowl, combine the thoroughly mashed bananas with the sour cream, melted and cooled butter, both sugars, vanilla, and eggs. Whisk everything together until well combined and smooth—the sour cream will add moisture and tang that's especially important at high altitude. I like to use quality sour cream like Daisy; it makes a noticeable difference in the final texture.
- In a separate bowl, whisk together the flour, baking soda, baking powder, salt, cinnamon, freshly grated nutmeg, cardamom, and allspice. Whisking the dry ingredients together ensures even distribution of the leavening agents and spices throughout the bread—this is especially important at high altitude where uneven rising can be an issue.
- Add the dry ingredient mixture from Step 3 to the wet ingredients from Step 2, folding gently with a spatula until just combined—don't overmix. Some lumps are okay; overmixing develops gluten and can make the bread tough. I stop mixing as soon as I don't see streaks of flour, which keeps the crumb tender and delicate.
- Pour the batter into the prepared pan from Step 1 and smooth the top gently with a spatula. Bake for 55 minutes at 350°F. The bread is done when a toothpick inserted into the center comes out with just a few moist crumbs (not wet batter). At high altitude, the reduced air pressure means breads bake faster, so check a few minutes early if needed.
- Let the bread cool in the pan for 10 minutes—this allows the structure to set so it won't fall apart when you remove it. Then invert the loaf onto a wire cooling rack and let it cool completely. This prevents the bottom from becoming soggy from condensation.

It’s great. I added some oil for moisture in place of a bit of the butter. I also used ginger instead of allspice and switched the amounts of brown and white sugar around.