I thought fig bars only came from the grocery store until I was well into my thirties. You know, those rectangular cookies wrapped in plastic that my kids beg for in the cereal aisle.
Then my neighbor brought over a plate of homemade ones, and I couldn’t believe the difference. The crust was tender, the fig filling was sweet but not cloying, and they actually tasted like real fruit. Store-bought fig bars suddenly seemed like a sad imitation of the real thing. The best part? They’re easier to make than you’d think.

Why You’ll Love These Fig Bars
- Fresh fig flavor – Using fresh figs instead of processed filling gives you that natural sweetness and amazing texture that store-bought bars just can’t match.
- Simple pantry ingredients – Most of what you need is probably already in your kitchen – just butter, flour, oats, and brown sugar for the base.
- Homemade goodness – These taste so much better than anything you can buy at the store, and you know exactly what’s going into them.
- Perfect for any occasion – Whether you need a lunchbox treat, afternoon snack, or something to bring to a potluck, these bars are always a hit.
- Quick and easy – Ready in just about an hour, these bars come together without any fussy techniques or special equipment.
What Kind of Figs Should I Use?
Fresh figs are the star of these bars, and you’ll want to choose ones that are ripe but still firm enough to hold their shape during baking. Look for figs that give slightly when you press them gently – they should feel soft but not mushy or overly squishy. Common varieties like Black Mission, Brown Turkey, or Calimyrna all work well for baking, so go with whatever looks best at your local market. If your figs are a bit underripe, that’s actually okay since they’ll soften as they cook and won’t turn to complete mush in the oven.
Options for Substitutions
These fig bars are pretty adaptable, so here are some swaps you can make:
- Fresh figs: If fresh figs aren’t available, you can use dried figs instead. Soak about 2 cups of dried figs in warm water for 30 minutes to soften them, then drain and chop. You might need to add a tablespoon of water to the mixture if it seems too thick.
- Old fashioned rolled oats: Quick oats work in a pinch, but your bars will have a slightly different texture – less chewy and more tender. Don’t use instant oats as they’ll get too mushy.
- All-purpose flour: You can substitute with whole wheat flour for a nuttier flavor, but use about 1¾ cups instead of 2 cups since whole wheat flour is denser.
- Butter: Coconut oil (melted) or vegetable oil can replace the butter if needed. Use the same amount, but let coconut oil cool slightly before mixing to avoid melting the other ingredients.
- Brown sugar: White sugar works fine, though you’ll lose some of that molasses flavor. You can also use coconut sugar as a 1:1 replacement.
- Lemon zest: Orange zest makes a nice substitute, or you can skip the citrus altogether if you don’t have any on hand.
Watch Out for These Mistakes While Baking
The biggest mistake when making fig bars is not cooking the fig filling long enough, which can leave you with a watery mess that soaks through the crust – simmer the quartered figs until most of the liquid has evaporated and the mixture thickens to a jam-like consistency.
Another common error is pressing the bottom crust too firmly into the pan, making it dense and hard instead of tender, so just gently pat it down to create an even layer.
Don’t skip letting the bars cool completely before cutting, as warm bars will crumble and fall apart – patience here makes all the difference for clean, neat squares.
For the best texture, make sure your oats are old-fashioned rolled oats rather than quick oats, since the larger flakes hold their shape better and give you that perfect chewy bite.
What to Serve With Fig Bars?
These fig bars are perfect with a hot cup of coffee or tea – the sweet, jammy figs pair beautifully with both bold espresso and gentle herbal teas. I love serving them as an afternoon snack alongside some vanilla Greek yogurt or a small scoop of vanilla ice cream for a more indulgent treat. They also make a great addition to a brunch spread with fresh fruit and pastries, or you can pack them up for picnics and lunchboxes since they travel so well. For something really special, try warming them slightly and serving with a drizzle of honey or a dollop of whipped cream.
Storage Instructions
Keep Fresh: These fig bars taste amazing for days after baking! Store them in an airtight container at room temperature for up to a week. I like to cut them into individual squares and layer them with parchment paper to keep them from sticking together.
Freeze: Fig bars are perfect for freezing when you want to make them ahead for parties or just keep some on hand for snacks. Wrap individual bars in plastic wrap or store them in a freezer-safe container for up to 3 months. They thaw beautifully at room temperature in about 30 minutes.
Make Ahead: You can actually prep the fig filling a day or two ahead and keep it covered in the fridge. The bars also taste even better the next day once all the flavors have had time to meld together, so don’t hesitate to bake them the night before you need them.
| Preparation Time | 20-30 minutes |
| Cooking Time | 30-35 minutes |
| Total Time | 50-65 minutes |
| Level of Difficulty | Medium |
Estimated Nutrition
Estimated nutrition for the whole recipe (without optional ingredients):
- Calories: 4200-4600
- Protein: 34-40 g
- Fat: 165-185 g
- Carbohydrates: 650-700 g
Ingredients
For the fig filling:
- 24 small to medium fresh figs (about 720 g), cut into quarters
- 1/3 cup packed brown sugar
- 1 tbsp grated lemon peel
- 1/4 tsp kosher salt
- 1 tsp vanilla extract
For the crust and crumble:
- 1 cup melted unsalted butter (226 g)
- 2 cups all-purpose flour (240 g)
- 2 cups rolled oats (178 g)
- 1 cup brown sugar (213 g)
- 1/2 tsp salt
- 3/4 tsp baking powder
- 2 tsp vanilla extract
Step 1: Make the Fresh Fig Filling
- 24 small to medium fresh figs (about 720 g), cut into quarters
- 1/3 cup packed brown sugar
- 1 tbsp grated lemon peel
- 1/4 tsp kosher salt
- 1 tsp vanilla extract
In a medium heavy-bottom saucepan, combine the quartered figs, 1/3 cup packed brown sugar, grated lemon peel, 1/4 teaspoon kosher salt, and 1 teaspoon vanilla extract.
Heat the mixture over medium heat until the figs release their juices and the mixture comes to a slow boil.
Reduce the heat and simmer for 45 minutes, stirring occasionally and breaking up larger fig pieces with the back of a wooden spoon.
Once thickened and softened, remove the pan from the heat and let the filling cool.
For a smoother texture, you can puree the mixture using an immersion blender, blender, or food processor.
I like to leave a few fig chunks for a more rustic filling.
Step 2: Prepare the Crust and Crumble Topping
- 1 cup melted unsalted butter (226 g)
- 2 cups all-purpose flour (240 g)
- 2 cups rolled oats (178 g)
- 1 cup brown sugar (213 g)
- 1/2 tsp salt
- 3/4 tsp baking powder
- 2 tsp vanilla extract
Preheat the oven to 350°F (175°C).
Line a 9×13-inch baking pan with aluminum foil, making sure the ends extend over the sides to help lift out the bars later.
Spray the lined pan lightly with cooking spray.
In a large microwave-safe bowl, melt 1 cup unsalted butter.
Add the all-purpose flour, rolled oats, 1 cup brown sugar, 1/2 teaspoon salt, 3/4 teaspoon baking powder, and 2 teaspoons vanilla extract to the melted butter.
Stir everything together until well combined and no dry streaks of flour remain.
The mixture should be thick and crumbly; you may find it easier to finish mixing with your hands.
For extra depth, I like to briefly toast the oats in a dry pan before adding them to the crust mixture.
Step 3: Assemble the Fig Bars
- crust mixture from Step 2
- fig filling from Step 1
Reserve 1 1/2 cups of the oat crust mixture for the topping.
Press the remaining mixture evenly into the bottom of the prepared pan, using the bottom of a glass or your hands to flatten it into a solid, even layer.
Spoon the cooled fig filling (from Step 1) over the crust and spread it out to cover the surface evenly.
Crumble the reserved 1 1/2 cups of oat mixture evenly over the fig layer, allowing some bits to peek through for a pretty, rustic look.
Step 4: Bake and Serve the Fig Bars
Bake the assembled bars in the oven at 350°F (175°C) for 30-35 minutes, or until the jam is bubbling and the crumb topping is golden brown.
Allow the bars to cool completely in the pan.
Once cooled, lift the bars out of the pan using the overhanging foil.
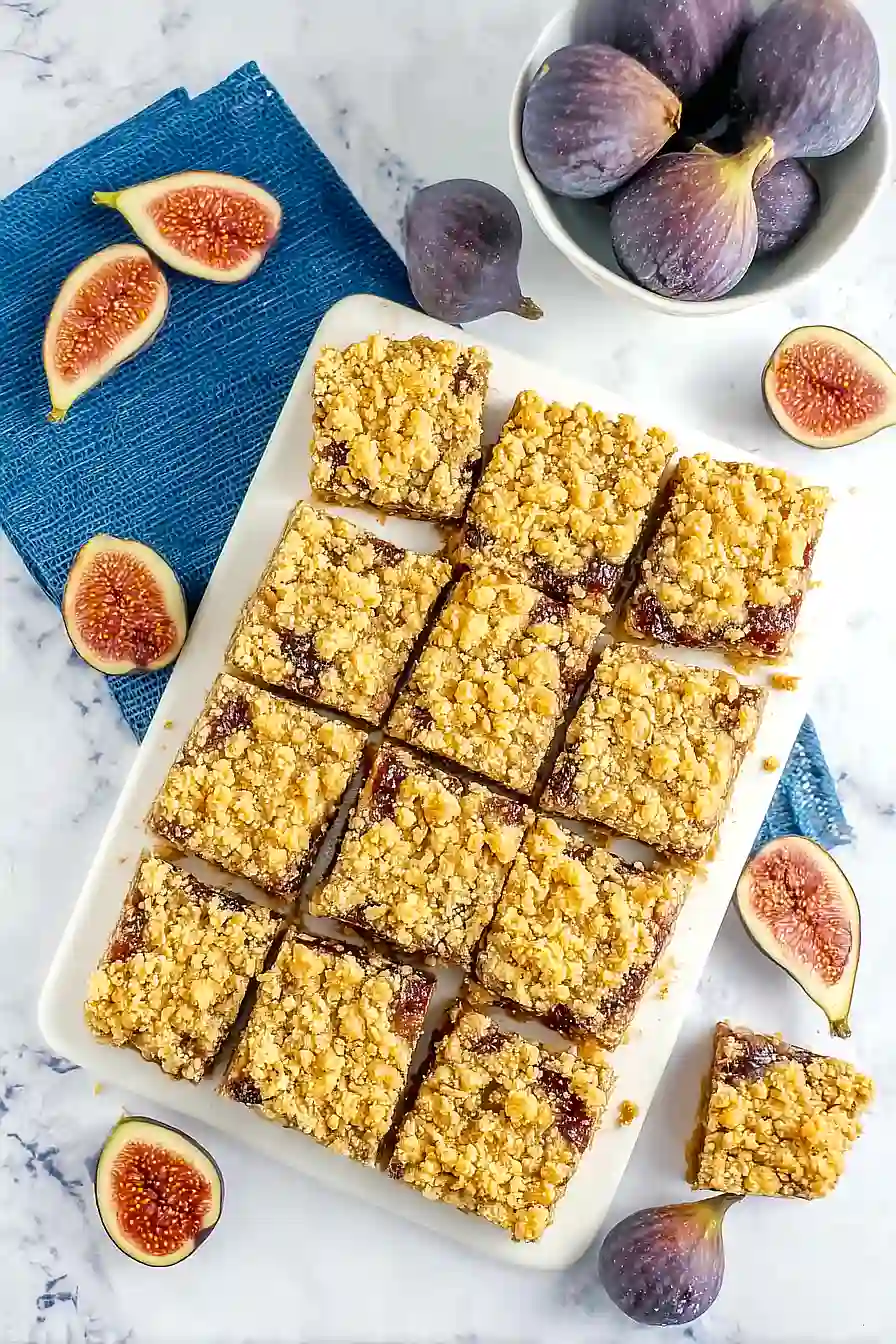
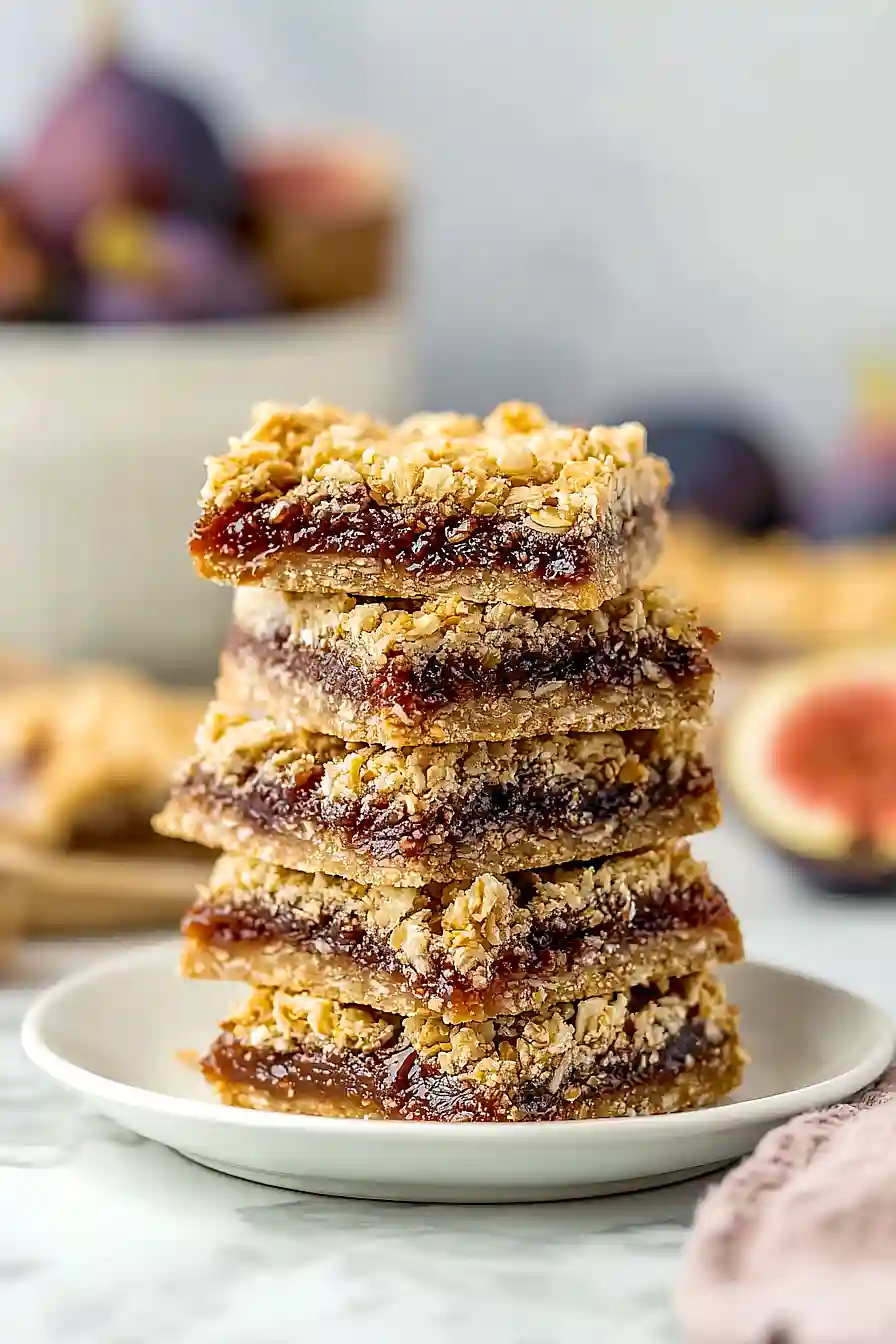
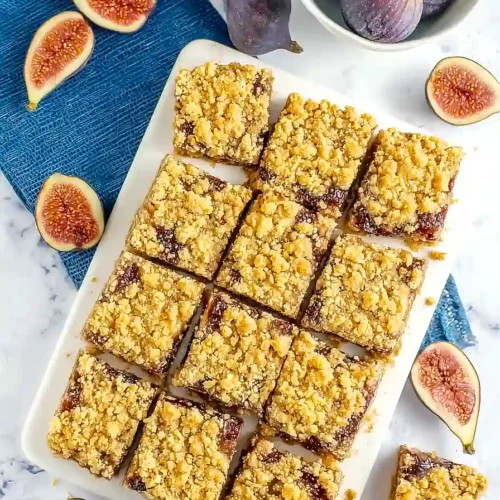
Slice into bars and serve.
For neater slices, I like to chill the bars in the fridge for 30 minutes before cutting.
Best Fig Bars
Ingredients
For the fig filling:
- 24 small to medium fresh figs (about 720 g), cut into quarters
- 1/3 cup packed brown sugar
- 1 tbsp grated lemon peel
- 1/4 tsp kosher salt
- 1 tsp vanilla extract
For the crust and crumble:
- 1 cup melted unsalted butter (226 g)
- 2 cups all-purpose flour (240 g)
- 2 cups rolled oats (178 g)
- 1 cup brown sugar (213 g)
- 1/2 tsp salt
- 3/4 tsp baking powder
- 2 tsp vanilla extract
Instructions
- In a medium heavy-bottom saucepan, combine the quartered figs, 1/3 cup packed brown sugar, grated lemon peel, 1/4 teaspoon kosher salt, and 1 teaspoon vanilla extract. Heat the mixture over medium heat until the figs release their juices and the mixture comes to a slow boil. Reduce the heat and simmer for 45 minutes, stirring occasionally and breaking up larger fig pieces with the back of a wooden spoon. Once thickened and softened, remove the pan from the heat and let the filling cool. For a smoother texture, you can puree the mixture using an immersion blender, blender, or food processor. I like to leave a few fig chunks for a more rustic filling.
- Preheat the oven to 350°F (175°C). Line a 9x13-inch baking pan with aluminum foil, making sure the ends extend over the sides to help lift out the bars later. Spray the lined pan lightly with cooking spray. In a large microwave-safe bowl, melt 1 cup unsalted butter. Add the all-purpose flour, rolled oats, 1 cup brown sugar, 1/2 teaspoon salt, 3/4 teaspoon baking powder, and 2 teaspoons vanilla extract to the melted butter. Stir everything together until well combined and no dry streaks of flour remain. The mixture should be thick and crumbly; you may find it easier to finish mixing with your hands. For extra depth, I like to briefly toast the oats in a dry pan before adding them to the crust mixture.
- Reserve 1 1/2 cups of the oat crust mixture for the topping. Press the remaining mixture evenly into the bottom of the prepared pan, using the bottom of a glass or your hands to flatten it into a solid, even layer. Spoon the cooled fig filling (from Step 1) over the crust and spread it out to cover the surface evenly. Crumble the reserved 1 1/2 cups of oat mixture evenly over the fig layer, allowing some bits to peek through for a pretty, rustic look.
- Bake the assembled bars in the oven at 350°F (175°C) for 30-35 minutes, or until the jam is bubbling and the crumb topping is golden brown. Allow the bars to cool completely in the pan. Once cooled, lift the bars out of the pan using the overhanging foil. Slice into bars and serve. For neater slices, I like to chill the bars in the fridge for 30 minutes before cutting.
