Finding a dessert that brings together two beloved flavors in one showstopping treat can feel like a tall order. After all, rhubarb and custard are amazing on their own, but getting them to work together in a cheesecake without turning into a soggy mess or losing their distinct tastes takes some careful planning.
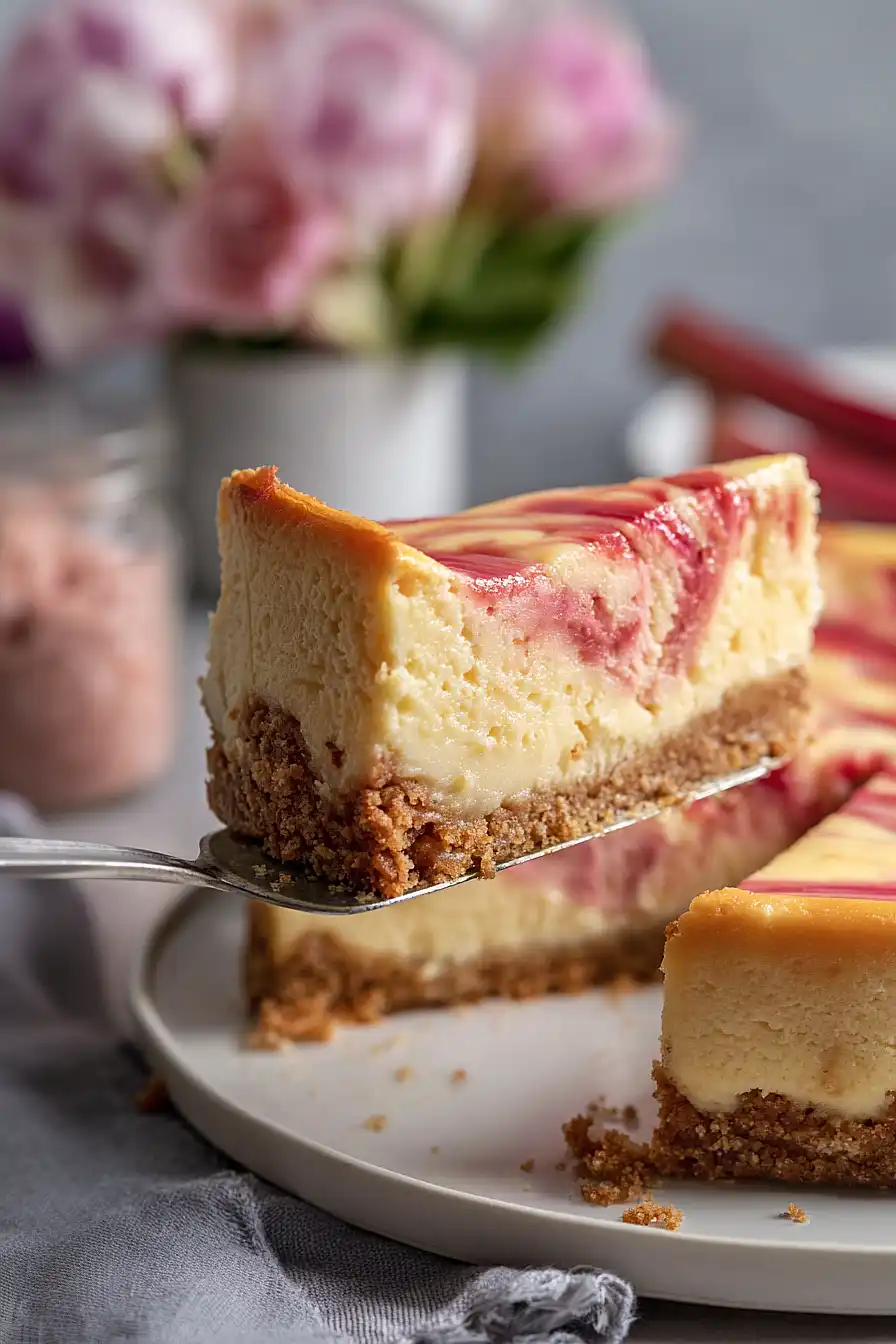
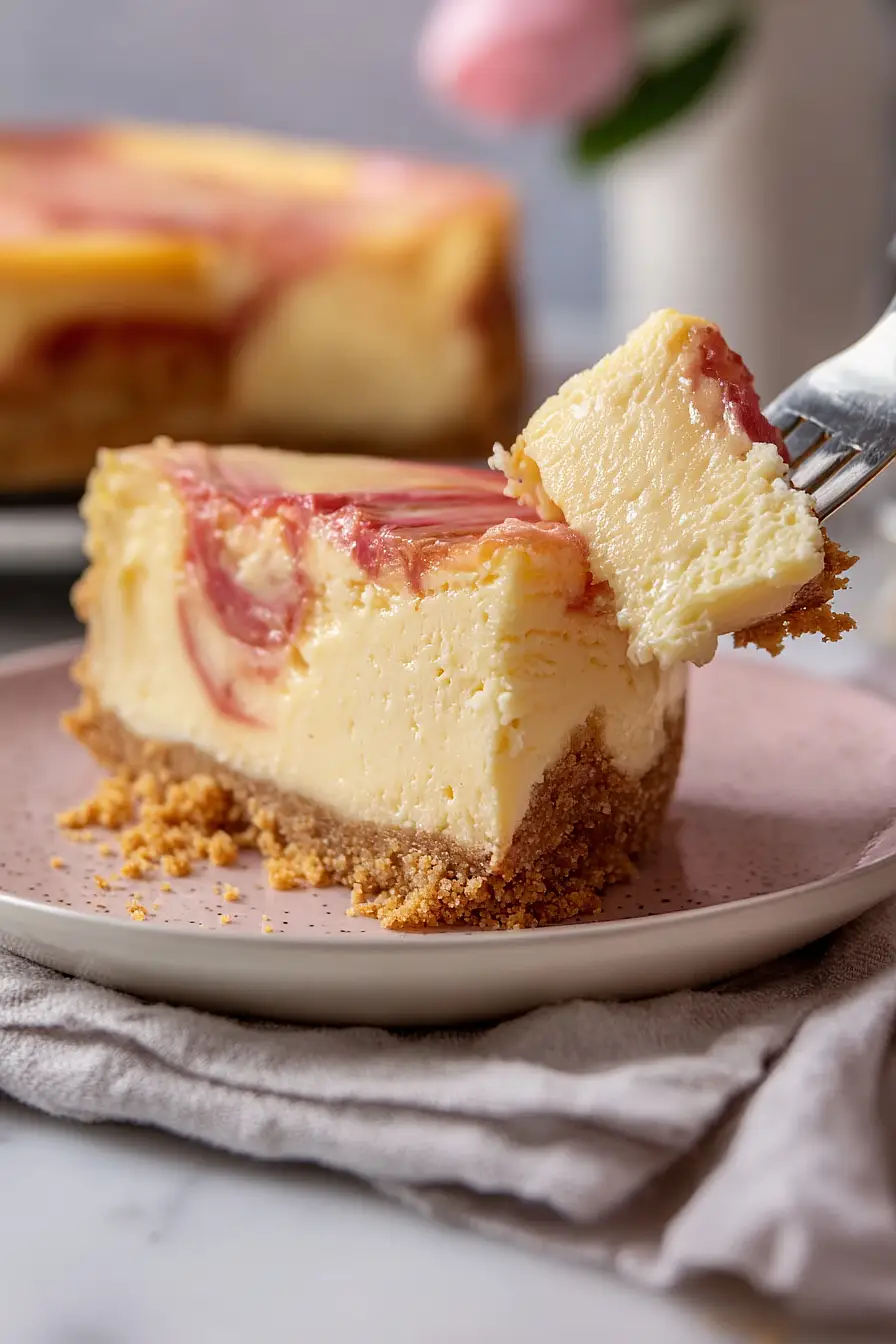
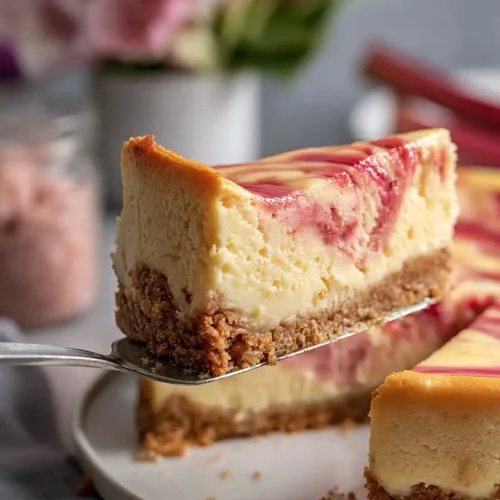
Luckily, this rhubarb and custard cheesecake checks all the boxes: it’s got that tangy rhubarb compote swirled through creamy custard-flavored filling, sits on a buttery biscuit base, and tastes just like the classic British sweet combo we all know and love.

Why You’ll Love This Rhubarb and Custard Cheesecake
- Nostalgic flavor combination – The classic pairing of tangy rhubarb and creamy custard brings back childhood memories in the most delicious way possible.
- Gluten-free friendly – Made with gluten-free digestive biscuits, this cheesecake is perfect for anyone avoiding gluten without sacrificing taste or texture.
- Beautiful presentation – The pink rhubarb puree creates a gorgeous swirl against the custard-flavored cheesecake, making it look as good as it tastes.
- Make-ahead dessert – This cheesecake actually tastes better after chilling overnight, so you can prepare it a day before your gathering and have one less thing to worry about.
- Unique twist on classic cheesecake – The custard powder adds a comforting, familiar flavor that sets this apart from your typical cheesecake recipes.
What Kind of Rhubarb Should I Use?
For this cheesecake, forced rhubarb is your best bet if you can find it. This is the pretty pink variety you’ll see in stores during late winter and early spring, and it gives you that gorgeous rosy color in your puree. If you can only get the regular green-red rhubarb that shows up later in the season, don’t worry – it’ll still taste great, just with a more muted color. Look for stalks that are firm and crisp, avoiding any that feel soft or look dried out at the ends. Just remember to trim off and discard the leaves if they’re still attached, as they’re not edible.
Options for Substitutions
This cheesecake recipe has some room for swaps, though a few ingredients are best kept as-is:
- Rhubarb: If you can’t find pink forced rhubarb, regular green rhubarb works fine – you’ll just get a more muted color. You could also try strawberries or raspberries for a different fruit twist, though you might need to adjust the sugar slightly since they’re sweeter than rhubarb.
- Gluten free digestive biscuits: Regular digestive biscuits or graham crackers work perfectly if gluten isn’t a concern. You can also use ginger snaps or vanilla wafers for a different flavor profile.
- Custard powder: This is what gives the cheesecake its signature custard flavor, so it’s tough to substitute. If you absolutely can’t find it, you could try vanilla pudding mix, but the flavor won’t be quite the same.
- Cream cheese: Stick with full fat cream cheese here – low fat versions will make your cheesecake watery and won’t set properly. Philadelphia really does work best for texture.
- Vanilla bean paste: Vanilla extract works just as well if that’s what you have. Use the same amount.
- Caster sugar: You can use regular granulated sugar instead – it dissolves just fine in this recipe.
Watch Out for These Mistakes While Baking
The biggest mistake when making cheesecake is opening the oven door during baking, which causes sudden temperature changes and leads to cracks on the surface – resist the urge to peek and trust the process.
Overmixing the cream cheese filling once you add the eggs will incorporate too much air, which creates bubbles that expand and crack during baking, so mix just until the eggs are combined and no more.
Skipping the gradual cooling step is a recipe for disaster, as pulling a hot cheesecake straight into cold air will cause it to contract and crack, so always let it cool slowly in the turned-off oven with the door slightly open.
When making the rhubarb puree, don’t skip the cornflour step or your topping will be too watery and seep into the cheesecake, and make sure the rhubarb mixture has cooled to room temperature before swirling it on top to prevent the heat from affecting the custard filling.
What to Serve With Rhubarb and Custard Cheesecake?
This cheesecake is rich and creamy enough to stand on its own, but a dollop of lightly sweetened whipped cream on the side never hurts. If you want to play up the rhubarb flavor, try serving it with some fresh strawberries or raspberries since they’re in season around the same time and pair beautifully with the tangy rhubarb. A strong cup of coffee or black tea is perfect for cutting through the richness of the cream cheese and custard, making it an ideal dessert for an afternoon gathering. For a fancier presentation, you can drizzle a little extra rhubarb compote on the plate or add a light dusting of powdered sugar right before serving.
Storage Instructions
Store: Keep your cheesecake covered in the fridge for up to 5 days. I like to cover it loosely with plastic wrap or store it in an airtight container to keep it from picking up any fridge odors. The flavors actually get better after a day or two as everything settles together.
Freeze: This cheesecake freezes really well for up to 2 months. I recommend slicing it first and wrapping individual pieces in plastic wrap, then placing them in a freezer bag. That way you can grab just one slice whenever you want a treat without defrosting the whole thing.
Serve: Let frozen slices thaw in the fridge overnight for the best texture. If you’re serving it straight from the fridge, I like to let it sit at room temperature for about 15 minutes before eating so the flavors really come through and it’s not too firm.
| Preparation Time | 30-40 minutes |
| Cooking Time | 60-70 minutes |
| Total Time | 210-240 minutes |
| Level of Difficulty | Medium |
| Servings | 8 slices |
Estimated Nutrition
Estimated nutrition for the whole recipe (without optional ingredients):
- Calories: 3700-3900
- Protein: 55-65 g
- Fat: 250-270 g
- Carbohydrates: 320-340 g
Ingredients
For the rhubarb topping:
- 9 oz rhubarb (cut into 1-inch lengths)
- 1/2 cup sugar
- 1 1/2 tsp cornstarch
- 2 tsp lemon juice
For the biscuit base:
- 5.6 oz biscuits (crushed into fine crumbs)
- 1 tbsp brown sugar
- 3.5 oz butter (I like Kerrygold unsalted butter for this)
- 1 pinch salt
For the cheesecake filling:
- 25.4 oz cream cheese (I prefer Philadelphia brand for best texture)
- 1/2 cup brown sugar
- 1/2 cup sugar
- 3 tbsp custard powder (I use Bird’s for that classic yellow color)
- 1 tbsp vanilla essence
- 2 eggs (room temperature, about 70°F)
- 2 egg yolks
Step 1: Prepare the Rhubarb Compote
- 9 oz rhubarb
- 1/2 cup sugar
- 2 tsp lemon juice
- 1 1/2 tsp cornstarch
Cut the rhubarb into 1-inch lengths and place in a pot with 1/2 cup sugar and 2 tsp lemon juice.
Bring to a boil, then reduce heat and simmer for 15 minutes until the rhubarb is very soft and breaks apart easily.
Remove from heat and let cool slightly.
Once cooled, blend the cooked rhubarb until smooth using a blender or immersion blender.
In a small bowl, mix the cornstarch with 2 tablespoons of water to create a slurry, then stir this into the blended rhubarb.
Return the rhubarb mixture to the pot over medium heat and cook for 2 minutes, stirring constantly, until it thickens slightly and coats the back of a spoon.
Set aside to cool completely—I like to prepare this step first so the compote has time to cool while I work on other components.
Step 2: Make and Bake the Biscuit Base
- 5.6 oz biscuits
- 1 tbsp brown sugar
- 3.5 oz butter
- 1 pinch salt
Preheat your oven to 180°C (350°F) and line an 8-9 inch springform tin with parchment paper.
Crush the biscuits into fine crumbs—you can do this in a food processor or by placing them in a sealed bag and crushing with a rolling pin.
Melt the butter over low heat or in the microwave in 30-second intervals, then combine it with the crushed biscuits, 1 tbsp brown sugar, and a pinch of salt, mixing until the texture resembles wet sand.
Press this mixture firmly and evenly into the bottom of the prepared tin, using the bottom of a measuring cup to create an even layer.
Bake for 10 minutes until lightly golden, then remove from the oven and set aside to cool slightly while you prepare the filling.
Step 3: Build the Custard Cheesecake Filling
- 25.4 oz cream cheese
- 1/2 cup brown sugar
- 1/2 cup sugar
- 3 tbsp custard powder
- 1 tbsp vanilla essence
- 2 eggs
- 2 egg yolks
Ensure your cream cheese and eggs are at room temperature (about 70°F) for a smooth, lump-free filling.
In a large bowl, beat the cream cheese with 1/2 cup brown sugar and 1/2 cup white sugar until light and fluffy, about 2-3 minutes—this aerates the filling and creates a better texture.
In a small bowl, whisk together the custard powder with 3 tablespoons of the cream cheese mixture to create a smooth paste with no lumps, then stir this paste back into the main bowl until fully combined.
Add the vanilla essence and mix well.
Add the whole eggs one at a time, beating on low speed after each addition just until combined—overmixing at this stage can incorporate too much air and cause cracks.
Gently fold in the 2 egg yolks until fully incorporated.
I prefer to use Philadelphia cream cheese here because it creates a denser, creamier texture that pairs beautifully with the rhubarb.
Step 4: Assemble and Bake the Cheesecake
- custard cheesecake filling from Step 3
- cooled biscuit base from Step 2
- half of the cooled rhubarb compote from Step 1
Pour the custard cheesecake filling from Step 3 over the cooled biscuit base from Step 2, smoothing the top with a spatula.
Spoon half of the cooled rhubarb compote from Step 1 over the filling in a few dollops, then use a fork to swirl it gently into the filling, creating a marbled effect—don’t overmix or you’ll lose the beautiful pattern.
Place the tin in the oven and bake at 180°C for 10 minutes until the edges just begin to set, then reduce the oven temperature to 110°C and bake for a further 40 minutes.
The cheesecake is ready when the edges are set but the center still has a very slight jiggle when gently shaken—this residual heat will continue to cook it as it cools.
Turn off the oven, crack the door open about 2 inches, and let the cheesecake cool slowly inside for 2 hours.
This gradual cooling prevents the sudden temperature change that causes cracks.
Step 5: Finish and Serve
- remaining cooled rhubarb compote from Step 1
Remove the tin from the oven and let the cheesecake cool completely to room temperature for at least 1 hour, then refrigerate for at least 4 hours (or overnight for best results).
Run a thin knife around the edges of the tin to loosen the cheesecake, then carefully release the springform and transfer to a serving plate.
Top each slice with a generous spoonful of the remaining cooled rhubarb compote from Step 1 just before serving.
Irresistible Rhubarb and Custard Cheesecake
Ingredients
For the rhubarb topping
- 9 oz rhubarb (cut into 1-inch lengths)
- 1/2 cup sugar
- 1 1/2 tsp cornstarch
- 2 tsp lemon juice
For the biscuit base
- 5.6 oz biscuits (crushed into fine crumbs)
- 1 tbsp brown sugar
- 3.5 oz butter (I like Kerrygold unsalted butter for this)
- 1 pinch salt
For the cheesecake filling
- 25.4 oz cream cheese (I prefer Philadelphia brand for best texture)
- 1/2 cup brown sugar
- 1/2 cup sugar
- 3 tbsp custard powder (I use Bird's for that classic yellow color)
- 1 tbsp vanilla essence
- 2 eggs (room temperature, about 70°F)
- 2 egg yolks
Instructions
- Cut the rhubarb into 1-inch lengths and place in a pot with 1/2 cup sugar and 2 tsp lemon juice. Bring to a boil, then reduce heat and simmer for 15 minutes until the rhubarb is very soft and breaks apart easily. Remove from heat and let cool slightly. Once cooled, blend the cooked rhubarb until smooth using a blender or immersion blender. In a small bowl, mix the cornstarch with 2 tablespoons of water to create a slurry, then stir this into the blended rhubarb. Return the rhubarb mixture to the pot over medium heat and cook for 2 minutes, stirring constantly, until it thickens slightly and coats the back of a spoon. Set aside to cool completely—I like to prepare this step first so the compote has time to cool while I work on other components.
- Preheat your oven to 180°C (350°F) and line an 8-9 inch springform tin with parchment paper. Crush the biscuits into fine crumbs—you can do this in a food processor or by placing them in a sealed bag and crushing with a rolling pin. Melt the butter over low heat or in the microwave in 30-second intervals, then combine it with the crushed biscuits, 1 tbsp brown sugar, and a pinch of salt, mixing until the texture resembles wet sand. Press this mixture firmly and evenly into the bottom of the prepared tin, using the bottom of a measuring cup to create an even layer. Bake for 10 minutes until lightly golden, then remove from the oven and set aside to cool slightly while you prepare the filling.
- Ensure your cream cheese and eggs are at room temperature (about 70°F) for a smooth, lump-free filling. In a large bowl, beat the cream cheese with 1/2 cup brown sugar and 1/2 cup white sugar until light and fluffy, about 2-3 minutes—this aerates the filling and creates a better texture. In a small bowl, whisk together the custard powder with 3 tablespoons of the cream cheese mixture to create a smooth paste with no lumps, then stir this paste back into the main bowl until fully combined. Add the vanilla essence and mix well. Add the whole eggs one at a time, beating on low speed after each addition just until combined—overmixing at this stage can incorporate too much air and cause cracks. Gently fold in the 2 egg yolks until fully incorporated. I prefer to use Philadelphia cream cheese here because it creates a denser, creamier texture that pairs beautifully with the rhubarb.
- Pour the custard cheesecake filling from Step 3 over the cooled biscuit base from Step 2, smoothing the top with a spatula. Spoon half of the cooled rhubarb compote from Step 1 over the filling in a few dollops, then use a fork to swirl it gently into the filling, creating a marbled effect—don't overmix or you'll lose the beautiful pattern. Place the tin in the oven and bake at 180°C for 10 minutes until the edges just begin to set, then reduce the oven temperature to 110°C and bake for a further 40 minutes. The cheesecake is ready when the edges are set but the center still has a very slight jiggle when gently shaken—this residual heat will continue to cook it as it cools. Turn off the oven, crack the door open about 2 inches, and let the cheesecake cool slowly inside for 2 hours. This gradual cooling prevents the sudden temperature change that causes cracks.
- Remove the tin from the oven and let the cheesecake cool completely to room temperature for at least 1 hour, then refrigerate for at least 4 hours (or overnight for best results). Run a thin knife around the edges of the tin to loosen the cheesecake, then carefully release the springform and transfer to a serving plate. Top each slice with a generous spoonful of the remaining cooled rhubarb compote from Step 1 just before serving.
