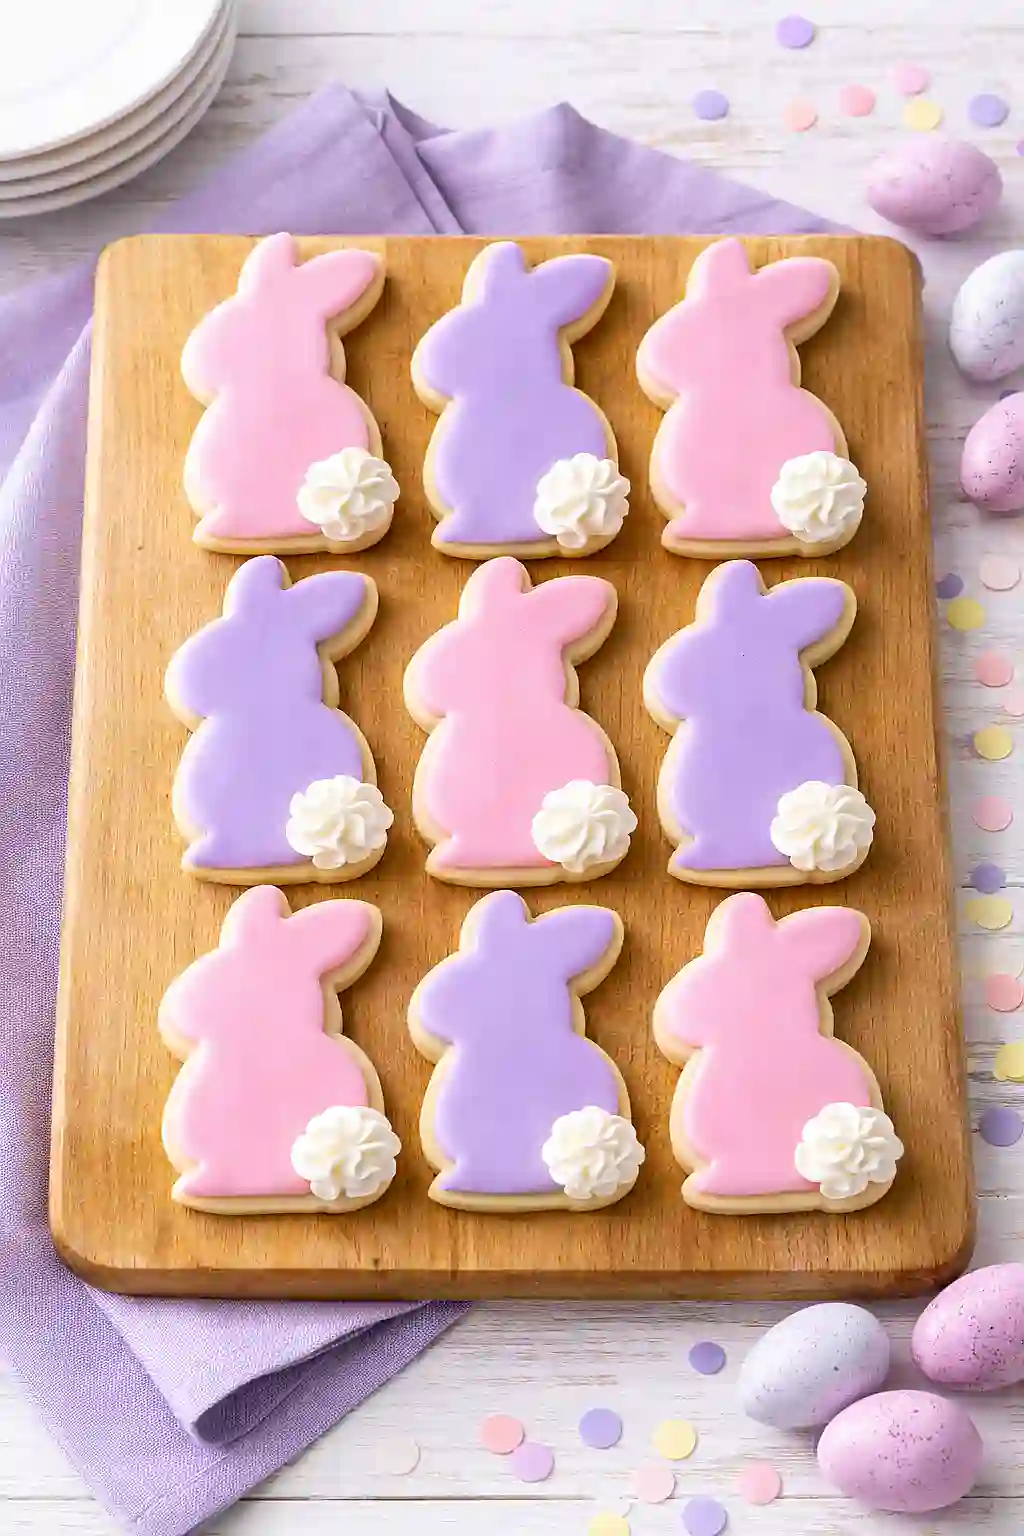
Looking for a fun spring or Easter baking project that’ll put a smile on everyone’s face? These fondant bunny cookies are exactly what you need. They might look like they came from a fancy bakery, but I promise they’re way easier to make than they appear.
The best part about these cookies is that they’re a great activity to do with kids, or just a relaxing afternoon project when you want to get creative in the kitchen. The sugar cookies themselves are soft and flavorful with a hint of nutmeg, and decorating them with fondant bunnies is actually pretty forgiving – even if you’ve never worked with fondant before.
Why You’ll Love These Fondant Bunny Cookies
- Perfect for Easter or spring celebrations – These adorable bunny cookies are a fun way to celebrate the season and will be a hit at any Easter gathering or spring party.
- Fun to make with kids – Decorating cookies with colorful fondant is a great activity to do together, and little ones will love shaping the bunnies and choosing their favorite colors.
- Simple ingredients – You probably already have most of these basic baking staples in your pantry, so you can whip these up without a special trip to the store.
- Impressive presentation – The fondant decorations make these cookies look like they came from a bakery, but they’re actually easy to create at home with just a little practice.
- Make-ahead friendly – You can bake the cookies in advance and decorate them later, making them a stress-free option when you’re planning for a party or event.
What Kind of Fondant Should I Use?
For these bunny cookies, you can use either store-bought or homemade fondant, and both will give you great results. Store-bought fondant is super convenient and comes in tons of colors already mixed, which saves you time if you’re not into food coloring. If you go the homemade route, you’ll have more control over the sweetness and texture, plus it’s usually a bit softer to work with. When shopping, look for fondant that’s pliable and easy to roll out – if it feels too stiff in the package, it might crack when you try to shape your bunnies. You can find fondant in the baking aisle of most craft stores or online, and leftover fondant keeps well wrapped tightly in plastic wrap for your next baking project.
Options for Substitutions
Here are some handy swaps you can make if you’re missing an ingredient or two:
- Butter: You can replace the butter in the cookie dough with margarine or coconut oil in equal amounts. The texture will be slightly different, but they’ll still taste great.
- Vanilla essence: Almond extract works nicely here if you want a different flavor, or you can use vanilla paste or even a bit of lemon zest for something fresh.
- Fondant: If you don’t have fondant or prefer not to use it, you can decorate these cookies with royal icing or buttercream instead. Just pipe on your bunny designs with different colored icings.
- Milk: Any milk works here – whole, 2%, almond, oat, or even water in a pinch. Start with less liquid and add more until you reach the consistency you want for the icing.
- Confectioners sugar: You can make your own by blending regular granulated sugar in a blender or food processor until it’s powdery. Add about 1 tablespoon of cornstarch per cup to prevent clumping.
- Baking powder: Don’t skip the baking powder – it’s what gives these cookies their lift and texture. If you’re out, you can make your own by mixing 1/2 teaspoon cream of tartar with 1/4 teaspoon baking soda.
Watch Out for These Mistakes While Baking
The biggest mistake when making sugar cookies is overbaking them – pull them from the oven when the edges are just barely set and the centers still look slightly underdone, as they’ll continue cooking on the hot pan and firm up as they cool.
Skipping the chilling step might be tempting, but warm dough spreads too much in the oven and makes your cookies lose their shape, so give it the full 30 minutes in the fridge (or pop it in the freezer for 15 minutes if you’re short on time).
When working with fondant, make sure your cookies are completely cool before decorating – warm cookies will cause the frosting to melt and the fondant to slide right off.
For cleaner cuts and professional-looking bunnies, dust your work surface and rolling pin with powdered sugar instead of flour when rolling out the fondant, which prevents sticking without affecting the color or taste.
What to Serve With Fondant Bunny Cookies?
These cute bunny cookies are perfect for Easter celebrations or spring gatherings, and they pair wonderfully with a cold glass of milk or a cup of hot cocoa. Kids especially love dunking these decorated cookies into their drinks, though you might want to eat around the fondant decorations to keep them looking nice. I like setting out a platter of these cookies alongside fresh fruit like strawberries and grapes for a simple dessert spread at parties. They also work great as part of a cookie exchange or packaged up in clear bags with ribbon as sweet homemade gifts for friends and neighbors.
Storage Instructions
Store: These decorated bunny cookies will stay fresh in an airtight container at room temperature for up to a week. Just make sure the fondant decorations are completely dry before stacking them, or place parchment paper between layers to keep them from sticking together.
Freeze: You can freeze the plain cookies (before decorating) for up to 3 months in a freezer-safe container or bag. I wouldn’t recommend freezing them after you’ve added the fondant, since it can get a bit sticky and lose its shape when thawed.
Make Ahead: These are perfect for making ahead! Bake the cookies a day or two before you need them and store them in an airtight container. Then decorate them the day before your event so the fondant has time to set but everything still looks fresh and pretty.
| Preparation Time | 60-70 minutes |
| Cooking Time | 10-15 minutes |
| Total Time | 70-85 minutes |
| Level of Difficulty | Medium |
| Servings | 15 cookies |
Estimated Nutrition
Estimated nutrition for the whole recipe (without optional ingredients):
- Calories: 3300-3600
- Protein: 20-25 g
- Fat: 140-155 g
- Carbohydrates: 470-500 g
Ingredients
For the cookies:
- 1 1/4 cups sugar
- 5 oz butter (I like Kerrygold unsalted butter for this)
- 1 egg (room temperature, about 70°F)
- 1 tsp vanilla extract
- 2 1/4 cups flour (I always use King Arthur all-purpose flour)
- 1 tsp baking powder
- 1 tsp salt
- 1/4 tsp ground nutmeg
For the decoration:
- 6 oz purple fondant (knead until soft and pliable)
- 6 oz pink fondant
For the buttercream:
- 3 oz butter (softened at room temperature)
- 1 1/4 cups confectioners sugar (sifted to remove lumps)
- 3 tbsp milk
- 1/4 tsp almond extract
Step 1: Prepare Mise en Place and Mix the Cookie Dough
- 1 1/4 cups sugar
- 5 oz butter
- 1 egg
- 1 tsp vanilla extract
- 2 1/4 cups flour
- 1 tsp baking powder
- 1 tsp salt
- 1/4 tsp ground nutmeg
Gather all ingredients and bring the egg and butter to room temperature (about 70°F) for even mixing.
In a large bowl, cream together the sugar and butter until light and fluffy, about 2-3 minutes—this incorporates air and creates a tender cookie.
Add the room-temperature egg and vanilla extract, beating until fully combined.
In a separate bowl, whisk together the flour, baking powder, salt, and nutmeg to distribute the leavening evenly.
Fold the dry mixture into the wet ingredients until just combined; don’t overmix or the cookies will be tough.
Step 2: Chill the Dough and Prepare the Oven
- cookie dough from Step 1
Transfer the dough from Step 1 to plastic wrap and refrigerate for at least 30 minutes—this prevents spreading during baking and makes the dough easier to cut.
While the dough chills, preheat your oven to 375°F and line a baking sheet with parchment paper.
I find that chilling the dough is essential for bunny shapes; it keeps the ears and details sharp during baking instead of melting into round blobs.
Step 3: Cut and Bake the Cookies
- chilled dough from Step 2
Remove the chilled dough from the refrigerator and place on a lightly floured surface.
Roll to 1/4 inch thickness and use a bunny-shaped cutter to cut out 14-16 cookies.
Transfer to the prepared baking sheet and bake for 6-7 minutes, until the edges are just set but the centers are still tender—overbaking will make them too crispy for the fondant topping.
Remove from the oven and let cool on the baking sheet for 5 minutes before transferring to a wire rack to cool completely.
Step 4: Prepare the Fondant Toppers
- 6 oz purple fondant
- 6 oz pink fondant
While the cookies cool, knead the purple and pink fondant separately until soft and pliable—this makes them easier to work with and prevents cracking.
Roll out each color to about 1/8 inch thickness on a surface lightly dusted with cornstarch or powdered sugar.
Use a small bunny-shaped cutter to cut out fondant shapes, or cut them freehand.
Set aside on parchment paper until ready to decorate.
Step 5: Make the Almond Buttercream Frosting
- 3 oz butter
- 1 1/4 cups confectioners sugar
- 3 tbsp milk
- 1/4 tsp almond extract
In a clean bowl, beat the softened butter for about 1 minute until creamy.
Add the sifted confectioners sugar gradually, alternating with the milk, and beat until light and fluffy, about 3-4 minutes.
Stir in the almond extract for a subtle flavor that complements the bunny aesthetic.
I always sift the confectioners sugar first to avoid lumpy frosting that won’t spread smoothly on the delicate cookies.
Step 6: Decorate the Cookies
- cooled cookies from Step 3
- almond buttercream frosting from Step 5
- fondant toppers from Step 4
Spread a thin layer of the almond buttercream from Step 5 onto each cooled cookie from Step 3.
Gently press a fondant bunny topper from Step 4 onto each frosted cookie, pressing lightly so it adheres but doesn’t sink into the frosting.
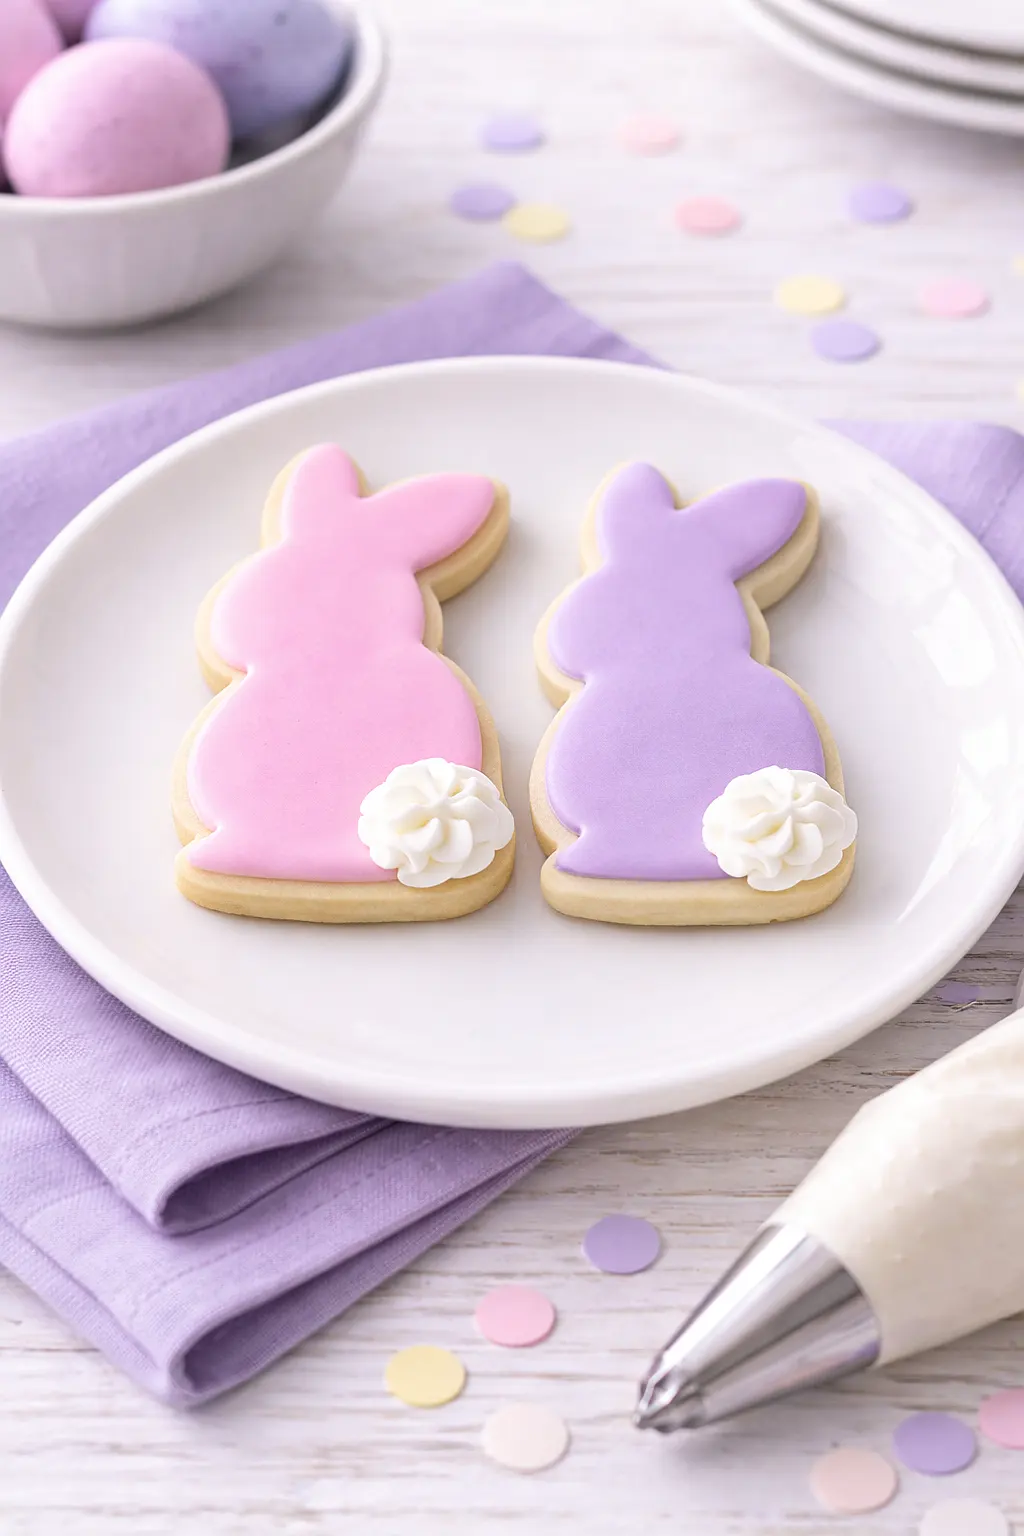
Transfer the frosting to a piping bag fitted with a small round tip and pipe a small fluffy tail onto each bunny using a circular motion—this adds dimension and cuteness.
Let the frosting set for 15-20 minutes before serving.
Tasty Fondant Bunny Cookies
Ingredients
For the cookies::
- 1 1/4 cups sugar
- 5 oz butter (I like Kerrygold unsalted butter for this)
- 1 egg (room temperature, about 70°F)
- 1 tsp vanilla extract
- 2 1/4 cups flour (I always use King Arthur all-purpose flour)
- 1 tsp baking powder
- 1 tsp salt
- 1/4 tsp ground nutmeg
For the decoration::
- 6 oz purple fondant (knead until soft and pliable)
- 6 oz pink fondant
For the buttercream::
- 3 oz butter (softened at room temperature)
- 1 1/4 cups confectioners sugar (sifted to remove lumps)
- 3 tbsp milk
- 1/4 tsp almond extract
Instructions
- Gather all ingredients and bring the egg and butter to room temperature (about 70°F) for even mixing. In a large bowl, cream together the sugar and butter until light and fluffy, about 2-3 minutes—this incorporates air and creates a tender cookie. Add the room-temperature egg and vanilla extract, beating until fully combined. In a separate bowl, whisk together the flour, baking powder, salt, and nutmeg to distribute the leavening evenly. Fold the dry mixture into the wet ingredients until just combined; don't overmix or the cookies will be tough.
- Transfer the dough from Step 1 to plastic wrap and refrigerate for at least 30 minutes—this prevents spreading during baking and makes the dough easier to cut. While the dough chills, preheat your oven to 375°F and line a baking sheet with parchment paper. I find that chilling the dough is essential for bunny shapes; it keeps the ears and details sharp during baking instead of melting into round blobs.
- Remove the chilled dough from the refrigerator and place on a lightly floured surface. Roll to 1/4 inch thickness and use a bunny-shaped cutter to cut out 14-16 cookies. Transfer to the prepared baking sheet and bake for 6-7 minutes, until the edges are just set but the centers are still tender—overbaking will make them too crispy for the fondant topping. Remove from the oven and let cool on the baking sheet for 5 minutes before transferring to a wire rack to cool completely.
- While the cookies cool, knead the purple and pink fondant separately until soft and pliable—this makes them easier to work with and prevents cracking. Roll out each color to about 1/8 inch thickness on a surface lightly dusted with cornstarch or powdered sugar. Use a small bunny-shaped cutter to cut out fondant shapes, or cut them freehand. Set aside on parchment paper until ready to decorate.
- In a clean bowl, beat the softened butter for about 1 minute until creamy. Add the sifted confectioners sugar gradually, alternating with the milk, and beat until light and fluffy, about 3-4 minutes. Stir in the almond extract for a subtle flavor that complements the bunny aesthetic. I always sift the confectioners sugar first to avoid lumpy frosting that won't spread smoothly on the delicate cookies.
- Spread a thin layer of the almond buttercream from Step 5 onto each cooled cookie from Step 3. Gently press a fondant bunny topper from Step 4 onto each frosted cookie, pressing lightly so it adheres but doesn't sink into the frosting. Transfer the frosting to a piping bag fitted with a small round tip and pipe a small fluffy tail onto each bunny using a circular motion—this adds dimension and cuteness. Let the frosting set for 15-20 minutes before serving.
