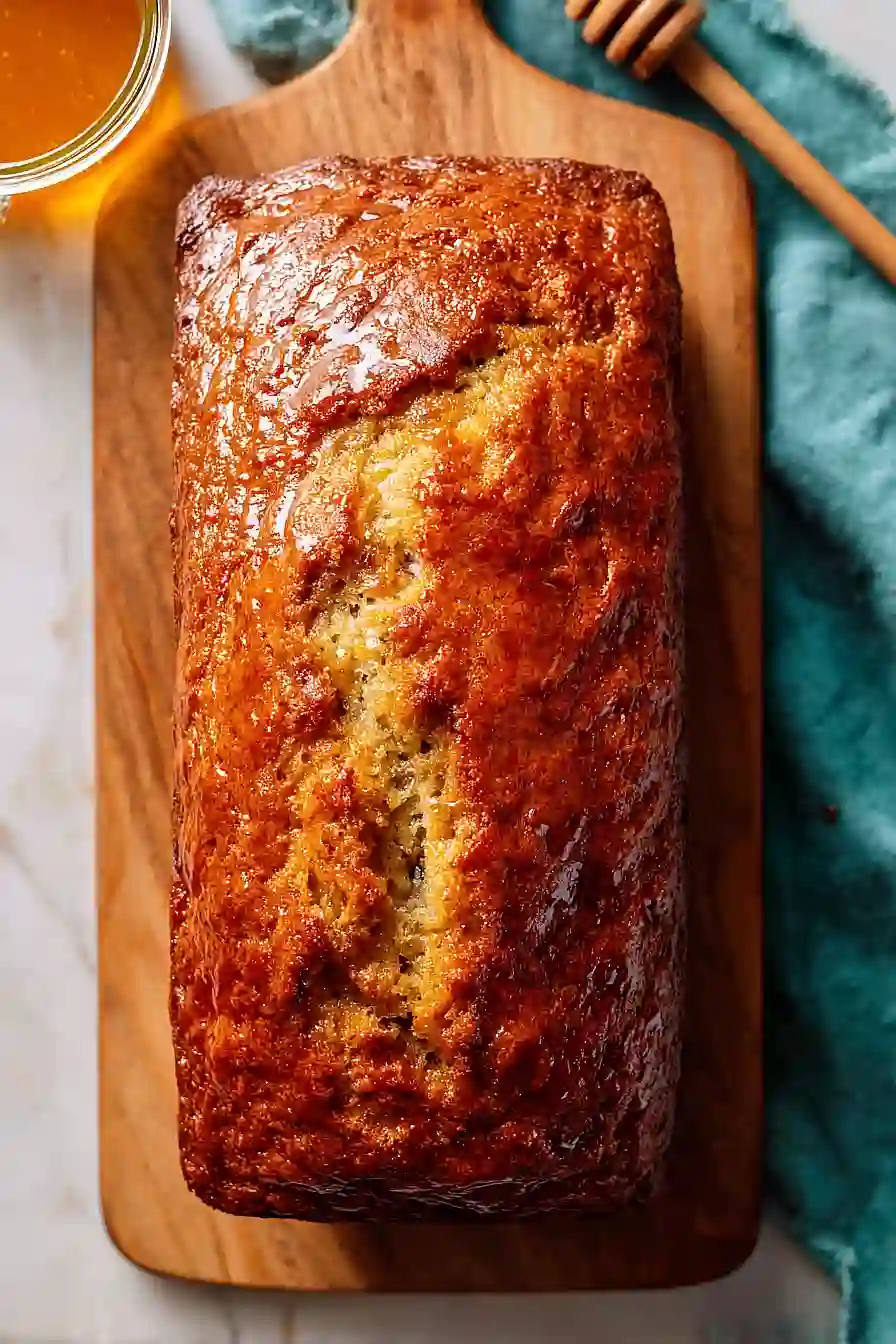
I didn’t grow up making banana bread with honey. In my house, it was always sugar—white sugar or brown sugar, whichever my mom grabbed from the pantry first. But a few years back, I had a bunch of bananas going brown on my counter and realized I was out of sugar.
I did have honey, though. So I figured, why not? Turns out, honey banana bread is now the only kind I make. The honey gives it this really nice moisture that regular sugar just doesn’t. Plus, those super ripe bananas bring plenty of sweetness on their own, so you don’t need much else.
Why You’ll Love This Honey Banana Bread
- Naturally sweetened with honey – No refined sugar needed here! The honey and ripe bananas provide all the sweetness you need for a wholesome treat.
- Simple pantry ingredients – You probably have everything you need already sitting in your kitchen, making this an easy go-to recipe when those bananas get too ripe.
- Perfect for using overripe bananas – Those brown bananas on your counter aren’t going to waste anymore. They’re actually ideal for this recipe and add amazing flavor.
- Easy one-bowl mixing – No fancy equipment or complicated steps required. Just mix, pour, and bake for a delicious homemade bread with minimal cleanup.
What Kind of Bananas Should I Use?
The best bananas for banana bread are the ones sitting on your counter that have turned brown and spotty – yes, those overripe ones you might be tempted to toss! The browner and softer they are, the sweeter and more flavorful your bread will be. If your bananas are still yellow or just barely speckled, you can speed up the ripening process by placing them in a paper bag for a day or two, or even baking them in their peels at 300°F for about 15 minutes until they’re blackened. Just make sure to let them cool before mashing, and don’t worry if they look a little ugly – that’s exactly what you want for the best banana bread.
Options for Substitutions
This banana bread recipe is pretty forgiving when it comes to swaps:
- Honey: You can replace honey with the same amount of maple syrup or agave nectar. If you prefer granulated sugar, use about 2/3 cup, but you might need to add an extra tablespoon of milk to keep the batter moist.
- Canola oil: Any neutral oil works here – vegetable oil, melted coconut oil, or even melted butter if you want a richer flavor. Just use the same measurement.
- Milk: Any type of milk works fine – whole, 2%, almond, oat, or soy milk. They’ll all give you good results.
- All-purpose flour: You can use whole wheat flour for half the amount to add some nutrition, but don’t replace all of it or your bread will be too dense. For a gluten-free version, use a 1-to-1 gluten-free baking flour blend.
- Bananas: This is the one ingredient you really shouldn’t substitute – ripe bananas are what make banana bread work. The riper and spottier they are, the better your bread will taste.
Watch Out for These Mistakes While Baking
The biggest mistake when making banana bread is overmixing the batter once you add the flour, which develops too much gluten and results in a dense, tough loaf – stir just until the dry ingredients are incorporated, even if you see a few lumps.
Since honey browns faster than sugar, keep an eye on your bread after 45 minutes and tent it loosely with foil if the top is getting too dark before the center is done.
To check if your bread is actually finished, insert a toothpick or knife into the center – it should come out with just a few moist crumbs, not wet batter, and the internal temperature should reach about 200°F.
Don’t skip the cooling step, as cutting into the bread too early can cause it to fall apart and seem gummy in the middle, so let it rest in the pan for those full 10 minutes before transferring to a wire rack.
What to Serve With Honey Banana Bread?
Honey banana bread is perfect for breakfast or an afternoon snack with a hot cup of coffee or tea. I love slicing it thick and spreading softened butter or cream cheese on top while it’s still slightly warm – the butter melts right in and makes it even better. For a more filling breakfast, serve it alongside scrambled eggs and fresh fruit like berries or sliced strawberries. You can also toast leftover slices the next day and top them with peanut butter and sliced bananas for a quick and easy breakfast that feels like a treat.
Storage Instructions
Store: This honey banana bread stays moist for days when wrapped tightly in plastic wrap or stored in an airtight container at room temperature. It’ll keep for about 3-4 days on the counter, or you can pop it in the fridge for up to a week if your kitchen is warm.
Freeze: Banana bread freezes really well, which makes it perfect for having a sweet treat ready whenever you need it. Wrap individual slices in plastic wrap and then place them in a freezer bag for up to 3 months. You can also freeze the whole loaf if you prefer.
Enjoy: Thaw frozen slices at room temperature for about 30 minutes, or warm them in the microwave for 15-20 seconds for that fresh-baked feel. I like to toast mine lightly with a little butter on top for breakfast!
| Preparation Time | 10-15 minutes |
| Cooking Time | 55-70 minutes |
| Total Time | 65-85 minutes |
| Level of Difficulty | Easy |
| Servings | 12 slices |
Estimated Nutrition
Estimated nutrition for the whole recipe (without optional ingredients):
- Calories: 1700-1850
- Protein: 28-32 g
- Fat: 28-32 g
- Carbohydrates: 370-390 g
Ingredients
For the wet mixture:
- 4 bananas (very ripe with brown spots for natural sweetness)
- 1 cup honey (I use Nature Nate’s Raw & Unfiltered)
- 1/2 teaspoon vanilla extract
- 3 tablespoons canola oil
- 1 egg (room temperature, about 70°F)
- 0.5 cup milk
For the dry mix:
- 2.5 cups flour (I always use King Arthur all-purpose flour)
- 1 teaspoon baking powder
- 1/4 teaspoon baking soda
- 3/4 teaspoon salt
Step 1: Prepare Pan and Preheat Oven
Preheat your oven to 325°F and position the rack to the middle.
While it heats, grease a 9×5 inch loaf pan thoroughly with butter or cooking spray, making sure to coat the bottom and all sides evenly.
This prevents sticking and ensures even browning.
Step 2: Combine Wet Ingredients
- 4 bananas, very ripe with brown spots
- 1 cup honey
- 0.5 cup milk
- 1 egg
- 3 tablespoons canola oil
- 1/2 teaspoon vanilla extract
In a large mixing bowl, mash the very ripe bananas with a fork until mostly smooth with just a few small lumps remaining—this texture adds character to the bread.
Add the honey, milk, egg (at room temperature for proper mixing), canola oil, and vanilla extract to the mashed bananas.
Whisk everything together until well combined and smooth.
I find that room temperature eggs blend more seamlessly into the batter, creating a more uniform crumb structure.
Step 3: Combine Dry Ingredients and Build Batter
- 2.5 cups flour
- 1 teaspoon baking powder
- 1/4 teaspoon baking soda
- 3/4 teaspoon salt
- wet ingredient mixture from Step 2
In a separate bowl, whisk together the flour, baking powder, baking soda, and salt.
This aerates the dry ingredients and distributes the leavening agents evenly.
Pour the wet ingredient mixture from Step 2 into the dry ingredients and gently fold together with a spatula or wooden spoon until just combined—stop as soon as no flour streaks remain.
Overmixing develops gluten and can make the bread dense, so restraint here pays off with a tender crumb.
Step 4: Bake Until Golden and Set
- batter from Step 3
- greased loaf pan from Step 1
Pour the batter from Step 3 into the prepared pan from Step 1, smoothing the top gently.
Bake for 55 to 70 minutes, depending on your oven—the bread is done when a toothpick inserted into the center comes out with just a few moist crumbs (not wet batter).
I like to start checking around the 55-minute mark, as every oven bakes differently, and you want the exterior golden brown without the inside drying out.
Step 5: Cool and Release from Pan
Remove the bread from the oven and let it cool in the pan for 10 minutes—this allows the structure to set enough to handle safely.
Run a thin knife around the edges to loosen the bread from the sides, then turn it out onto a wire cooling rack.
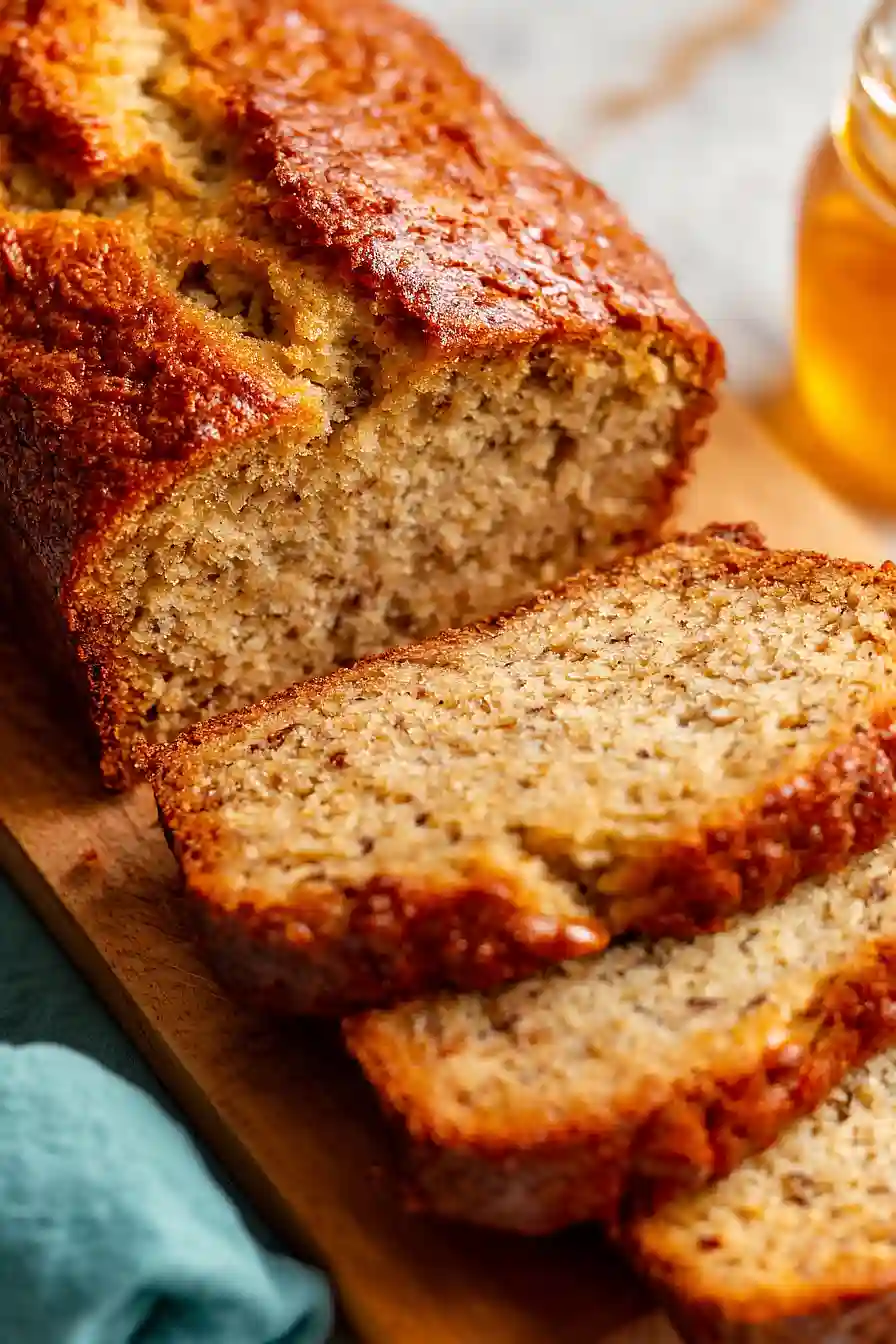
Let it cool completely before slicing to allow the interior to finish setting and prevent crumbling.
Simple Honey Banana Bread
Ingredients
For the wet mixture::
- 4 bananas (very ripe with brown spots for natural sweetness)
- 1 cup honey (I use Nature Nate's Raw & Unfiltered)
- 1/2 teaspoon vanilla extract
- 3 tablespoons canola oil
- 1 egg (room temperature, about 70°F)
- 0.5 cup milk
For the dry mix::
- 2.5 cups flour (I always use King Arthur all-purpose flour)
- 1 teaspoon baking powder
- 1/4 teaspoon baking soda
- 3/4 teaspoon salt
Instructions
- Preheat your oven to 325°F and position the rack to the middle. While it heats, grease a 9x5 inch loaf pan thoroughly with butter or cooking spray, making sure to coat the bottom and all sides evenly. This prevents sticking and ensures even browning.
- In a large mixing bowl, mash the very ripe bananas with a fork until mostly smooth with just a few small lumps remaining—this texture adds character to the bread. Add the honey, milk, egg (at room temperature for proper mixing), canola oil, and vanilla extract to the mashed bananas. Whisk everything together until well combined and smooth. I find that room temperature eggs blend more seamlessly into the batter, creating a more uniform crumb structure.
- In a separate bowl, whisk together the flour, baking powder, baking soda, and salt. This aerates the dry ingredients and distributes the leavening agents evenly. Pour the wet ingredient mixture from Step 2 into the dry ingredients and gently fold together with a spatula or wooden spoon until just combined—stop as soon as no flour streaks remain. Overmixing develops gluten and can make the bread dense, so restraint here pays off with a tender crumb.
- Pour the batter from Step 3 into the prepared pan from Step 1, smoothing the top gently. Bake for 55 to 70 minutes, depending on your oven—the bread is done when a toothpick inserted into the center comes out with just a few moist crumbs (not wet batter). I like to start checking around the 55-minute mark, as every oven bakes differently, and you want the exterior golden brown without the inside drying out.
- Remove the bread from the oven and let it cool in the pan for 10 minutes—this allows the structure to set enough to handle safely. Run a thin knife around the edges to loosen the bread from the sides, then turn it out onto a wire cooling rack. Let it cool completely before slicing to allow the interior to finish setting and prevent crumbling.
