If you ask me, granola bars are one of those snacks that should be easy to make at home.
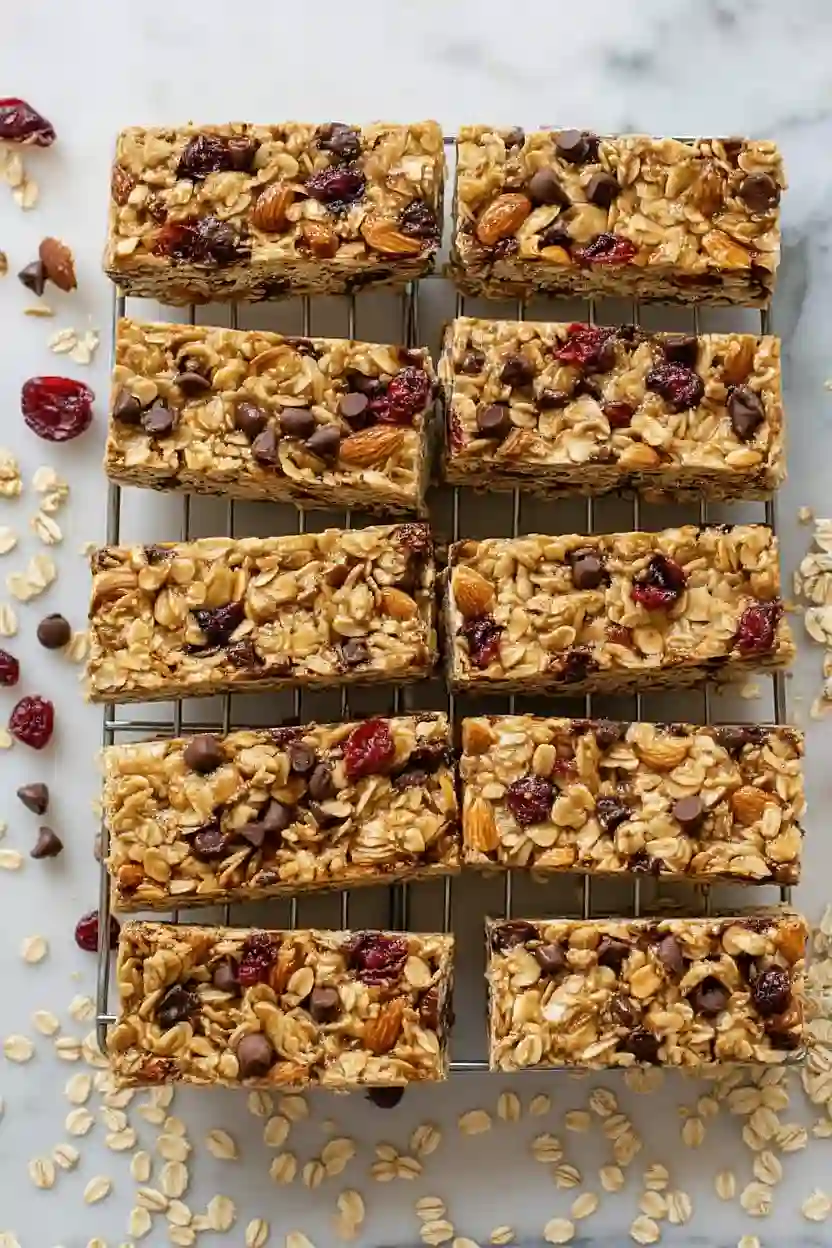
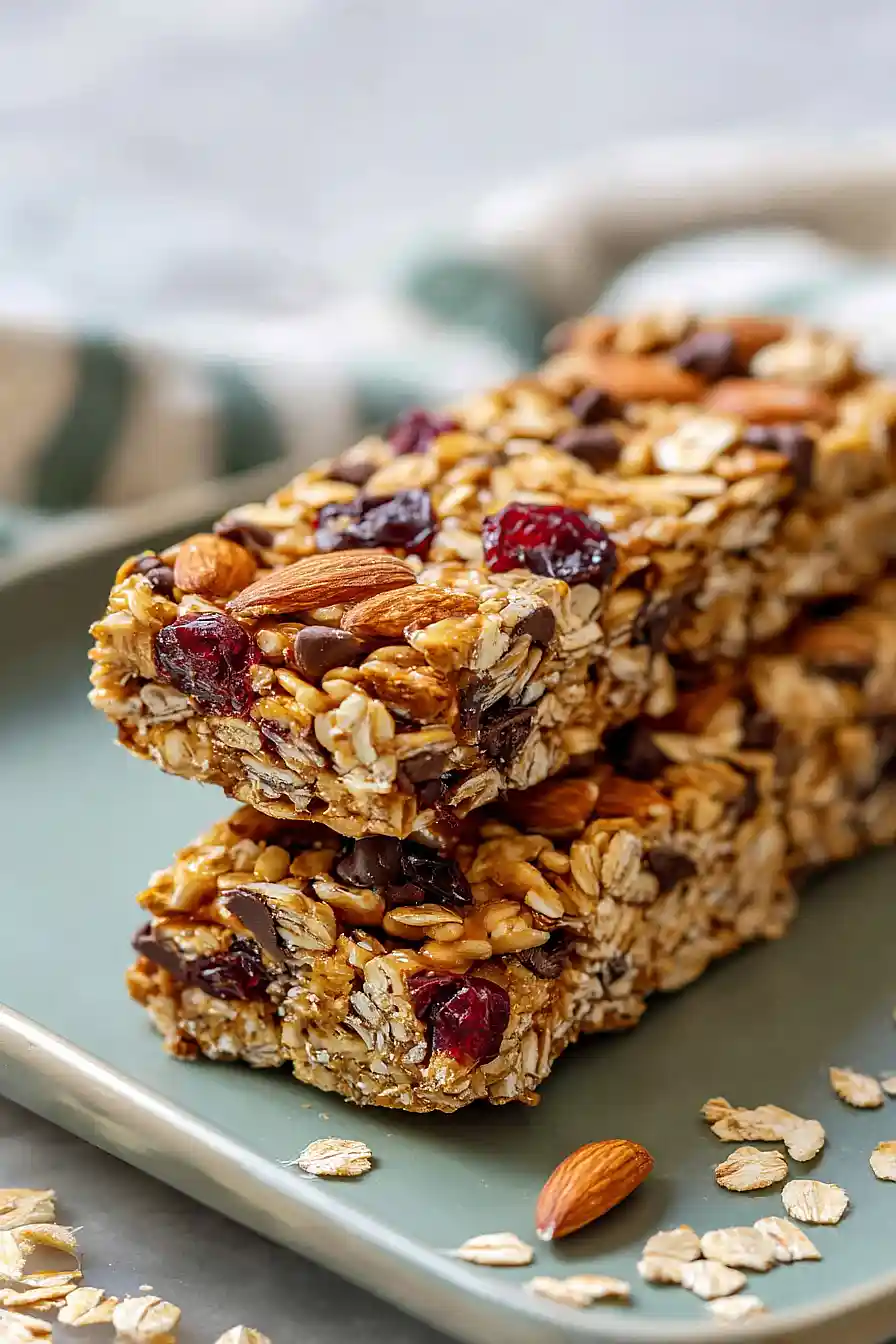
These chewy, wholesome bars skip the peanut butter but still pack plenty of flavor and texture. Toasted oats and crunchy almonds pair with sweet honey and butter to create that classic granola bar taste.
They’re studded with tart dried cranberries and melty chocolate chips for little bursts of sweetness in every bite. A sprinkle of extra chocolate chips pressed into the top makes them look bakery-worthy.
They’re a crowd-pleasing snack that’s perfect for lunchboxes, road trips, or that mid-afternoon energy boost.
Why You’ll Love These Granola Bars
- Peanut-free recipe – Perfect for anyone with peanut allergies or sensitivities, these bars use almonds instead so everyone can enjoy a tasty snack without worry.
- Customizable mix-ins – The combination of cranberries and chocolate chips gives you sweet and tart flavors, but you can easily swap in your favorite dried fruits, nuts, or seeds.
- Quick to make – Ready in under an hour, these homemade granola bars are faster than a trip to the store and taste so much better than store-bought versions.
- Meal prep friendly – Make a batch on Sunday and you’ll have grab-and-go breakfast or snack options for the whole week.
- Better than store-bought – You control exactly what goes into these bars, meaning no weird preservatives or ingredients you can’t pronounce.
What Kind of Oats Should I Use?
For granola bars, old-fashioned rolled oats are your best bet and will give you that classic chewy texture we all love. Quick oats can work in a pinch, but they tend to make the bars a bit more crumbly since they’re cut smaller and absorb liquid differently. I’d stay away from steel-cut oats for this recipe since they’re too hard and won’t bind together properly. Make sure your oats are fresh and not stale – give them a quick sniff before using, and if they smell off or bland, grab a new container for the best flavor.

Options for Substitutions
These granola bars are pretty forgiving when it comes to swapping ingredients:
- Almonds: Feel free to use any nuts you have on hand – walnuts, pecans, cashews, or even sunflower seeds if you need a nut-free option. Just keep the amount the same and chop them to similar sizes.
- Honey: Maple syrup or agave nectar work great as substitutes. You can also use corn syrup, though it won’t add the same flavor depth.
- Butter: Coconut oil is a solid swap if you want dairy-free bars. Use the same amount and make sure it’s melted before mixing.
- Cranberries: Any dried fruit works here – raisins, chopped apricots, cherries, or blueberries are all good choices. You can also mix and match different dried fruits.
- Chocolate chips: Switch these out for white chocolate chips, butterscotch chips, or even chopped dark chocolate. You could also skip them entirely and add more dried fruit instead.
- Oats: Stick with regular rolled oats for this recipe – quick oats will make the bars too mushy, and steel-cut oats won’t soften enough.
Watch Out for These Mistakes While Baking
The biggest mistake people make with homemade granola bars is not pressing the mixture firmly enough into the pan, which leads to crumbly bars that fall apart when you try to cut them – use the back of a measuring cup or your hands to really pack it down for a full minute.
Another common error is cutting the bars too soon before they’ve fully chilled, so make sure to give them the full 2 hours in the fridge (or even longer if you have time) to help them set properly.
To get cleaner cuts and prevent sticking, line your pan with parchment paper that hangs over the edges, which makes it easy to lift the whole batch out before slicing.
If your honey mixture gets too hot and starts to caramelize or darken, pull it off the heat immediately – you just want it bubbling and combined, not cooked, or your bars will turn out too hard and crunchy instead of chewy.
What to Serve With Granola Bars?
These granola bars are perfect for breakfast on busy mornings alongside a cup of coffee or tea and some fresh fruit like sliced bananas or berries. They also make a great afternoon snack with a glass of cold milk or a smoothie to keep you going until dinner. I love packing them in lunchboxes with some apple slices and cheese cubes for a balanced snack, or bringing them along on hikes and road trips since they travel so well. You can even crumble them over Greek yogurt for a quick breakfast bowl that feels a bit more special than your usual routine.
Storage Instructions
Store: Keep your granola bars in an airtight container at room temperature for up to a week. I like to layer them with parchment paper in between so they don’t stick together. They make a great grab-and-go breakfast or snack throughout the week.
Freeze: These bars freeze really well for longer storage. Wrap each bar individually in plastic wrap or parchment paper, then place them all in a freezer bag. They’ll stay good for up to 3 months, and you can just grab one whenever you need a quick snack.
Thaw: When you want to eat a frozen bar, just let it sit at room temperature for about 20 minutes. You can also eat them straight from the freezer if you like a firmer, chewier texture – they won’t freeze solid because of the honey and butter.
| Preparation Time | 20-25 minutes |
| Cooking Time | 20-25 minutes |
| Total Time | 40-50 minutes |
| Level of Difficulty | Medium |
| Servings | 12 bars |
Estimated Nutrition
Estimated nutrition for the whole recipe (without optional ingredients):
- Calories: 2250-2450
- Protein: 30-35 g
- Fat: 90-100 g
- Carbohydrates: 340-360 g
Ingredients
For the dry mix:
- 2 3/4 cups oats (I always use Quaker Old Fashioned oats for the best chewy texture)
- 1/2 cup almonds (roughly chopped into 1/4-inch pieces)
For the syrup:
- 1/3 cup honey (I use Nature Nate’s 100% pure honey)
- 1/3 cup unsalted butter (I like Kerrygold for a richer flavor)
- 1/4 cup brown sugar
- 3/4 tsp vanilla
- 1/4 tsp salt
For the mix-ins:
- 1/2 cup dried cranberries
- 1/3 cup chocolate chips
- 3 tbsp chocolate chips (reserved for pressing into the top after bars are pressed into the pan)
Step 1: Prepare Pan and Toast Oats and Almonds
- 2 3/4 cups oats
- 1/2 cup almonds, roughly chopped
Preheat your oven to 350°F and line a 9×9 inch square baking pan with parchment paper, leaving a slight overhang on two sides for easy removal later.
Spread the oats and roughly chopped almonds on a separate baking sheet and toast them for 8-10 minutes, stirring halfway through.
This toasting step develops a deeper, nuttier flavor that makes the bars taste more complex and satisfying.
Step 2: Create the Honey-Butter Binder
- 1/3 cup unsalted butter
- 1/3 cup honey
- 1/4 cup brown sugar
- 3/4 tsp vanilla
- 1/4 tsp salt
While the oats and almonds toast, combine the butter, honey, brown sugar, vanilla, and salt in a small saucepan over medium heat.
Stir occasionally until the butter is completely melted and the mixture comes to a gentle bubble, about 3-5 minutes.
This heating step helps the honey and sugar dissolve evenly into the butter, creating a uniform binding liquid that will hold your bars together perfectly.
Step 3: Combine Toasted Oats with Binder and Add Mix-Ins
- toasted oats and almonds from Step 1
- honey-butter binder from Step 2
- 1/2 cup dried cranberries
- 1/3 cup chocolate chips
Transfer the toasted oats and almonds from Step 1 to a large mixing bowl.
Pour the warm honey-butter mixture from Step 2 over the oats and let it sit undisturbed for 5 minutes—this allows the oats to absorb the liquid evenly and become cohesive.
After 5 minutes, fold in the dried cranberries and 1/3 cup chocolate chips until everything is well coated and evenly distributed.
I like to use dried cranberries here because they stay chewy and provide little pockets of tartness that balance the sweetness beautifully.
Step 4: Press Mixture into Pan and Add Chocolate Topping
- oat mixture from Step 3
- 3 tbsp chocolate chips
Pour the oat mixture into your prepared pan and press firmly and evenly for about 1 minute using your hands, a spatula, or the bottom of a measuring cup—you want a compact, even layer with no air gaps.
Sprinkle the reserved 3 tablespoons of chocolate chips evenly over the top, then press them gently into the surface for 30 seconds so they set slightly.
The chocolate on top adds a nice visual appeal and extra bursts of flavor in each bite.
Step 5: Chill and Cut into Bars
Place the pan in the refrigerator for at least 2 hours until the bars are completely set and firm to the touch.
Once chilled, use the parchment overhang to lift the entire block out of the pan and onto a cutting board.
Cut into 12 equal bars (a 3×4 grid works well) using a sharp, dry knife—wiping the blade between cuts helps prevent the chocolate from smudging.
Store in an airtight container at room temperature for up to 5 days, or freeze for longer storage.

Simple Granola Bars Without Peanut Butter
Ingredients
For the dry mix::
- 2 3/4 cups oats (I always use Quaker Old Fashioned oats for the best chewy texture)
- 1/2 cup almonds (roughly chopped into 1/4-inch pieces)
For the syrup::
- 1/3 cup honey (I use Nature Nate's 100% pure honey)
- 1/3 cup unsalted butter (I like Kerrygold for a richer flavor)
- 1/4 cup brown sugar
- 3/4 tsp vanilla
- 1/4 tsp salt
For the mix-ins::
- 1/2 cup dried cranberries
- 1/3 cup chocolate chips
- 3 tbsp chocolate chips (reserved for pressing into the top after bars are pressed into the pan)
Instructions
- Preheat your oven to 350°F and line a 9x9 inch square baking pan with parchment paper, leaving a slight overhang on two sides for easy removal later. Spread the oats and roughly chopped almonds on a separate baking sheet and toast them for 8-10 minutes, stirring halfway through. This toasting step develops a deeper, nuttier flavor that makes the bars taste more complex and satisfying.
- While the oats and almonds toast, combine the butter, honey, brown sugar, vanilla, and salt in a small saucepan over medium heat. Stir occasionally until the butter is completely melted and the mixture comes to a gentle bubble, about 3-5 minutes. This heating step helps the honey and sugar dissolve evenly into the butter, creating a uniform binding liquid that will hold your bars together perfectly.
- Transfer the toasted oats and almonds from Step 1 to a large mixing bowl. Pour the warm honey-butter mixture from Step 2 over the oats and let it sit undisturbed for 5 minutes—this allows the oats to absorb the liquid evenly and become cohesive. After 5 minutes, fold in the dried cranberries and 1/3 cup chocolate chips until everything is well coated and evenly distributed. I like to use dried cranberries here because they stay chewy and provide little pockets of tartness that balance the sweetness beautifully.
- Pour the oat mixture into your prepared pan and press firmly and evenly for about 1 minute using your hands, a spatula, or the bottom of a measuring cup—you want a compact, even layer with no air gaps. Sprinkle the reserved 3 tablespoons of chocolate chips evenly over the top, then press them gently into the surface for 30 seconds so they set slightly. The chocolate on top adds a nice visual appeal and extra bursts of flavor in each bite.
- Place the pan in the refrigerator for at least 2 hours until the bars are completely set and firm to the touch. Once chilled, use the parchment overhang to lift the entire block out of the pan and onto a cutting board. Cut into 12 equal bars (a 3x4 grid works well) using a sharp, dry knife—wiping the blade between cuts helps prevent the chocolate from smudging. Store in an airtight container at room temperature for up to 5 days, or freeze for longer storage.
