Finding a dessert that’s both comforting and interesting can be tricky, especially when you want something that feels a bit different from your usual rotation. Most of us reach for the same chocolate chip cookies or brownies week after week, but sometimes you crave something with a little more character – something that tells a story.
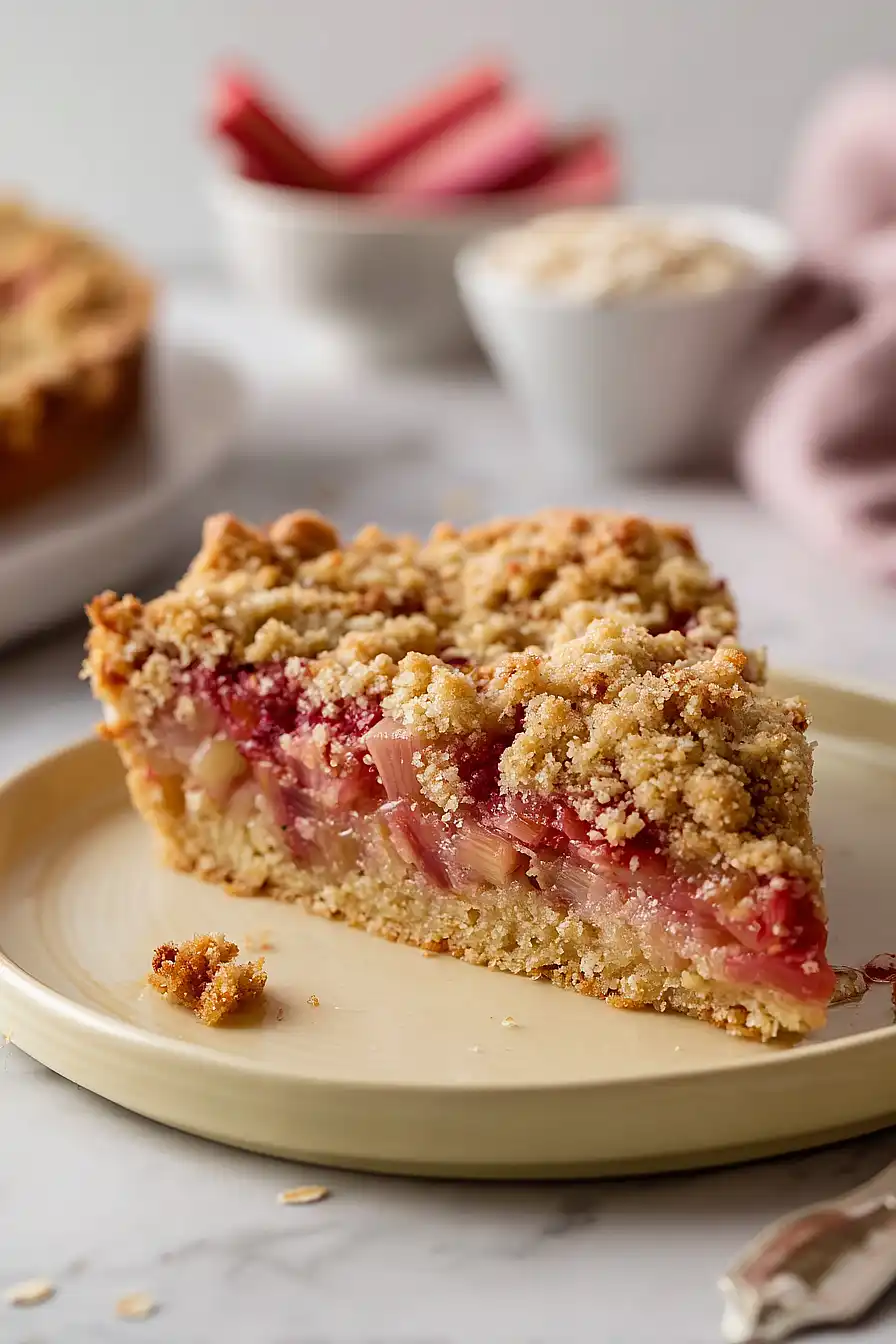
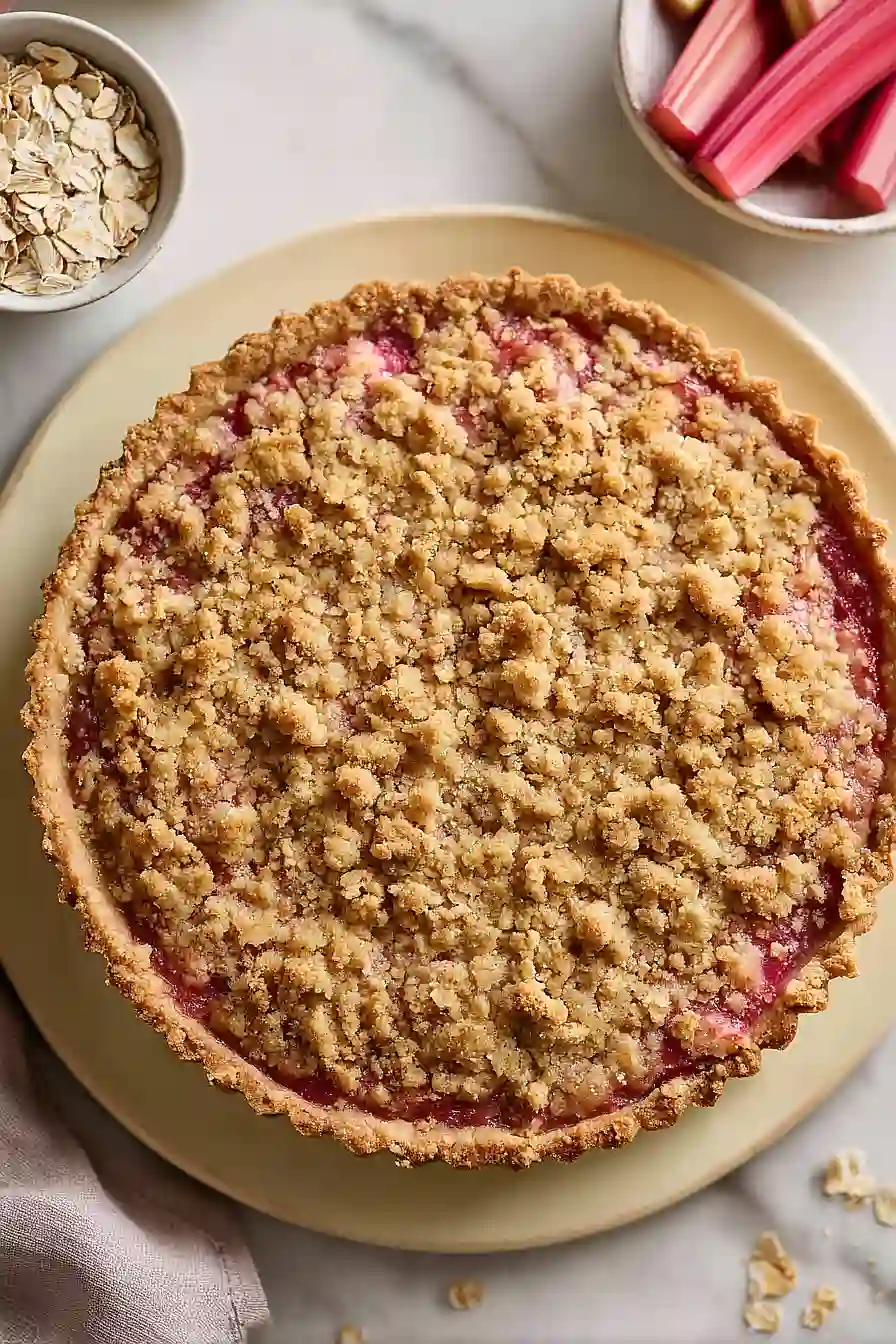
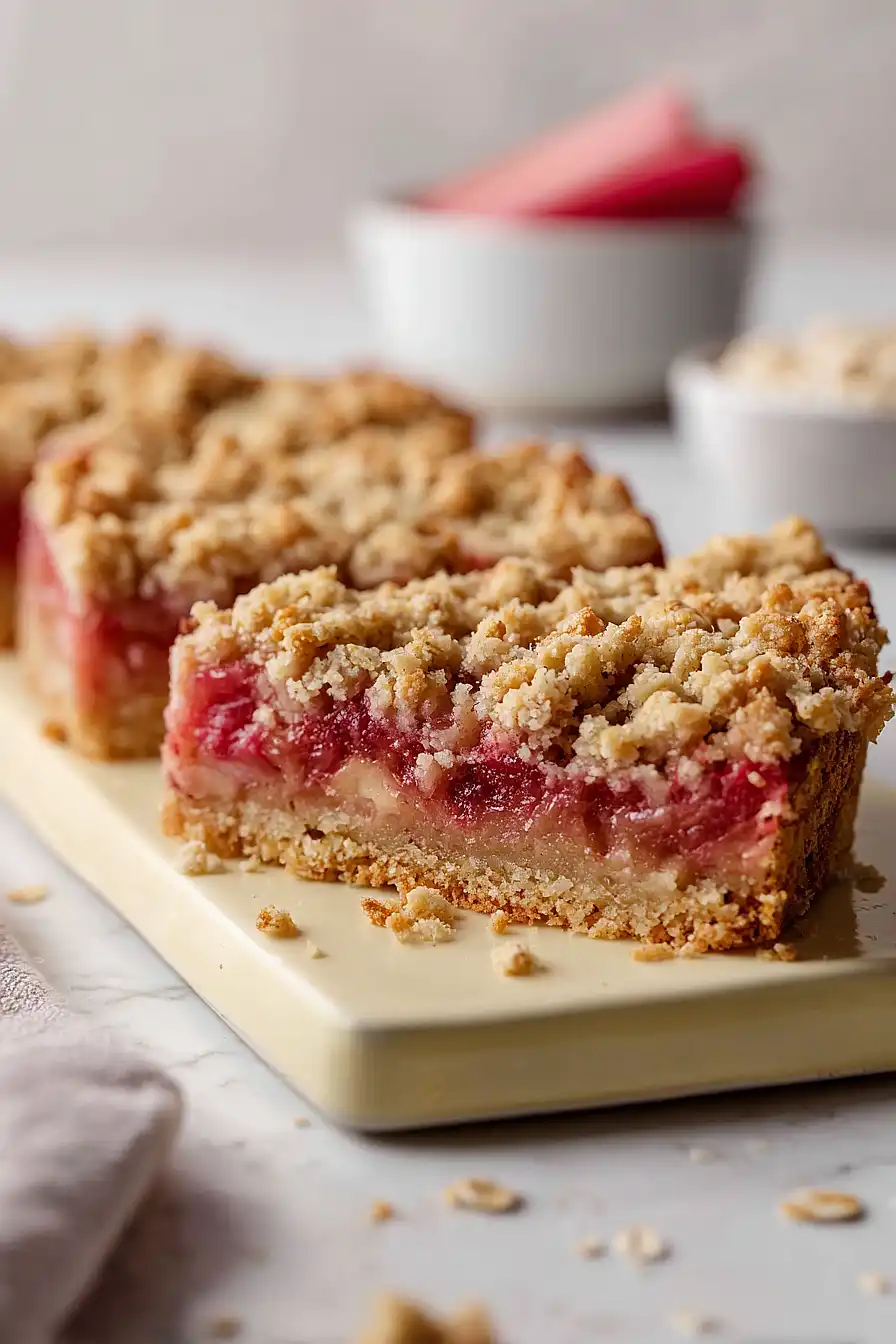
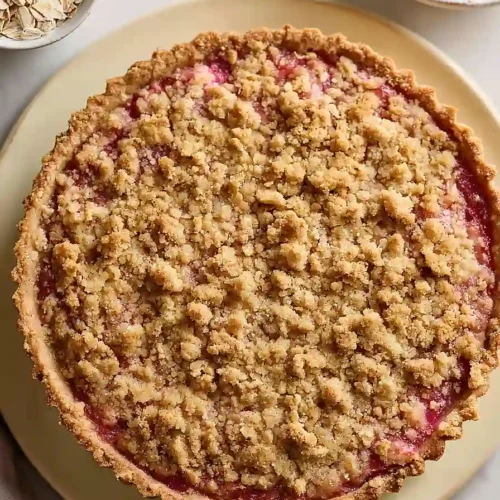
That’s where this Icelandic rhubarb cake comes in. It’s got all the cozy, homestyle appeal of a classic crumble with layers of tangy rhubarb filling and a buttery oat topping that strikes the perfect balance between sweet and tart. Plus, it’s surprisingly simple to throw together, even on a busy afternoon.
Why You’ll Love This Rhubarb Cake
- Simple, everyday ingredients – You probably have most of these pantry staples on hand already, making this an easy cake to whip up whenever the craving strikes.
- Perfect balance of sweet and tart – The tangy rhubarb filling paired with the sweet, crumbly oat topping creates a flavor combination that’s absolutely irresistible.
- Great way to use fresh rhubarb – If you’re looking for something different to do with rhubarb besides pie, this cake is a delicious alternative that showcases the ingredient beautifully.
- Comforting texture – The oat-based crust and topping give this cake a homey, rustic feel that’s perfect with a cup of coffee or tea.
What Kind of Rhubarb Should I Use?
Fresh rhubarb is always your best bet for this Icelandic cake, and you’ll find it at most grocery stores during spring and early summer. The color of the stalks doesn’t really matter – some rhubarb is bright red while other varieties are more green or pink, and they all taste pretty similar. Just make sure the stalks are firm and crisp, not limp or dried out at the ends. If fresh rhubarb isn’t in season, frozen rhubarb works just fine too – just thaw it first and drain off any excess liquid before using it in the recipe.
Options for Substitutions
This cake is pretty forgiving when it comes to swaps, so here are some options if you need them:
- Rhubarb: Fresh rhubarb is really what makes this cake special, but if it’s out of season, you can use frozen rhubarb – just thaw it first and drain any excess liquid before cooking. You could also try mixing in some strawberries (about 1/2 pound rhubarb and 1/2 pound strawberries) for a sweeter twist.
- Oats: Old-fashioned rolled oats work best here, but quick oats will do in a pinch. Just don’t use instant oats as they’ll turn mushy. If you need a gluten-free option, make sure your oats are certified gluten-free.
- Butter: You can swap butter for coconut oil or a neutral vegetable oil if needed, though the flavor will be slightly different. Use the same amount and make sure it’s melted and cooled a bit before mixing.
- Brown sugar: Regular white sugar works fine in the crumble topping, or you can use coconut sugar for a deeper flavor. The texture might be slightly less moist with white sugar.
- Egg: For a vegan version, try using a flax egg (1 tablespoon ground flaxseed mixed with 3 tablespoons water, let sit for 5 minutes) or 1/4 cup unsweetened applesauce.
Watch Out for These Mistakes While Baking
The biggest mistake when making this Icelandic rhubarb cake is not cooking down the rhubarb filling enough – if it’s too watery, it’ll make the crust soggy and prevent the cake from setting properly, so make sure to simmer it until most of the liquid has evaporated and it looks thick and jammy.
Don’t skip the chilling step for the dough, as cold dough is much easier to crumble on top and won’t turn greasy during baking.
When pressing the bottom layer into the pan, make sure it’s even and goes slightly up the sides to create a barrier that keeps the filling from leaking out.
Finally, resist cutting into the cake right away – letting it cool for at least 15-20 minutes helps everything firm up so you get clean slices instead of a runny mess.
What to Serve With Icelandic Rhubarb Cake?
This cake is perfect for an afternoon coffee break or as a simple dessert after dinner. A dollop of lightly sweetened whipped cream or a scoop of vanilla ice cream goes really well with the tart rhubarb filling and crumbly oat topping. If you want to keep it traditional, serve it with a hot cup of coffee or tea – the Icelandic way is to enjoy it with strong black coffee. For a fancier presentation, you can add a drizzle of caramel sauce or dust the top with a bit of powdered sugar right before serving.
Storage Instructions
Store: This rhubarb cake keeps really well at room temperature for about 2 days if you cover it loosely with foil or plastic wrap. For longer storage, pop it in the fridge in an airtight container where it’ll stay fresh for up to 5 days.
Freeze: You can freeze individual slices or the whole cake for up to 3 months. Just wrap it tightly in plastic wrap and then in foil to prevent freezer burn. I like to slice it first so I can grab a piece whenever I want one.
Serve: This cake is delicious cold straight from the fridge, or you can let it sit at room temperature for about 30 minutes before serving. If you froze it, just thaw it overnight in the fridge or at room temperature for a couple hours.
| Preparation Time | 45-60 minutes |
| Cooking Time | 30-35 minutes |
| Total Time | 75-95 minutes |
| Level of Difficulty | Medium |
| Servings | 10 slices |
Estimated Nutrition
Estimated nutrition for the whole recipe (without optional ingredients):
- Calories: 2100-2250
- Protein: 27-32 g
- Fat: 55-65 g
- Carbohydrates: 400-420 g
Ingredients
For the filling:
- 1.2 lbs rhubarb (trimmed and cut into 1/2-inch pieces)
- 2 tbsp water
- 7/8 cup sugar
- 1 pinch salt
- 3/4 tsp vanilla
For the crust and topping:
- 1 1/4 cups oats (I use Quaker Old Fashioned oats for better texture)
- 1 1/2 cups flour (I always use King Arthur all-purpose flour)
- 5/8 cup brown sugar
- 1/2 tsp baking soda
- 1 tsp salt
- 3/4 cup butter (cold and cut into 1/2-inch cubes)
- 1 1/4 tsp vanilla
- 1 egg
- 1/4 tsp ground cinnamon
Step 1: Prepare the Rhubarb Filling
- 1.2 lbs rhubarb, cut into 1/2-inch pieces
- 2 tbsp water
- 7/8 cup sugar
- 1 pinch salt
- 3/4 tsp vanilla
Combine the trimmed and cut rhubarb, water, sugar, and salt in a medium saucepan over medium-high heat.
Bring to a boil, then cover and simmer for 5 minutes to soften the rhubarb.
Uncover the pot and continue simmering for another 10 minutes, stirring occasionally, until the mixture thickens slightly and the rhubarb breaks down into a jammy consistency.
Remove from heat, stir in the vanilla, and set aside to cool completely.
I prefer to let this cool to room temperature before assembling so it doesn’t melt the dough base.
Step 2: Make the Oat Crumble Dough
- 1 1/4 cups oats
- 1 1/2 cups flour
- 5/8 cup brown sugar
- 1/2 tsp baking soda
- 1 tsp salt
- 3/4 cup butter, cold and cubed
- 1 egg
- 1 1/4 tsp vanilla
- 1/4 tsp ground cinnamon
Preheat your oven to 350°F.
In a large bowl, combine the oats, flour, brown sugar, baking soda, and salt, mixing until evenly distributed.
Add the cold butter cubes and work them into the dry mixture using your fingertips or a pastry cutter until the mixture resembles coarse breadcrumbs with some pea-sized butter pieces still visible.
In a small bowl, whisk together the egg and vanilla, then add to the oat mixture and stir until a shaggy dough forms.
I find that working quickly with cold butter keeps the texture more crumbly and creates a better final result.
Step 3: Line Pan and Chill Dough
- dough from Step 2
Press approximately two-thirds of the dough firmly into the bottom of a 9×13 inch baking dish, creating an even base layer.
Cover the dish with plastic wrap and refrigerate both the base layer and the remaining dough for 20-30 minutes until firm.
This chilling step prevents the dough from spreading too much during baking and helps maintain the crumbly texture.
Step 4: Assemble and Bake the Cake
- chilled dough base from Step 3
- cooled rhubarb filling from Step 1
- remaining dough from Step 3
Remove the chilled dough from the refrigerator and carefully spread the cooled rhubarb filling evenly over the pressed dough base.
Crumble the remaining dough pieces over the filling in an even layer, leaving some gaps so the rhubarb shows through slightly.
Bake at 350°F for 30-35 minutes until the top is golden brown and the filling bubbles slightly at the edges.
The cake is done when the crumble topping has set and turned a light to medium golden color.
Step 5: Cool and Serve
Remove the cake from the oven and allow it to cool for at least 15 minutes before cutting.
This rests the filling and makes it easier to cut clean pieces.
Serve warm or at room temperature—both are delicious.
The cake keeps well for 2-3 days covered at room temperature.
Oat Icelandic Rhubarb Cake
Ingredients
For the filling::
- 1.2 lbs rhubarb (trimmed and cut into 1/2-inch pieces)
- 2 tbsp water
- 7/8 cup sugar
- 1 pinch salt
- 3/4 tsp vanilla
For the crust and topping::
- 1 1/4 cups oats (I use Quaker Old Fashioned oats for better texture)
- 1 1/2 cups flour (I always use King Arthur all-purpose flour)
- 5/8 cup brown sugar
- 1/2 tsp baking soda
- 1 tsp salt
- 3/4 cup butter (cold and cut into 1/2-inch cubes)
- 1 1/4 tsp vanilla
- 1 egg
- 1/4 tsp ground cinnamon
Instructions
- Combine the trimmed and cut rhubarb, water, sugar, and salt in a medium saucepan over medium-high heat. Bring to a boil, then cover and simmer for 5 minutes to soften the rhubarb. Uncover the pot and continue simmering for another 10 minutes, stirring occasionally, until the mixture thickens slightly and the rhubarb breaks down into a jammy consistency. Remove from heat, stir in the vanilla, and set aside to cool completely. I prefer to let this cool to room temperature before assembling so it doesn't melt the dough base.
- Preheat your oven to 350°F. In a large bowl, combine the oats, flour, brown sugar, baking soda, and salt, mixing until evenly distributed. Add the cold butter cubes and work them into the dry mixture using your fingertips or a pastry cutter until the mixture resembles coarse breadcrumbs with some pea-sized butter pieces still visible. In a small bowl, whisk together the egg and vanilla, then add to the oat mixture and stir until a shaggy dough forms. I find that working quickly with cold butter keeps the texture more crumbly and creates a better final result.
- Press approximately two-thirds of the dough firmly into the bottom of a 9x13 inch baking dish, creating an even base layer. Cover the dish with plastic wrap and refrigerate both the base layer and the remaining dough for 20-30 minutes until firm. This chilling step prevents the dough from spreading too much during baking and helps maintain the crumbly texture.
- Remove the chilled dough from the refrigerator and carefully spread the cooled rhubarb filling evenly over the pressed dough base. Crumble the remaining dough pieces over the filling in an even layer, leaving some gaps so the rhubarb shows through slightly. Bake at 350°F for 30-35 minutes until the top is golden brown and the filling bubbles slightly at the edges. The cake is done when the crumble topping has set and turned a light to medium golden color.
- Remove the cake from the oven and allow it to cool for at least 15 minutes before cutting. This rests the filling and makes it easier to cut clean pieces. Serve warm or at room temperature—both are delicious. The cake keeps well for 2-3 days covered at room temperature.
