Banana pudding holds a special place in my heart. It’s one of those desserts that feels nostalgic and comforting, like something you’d bring to a family gathering or make on a lazy Sunday afternoon. But when my daughter was diagnosed with celiac disease a few years ago, I thought our banana pudding days were over. Turns out, I was wrong.
Going gluten-free doesn’t mean giving up the desserts you love. It just means getting a little creative with your ingredients. The hardest part was finding vanilla wafers that actually tasted good and had that satisfying crunch. After trying a bunch of different brands, I finally found ones that work perfectly.
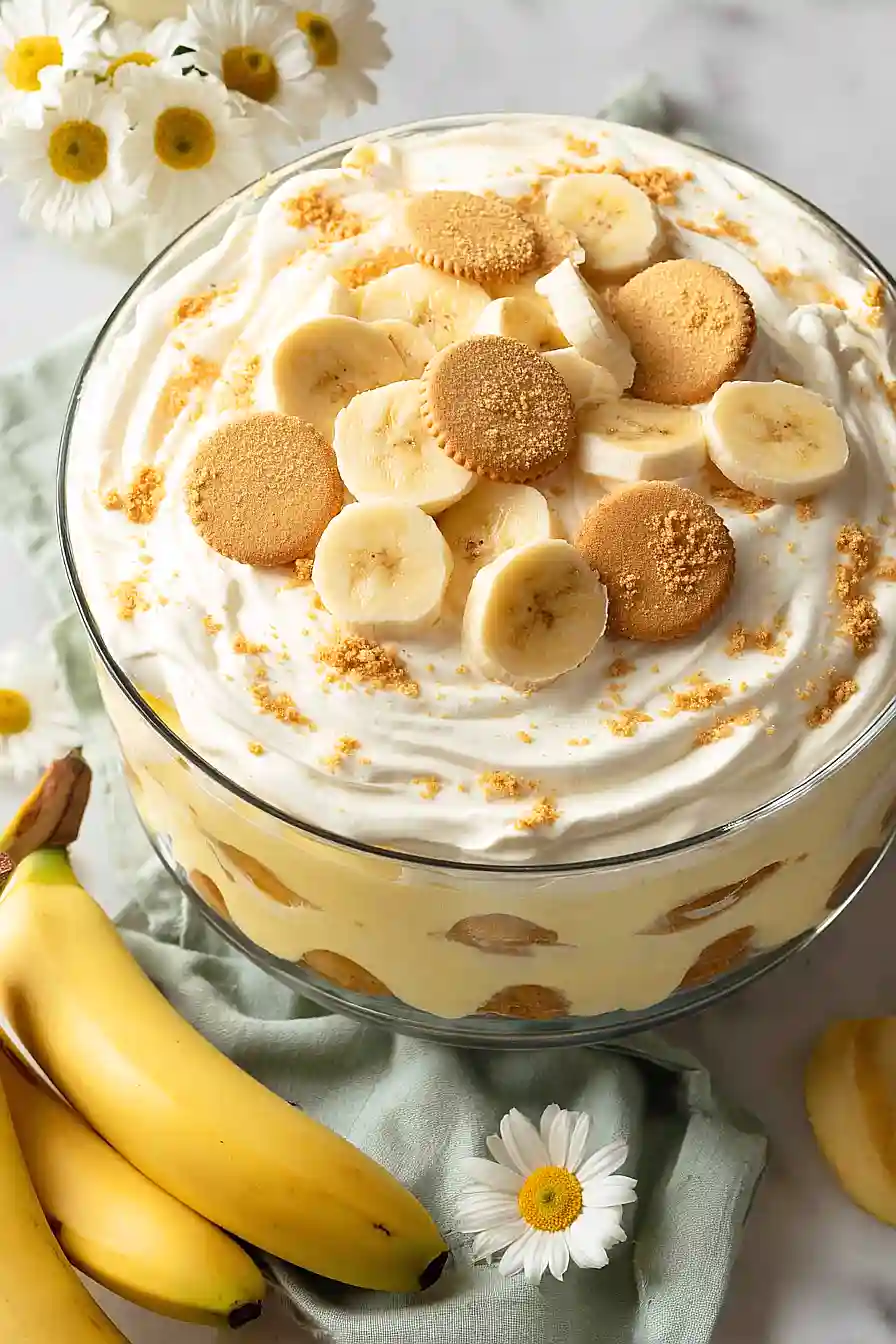
This recipe tastes just like the traditional version I grew up eating. The layers of creamy pudding, fresh bananas, and crunchy wafers come together in a way that makes everyone happy—whether they’re gluten-free or not. Trust me, no one will know the difference.

Why You’ll Love This Gluten Free Banana Pudding
- Gluten-free friendly – This classic dessert uses gluten-free vanilla wafers so everyone at the table can enjoy it without worry.
- No-bake dessert – You don’t need to turn on the oven for this one. Just layer everything together and let it chill in the fridge.
- Crowd-pleasing comfort food – The creamy pudding, fresh bananas, and crunchy wafers make this a nostalgic dessert that’s perfect for potlucks, family gatherings, or Sunday dinners.
- Simple assembly – With just a few basic ingredients and some layering, you can put this together in about 15 minutes of active time before it chills.
- Make-ahead friendly – This dessert actually gets better as it sits, making it perfect to prepare the night before your event.
What Kind of Bananas Should I Use?
The ripeness of your bananas really matters for banana pudding. You’ll want bananas that are ripe but still firm – look for ones that are mostly yellow with just a few brown spots. If your bananas are too green, they’ll taste starchy and won’t have that sweet banana flavor you’re looking for. On the flip side, overly ripe bananas with lots of brown spots will get mushy too quickly and can make your pudding watery. A good trick is to slice your bananas right before assembling the pudding so they don’t have time to brown and oxidize.
Options for Substitutions
This banana pudding is pretty adaptable, so here are some swaps you can make:
- Vanilla wafers: Make sure you’re using gluten-free vanilla wafers for this recipe – that’s not something you can substitute if you need it to stay gluten-free. Brands like Kinnikinnick or Glutino work well.
- Sweetened condensed milk: If you’re out, you can make your own by simmering 2 cups of whole milk with ¾ cup sugar until it reduces by half and thickens up. It takes about 30-40 minutes, so plan ahead.
- Vanilla pudding mix: Look for gluten-free pudding mix (Jell-O brand is typically safe, but always check the label). You can also make pudding from scratch using cornstarch, milk, sugar, and vanilla if you prefer.
- Heavy cream: You can use whipped topping like Cool Whip if you prefer, though fresh whipped cream gives better flavor. Just make sure to whip it to stiff peaks before folding it in.
- Bananas: Use bananas that are ripe but still firm – not overly brown. The quantity can be adjusted based on how banana-forward you want your pudding to be.
Watch Out for These Mistakes While Cooking
The biggest mistake people make with banana pudding is slicing the bananas too early, which causes them to turn brown and mushy – cut them right before assembling your layers and toss them with a little lemon juice if you need to prep ahead.
Another common error is under-whipping the heavy cream, so make sure it forms stiff peaks that hold their shape when you lift the beaters, otherwise your pudding will be runny instead of light and fluffy.
Don’t skip the chilling time after mixing the pudding base, as those 3-4 hours allow it to set properly and give you the right consistency for layering.
Finally, resist the urge to dig in right after assembling – the 4-8 hour chill time is when the magic happens, letting the wafers soften to a cake-like texture and all the flavors blend together perfectly.

What to Serve With Banana Pudding?
Banana pudding is pretty much a dessert that stands on its own, but I love serving it after a big Southern-style meal with fried chicken, mac and cheese, and collard greens. It’s also perfect for potlucks and barbecues since you can make it ahead of time and it feeds a crowd. If you want to keep the dessert table interesting, pair it with some fresh berries on the side or a simple fruit salad to balance out the richness. For a fun twist at parties, I sometimes serve it alongside pecan pie or sweet potato pie so guests can try a little bit of everything.
Storage Instructions
Store: Keep your banana pudding covered tightly with plastic wrap in the fridge for up to 3 days. The wafers will get softer as it sits, which some people actually prefer! Just know that the bananas might start to brown a bit after the first day, but it still tastes great.
Make Ahead: You can prep this dessert a few hours before serving, which actually helps the flavors meld together nicely. I’d recommend waiting to add the top layer of wafers until right before serving so they stay a bit crunchier. The pudding mixture itself can be made a day ahead and kept in the fridge.
Serve: This dessert is best enjoyed cold, straight from the fridge. If it’s been sitting out for a while, just pop it back in the refrigerator for 20-30 minutes before serving to get it nice and chilled again.
| Preparation Time | 20-30 minutes |
| Cooking Time | 0 minutes |
| Total Time | 480-720 minutes |
| Level of Difficulty | Medium |
| Servings | 12 servings |
Estimated Nutrition
Estimated nutrition for the whole recipe (without optional ingredients):
- Calories: 3400-3600
- Protein: 40-50 g
- Fat: 140-160 g
- Carbohydrates: 490-520 g
Ingredients
For the pudding base:
- 1 can sweetened condensed milk (I use Eagle Brand for the best consistency)
- 1.75 cups cold water
- 1 box vanilla pudding mix (ensure it is certified gluten-free)
- 1/4 teaspoon ground nutmeg
For the assembly:
- 3 cups heavy cream (I prefer Horizon Organic for a stable whipped peak)
- 5 cups bananas (sliced into 1/4-inch rounds)
- 1 box vanilla wafers (I use Kinnikinnick gluten-free wafers for a perfect crunch)
Step 1: Prepare the Pudding Base
- 1 can sweetened condensed milk
- 1.75 cups cold water
- 1 box vanilla pudding mix
In a large bowl, whisk together the sweetened condensed milk and cold water until fully combined, about 1 minute.
Add the vanilla pudding mix and whisk continuously for 2 minutes until the mixture is smooth and no lumps remain.
The pudding will thicken slightly as you stir.
Cover and refrigerate for 3-4 hours until the pudding reaches a custard-like consistency—this resting time is crucial for proper texture development.
Step 2: Whip the Heavy Cream and Fold
- 3 cups heavy cream
- chilled pudding base from Step 1
About 30 minutes before assembling, pour the heavy cream into a chilled bowl and whip with an electric mixer on medium-high speed until stiff peaks form—this takes about 3-5 minutes.
I like to chill my mixing bowl and beaters beforehand; it helps the cream reach stiff peaks faster and stay stable.
Gently fold the whipped cream into the chilled pudding from Step 1 using a rubber spatula, being careful to maintain the airy texture—use a folding motion rather than stirring to preserve the volume.
Step 3: Assemble the Layered Pudding
- 1 box vanilla wafers
- 5 cups bananas, sliced into 1/4-inch rounds
- 1/4 teaspoon ground nutmeg
- pudding and whipped cream mixture from Step 2
In a 9×13-inch baking dish (or similar size), create the first layer by breaking vanilla wafers into bite-sized pieces and spreading them evenly across the bottom—you’ll use roughly 1/3 of the box.
Arrange 1/3 of the banana slices over the wafers in a single, even layer.
Spread 1/3 of the pudding mixture from Step 2 over the bananas, smoothing gently with an offset spatula.
Repeat this layering process two more times (wafers, bananas, pudding) to create three distinct layers, ending with the pudding mixture on top.
I find that slicing bananas into consistent 1/4-inch rounds prevents them from oxidizing too quickly and ensures even texture throughout the dish.
Step 4: Final Chill and Serve
- assembled pudding from Step 3
Sprinkle the ground nutmeg over the top layer for a hint of warmth and flavor.
Cover the dish loosely with plastic wrap and refrigerate for at least 4-8 hours (overnight is ideal) to allow the flavors to meld and the wafers to soften slightly while maintaining some textural contrast.
This resting time also helps the pudding set fully.
Serve chilled directly from the dish, or portion into individual bowls.
The pudding will keep refrigerated for up to 2 days.
Gluten Free Banana Pudding
Ingredients
For the pudding base::
- 1 can sweetened condensed milk (I use Eagle Brand for the best consistency)
- 1.75 cups cold water
- 1 box vanilla pudding mix (ensure it is certified gluten-free)
- 1/4 teaspoon ground nutmeg
For the assembly::
- 3 cups heavy cream (I prefer Horizon Organic for a stable whipped peak)
- 5 cups bananas (sliced into 1/4-inch rounds)
- 1 box vanilla wafers (I use Kinnikinnick gluten-free wafers for a perfect crunch)
Instructions
- In a large bowl, whisk together the sweetened condensed milk and cold water until fully combined, about 1 minute. Add the vanilla pudding mix and whisk continuously for 2 minutes until the mixture is smooth and no lumps remain. The pudding will thicken slightly as you stir. Cover and refrigerate for 3-4 hours until the pudding reaches a custard-like consistency—this resting time is crucial for proper texture development.
- About 30 minutes before assembling, pour the heavy cream into a chilled bowl and whip with an electric mixer on medium-high speed until stiff peaks form—this takes about 3-5 minutes. I like to chill my mixing bowl and beaters beforehand; it helps the cream reach stiff peaks faster and stay stable. Gently fold the whipped cream into the chilled pudding from Step 1 using a rubber spatula, being careful to maintain the airy texture—use a folding motion rather than stirring to preserve the volume.
- In a 9x13-inch baking dish (or similar size), create the first layer by breaking vanilla wafers into bite-sized pieces and spreading them evenly across the bottom—you'll use roughly 1/3 of the box. Arrange 1/3 of the banana slices over the wafers in a single, even layer. Spread 1/3 of the pudding mixture from Step 2 over the bananas, smoothing gently with an offset spatula. Repeat this layering process two more times (wafers, bananas, pudding) to create three distinct layers, ending with the pudding mixture on top. I find that slicing bananas into consistent 1/4-inch rounds prevents them from oxidizing too quickly and ensures even texture throughout the dish.
- Sprinkle the ground nutmeg over the top layer for a hint of warmth and flavor. Cover the dish loosely with plastic wrap and refrigerate for at least 4-8 hours (overnight is ideal) to allow the flavors to meld and the wafers to soften slightly while maintaining some textural contrast. This resting time also helps the pudding set fully. Serve chilled directly from the dish, or portion into individual bowls. The pudding will keep refrigerated for up to 2 days.
