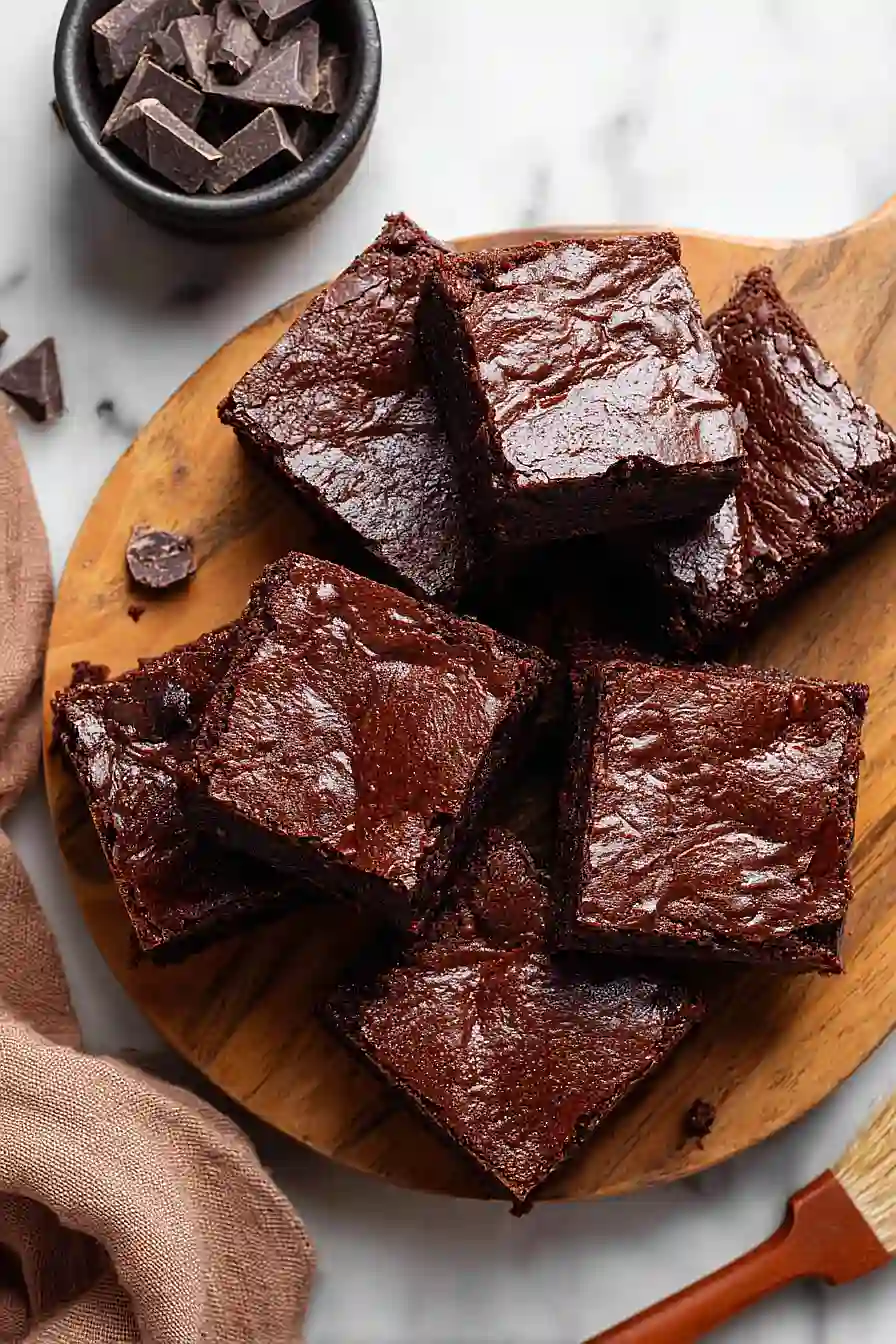
If you ask me, brownies with just a handful of ingredients are pure magic.
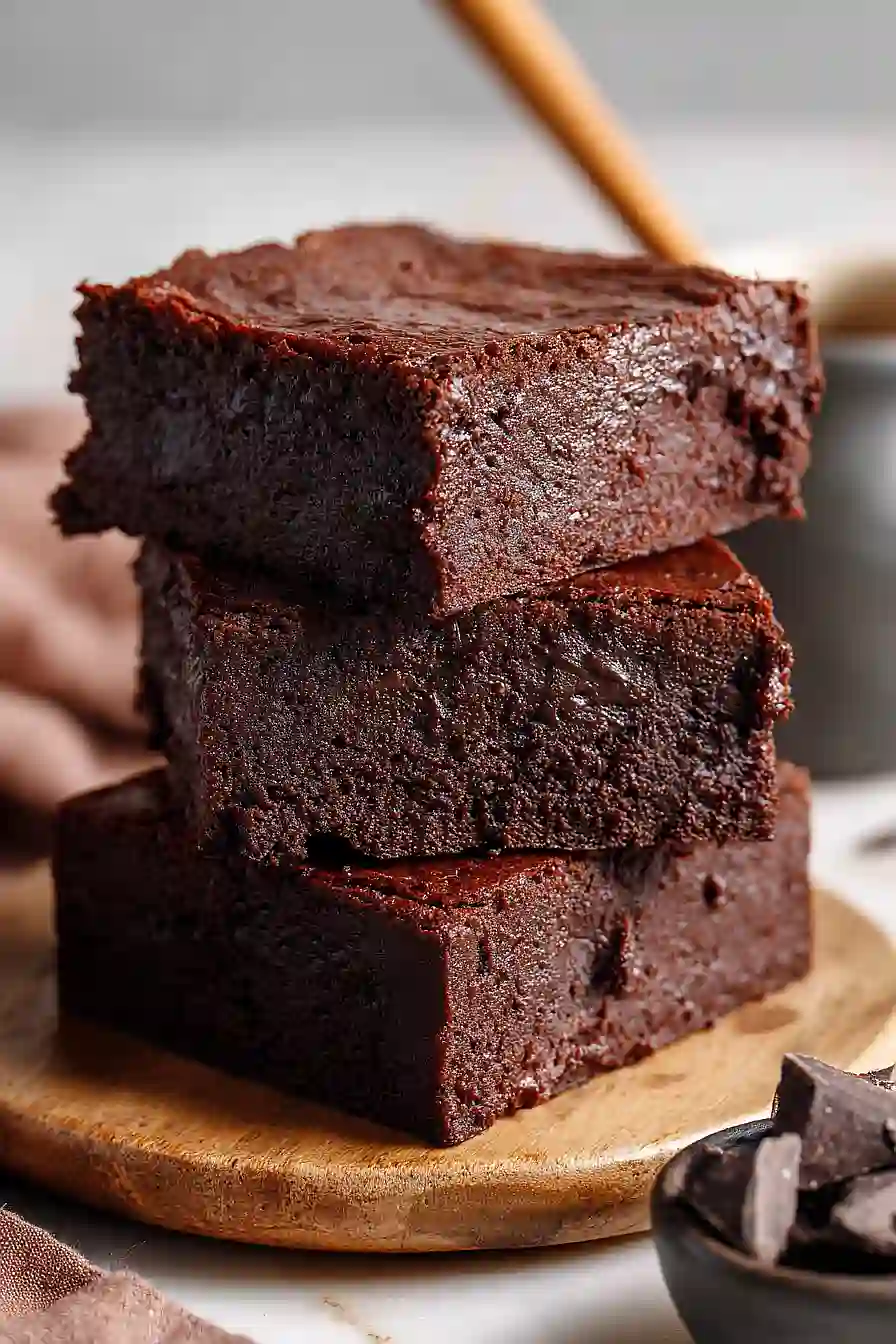
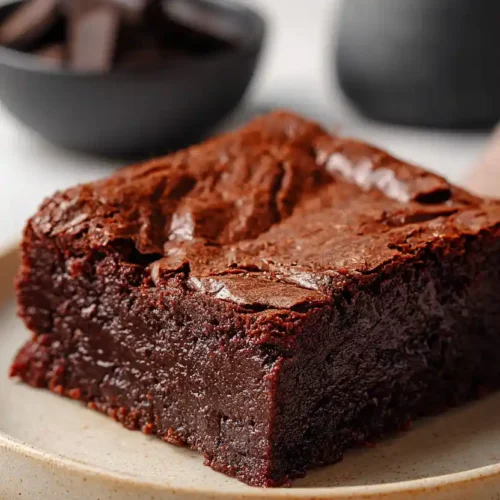
These fudgy brownies come together with mostly pantry staples and minimal effort. Rich chocolate and sweet condensed milk create a dense, gooey center that’s hard to resist.
There’s no need for butter or eggs here. The condensed milk does all the heavy lifting, binding everything together while keeping the brownies moist and chewy. A bit of flour gives them structure, and a pinch of sea salt balances out the sweetness.
They’re the kind of dessert you can whip up on a weeknight when you need chocolate fast, perfect for satisfying those last-minute cravings.
Why You’ll Love These Condensed Milk Brownies
- Only 3 ingredients – You just need dark chocolate, sweetened condensed milk, and flour to make these fudgy brownies. No butter, eggs, or sugar required.
- Simple preparation – Just melt, mix, and bake. There’s no complicated technique or special equipment needed to pull these off.
- Rich and fudgy texture – The sweetened condensed milk creates an incredibly dense, moist brownie that’s more like a chocolate truffle than a cake.
- Perfect for beginner bakers – With so few ingredients and straightforward steps, this recipe is foolproof and great if you’re just learning to bake or need a quick dessert.
What Kind of Dark Chocolate Should I Use?
For these brownies, you’ll want to pick a dark chocolate that you actually enjoy eating on its own, since it’s the star of the show here. I’d recommend using chocolate in the 60-70% cocoa range – anything higher might make your brownies a bit too bitter, especially since the condensed milk is already pretty sweet. You can use chocolate chips, a chopped chocolate bar, or even baking chocolate, whatever you have on hand will work. Just avoid using unsweetened baking chocolate for this recipe, as the balance of sweetness won’t be quite right.

Options for Substitutions
With only three ingredients, this recipe is pretty straightforward, but here are a few swaps you can make:
- Dark chocolate: You can use milk chocolate or semi-sweet chocolate instead of dark chocolate. Keep in mind that milk chocolate will make your brownies sweeter and less intense, while semi-sweet falls somewhere in between. Chocolate chips work too, though bar chocolate melts more smoothly.
- Sweetened condensed milk: This ingredient is really the star of the recipe and shouldn’t be substituted. Don’t use evaporated milk or regular milk – they won’t give you the same fudgy texture or sweetness that makes these brownies work.
- Plain flour: All-purpose flour is what you need here, but if you’re looking for a gluten-free option, try a 1:1 gluten-free baking flour blend. The texture might be slightly different, but it should still work well.
Watch Out for These Mistakes While Baking
The biggest mistake people make with these brownies is overbaking them, which turns fudgy perfection into dry, crumbly squares – pull them out when the center still has a slight jiggle and a toothpick comes out with a few moist crumbs, not completely clean.
Burning the chocolate is another easy trap to fall into, so keep your heat on the lowest setting and stir constantly while melting the chocolate with the condensed milk to prevent scorching on the bottom of the pan.
Skipping the full cooling time might be tempting, but cutting into warm brownies will give you a gooey mess instead of clean squares, so resist the urge and let them cool completely in the tin for at least an hour.
For extra fudgy brownies, try using a mix of dark and milk chocolate, and make sure to line your tin properly with parchment paper hanging over the edges so you can easily lift the whole batch out for cutting.
What to Serve With Condensed Milk Brownies?
These rich, fudgy brownies are pretty indulgent on their own, but they’re amazing when served warm with a scoop of vanilla ice cream on top. A cold glass of milk is always a good call if you want to keep things simple, or try them with a hot cup of coffee for an afternoon treat. I also love cutting them into smaller squares and serving them alongside fresh berries like strawberries or raspberries – the tartness of the fruit balances out the sweetness perfectly. For a fun dessert spread, you can set out whipped cream and chocolate sauce so everyone can customize their brownie however they like.
Storage Instructions
Store: Keep your brownies in an airtight container at room temperature for up to 3 days, or in the fridge for up to a week. I actually prefer them cold from the fridge because they get extra fudgy and dense!
Freeze: These brownies freeze really well for up to 3 months. Cut them into squares first, then wrap individually in plastic wrap before putting them in a freezer bag. That way you can grab just one or two whenever a chocolate craving hits.
Thaw: Let frozen brownies sit at room temperature for about 30 minutes, or if you’re impatient like me, microwave them for 10-15 seconds for a warm, gooey treat. They taste amazing either way!
| Preparation Time | 10-15 minutes |
| Cooking Time | 20-25 minutes |
| Total Time | 90-100 minutes |
| Level of Difficulty | Easy |
| Servings | 12 squares |
Estimated Nutrition
Estimated nutrition for the whole recipe (without optional ingredients):
- Calories: 2600-2800
- Protein: 28-32 g
- Fat: 95-105 g
- Carbohydrates: 390-420 g
Ingredients
- 9.5 oz semi-sweet chocolate, broken into pieces
- 14 oz sweetened condensed milk
- 1/2 cup all-purpose flour
- 1/2 teaspoon sea salt
- 1 teaspoon vanilla extract
Step 1: Prepare the Pan and Preheat the Oven
Line a 9×9 inch square baking tin with parchment paper, allowing the paper to overhang slightly on two sides for easy removal later.
Preheat your oven to 160°C (320°F).
This low temperature is crucial for brownies—it allows the chocolate and condensed milk to set gently without the edges becoming dry or overbaked.
Step 2: Melt Chocolate with Condensed Milk
- 9.5 oz semi-sweet chocolate, broken into pieces
- 14 oz sweetened condensed milk
Break the semi-sweet chocolate into small, uniform pieces and place them in a heatproof bowl or heavy-bottomed pan.
Pour the sweetened condensed milk over the chocolate.
Set the bowl over a pan of gently simmering water (double boiler method) or melt over low direct heat, stirring frequently until completely smooth and combined, about 3-5 minutes.
I find the double boiler method gives you the best control and prevents the chocolate from burning—take your time here, as patience with chocolate melting makes all the difference in texture.
Step 3: Combine Dry Ingredients and Fold into Chocolate Mixture
- 1/2 cup all-purpose flour
- 1/2 teaspoon sea salt
- 1 teaspoon vanilla extract
- chocolate mixture from Step 2
While the chocolate mixture is still warm, whisk together the flour, sea salt, and vanilla extract in a small bowl.
Pour the dry ingredient mixture into the melted chocolate and condensed milk, folding gently with a spatula until just combined.
Don’t overmix—stop as soon as you don’t see streaks of flour.
I like to add the salt to enhance the sweetness and the vanilla to deepen the chocolate flavor; these small touches elevate a simple recipe significantly.
Step 4: Bake the Brownies
- batter from Step 3
Pour the batter from Step 3 into the prepared tin, spreading it evenly into the corners with a spatula.
Bake at 160°C for 20-25 minutes, until the edges are set but the center still has a slight jiggle when you gently shake the pan—the brownies will continue to cook slightly as they cool.
The batter should look fudgy, not cake-like.
Step 5: Cool and Cut into Squares
Remove the brownies from the oven and let them cool completely in the tin for at least 1 hour at room temperature.
Once fully cooled, use the overhanging parchment paper to lift the brownies out of the tin and place them on a cutting board.
Cut into squares using a sharp, dry knife, wiping the blade between cuts for clean edges.
Serve at room temperature or chill before serving for a firmer texture.
3-Ingredient Condensed Milk Brownies
Ingredients
- 9.5 oz semi-sweet chocolate, broken into pieces
- 14 oz sweetened condensed milk
- 1/2 cup all-purpose flour
- 1/2 teaspoon sea salt
- 1 teaspoon vanilla extract
Instructions
- Line a 9x9 inch square baking tin with parchment paper, allowing the paper to overhang slightly on two sides for easy removal later. Preheat your oven to 160°C (320°F). This low temperature is crucial for brownies—it allows the chocolate and condensed milk to set gently without the edges becoming dry or overbaked.
- Break the semi-sweet chocolate into small, uniform pieces and place them in a heatproof bowl or heavy-bottomed pan. Pour the sweetened condensed milk over the chocolate. Set the bowl over a pan of gently simmering water (double boiler method) or melt over low direct heat, stirring frequently until completely smooth and combined, about 3-5 minutes. I find the double boiler method gives you the best control and prevents the chocolate from burning—take your time here, as patience with chocolate melting makes all the difference in texture.
- While the chocolate mixture is still warm, whisk together the flour, sea salt, and vanilla extract in a small bowl. Pour the dry ingredient mixture into the melted chocolate and condensed milk, folding gently with a spatula until just combined. Don't overmix—stop as soon as you don't see streaks of flour. I like to add the salt to enhance the sweetness and the vanilla to deepen the chocolate flavor; these small touches elevate a simple recipe significantly.
- Pour the batter from Step 3 into the prepared tin, spreading it evenly into the corners with a spatula. Bake at 160°C for 20-25 minutes, until the edges are set but the center still has a slight jiggle when you gently shake the pan—the brownies will continue to cook slightly as they cool. The batter should look fudgy, not cake-like.
- Remove the brownies from the oven and let them cool completely in the tin for at least 1 hour at room temperature. Once fully cooled, use the overhanging parchment paper to lift the brownies out of the tin and place them on a cutting board. Cut into squares using a sharp, dry knife, wiping the blade between cuts for clean edges. Serve at room temperature or chill before serving for a firmer texture.
