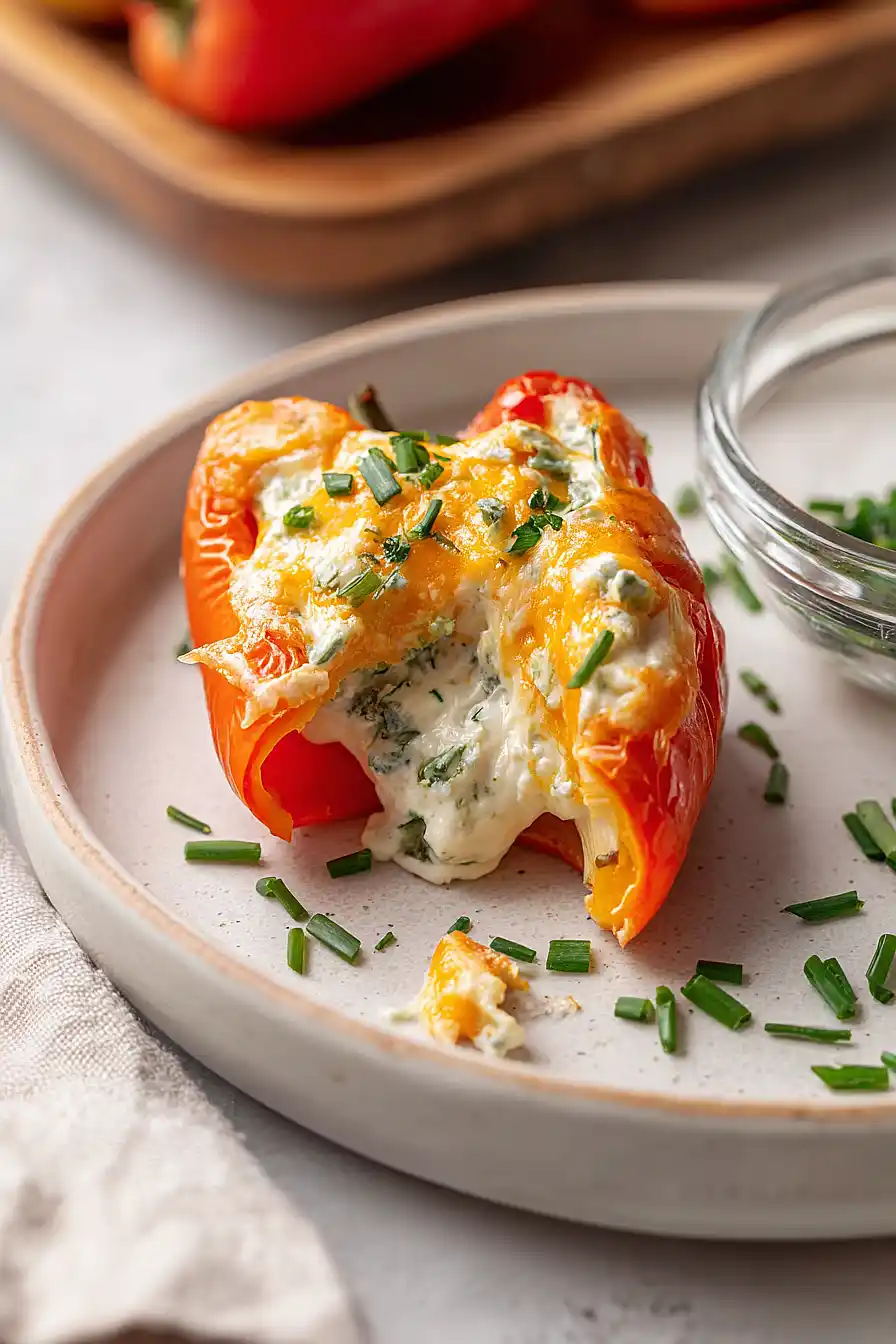
I’m always looking for easy appetizers that look like I spent way more time on them than I actually did. These cream cheese stuffed mini peppers are exactly that kind of recipe. They come together in about 20 minutes, but everyone thinks you’ve been working away in the kitchen for hours.
The filling is simple—just cream cheese, cheddar, and a few spices mixed together. No cooking required before you stuff them. I like using fresh chives because they add a nice onion flavor without being too strong, but you could swap in green onions if that’s what you have on hand.
These peppers are great for parties, game day, or honestly just a snack when you’re craving something a bit more interesting than chips and dip. I usually make a double batch because they disappear fast. The kids even like them, which is saying something when vegetables are involved.

Why You’ll Love These Cream Cheese Stuffed Mini Peppers
- Ready in under 30 minutes – These stuffed peppers come together quickly, making them perfect for last-minute appetizers or when you need something fast for game day.
- Simple ingredients – You only need a handful of basic ingredients that you might already have in your fridge.
- Naturally low-carb and keto-friendly – If you’re watching your carbs, these peppers are a tasty option that won’t derail your diet goals.
- Great for parties – These colorful bites look impressive on a platter and are easy to grab and eat, making them ideal for gatherings where people are mingling.
- Kid-approved – The creamy, cheesy filling and naturally sweet peppers make these a hit with children who might normally skip vegetables.
What Kind of Mini Peppers Should I Use?
You’ll find mini sweet peppers in most grocery stores, usually sold in bags in the produce section. They come in a mix of colors – red, yellow, and orange – and any combination will work perfectly for this recipe. Red peppers tend to be the sweetest since they’re the most ripe, but honestly, they all taste great when stuffed with cream cheese. Look for peppers that are firm to the touch without any soft spots or wrinkles, and try to pick ones that are roughly the same size so they cook evenly. If you can only find regular bell peppers, you can cut them into strips and stuff those instead, though you might need to adjust the cooking time slightly.

Options for Substitutions
This recipe is pretty straightforward, but here are some swaps you can make if needed:
- Cream cheese: You can use Neufchâtel cheese (the lighter version of cream cheese) or even goat cheese for a tangier flavor. Just make sure whatever you use is softened to room temperature so it mixes easily.
- Cheddar cheese: Feel free to swap cheddar with monterey jack, pepper jack (for extra kick), mozzarella, or even a Mexican cheese blend. Any melty cheese works great here.
- Chives: Green onions work perfectly as mentioned, but you can also use fresh parsley, cilantro, or even a pinch of dried herbs like oregano or Italian seasoning if that’s what you have on hand.
- Mini sweet peppers: These are really the star of the show, so I’d recommend sticking with them. If you absolutely can’t find them, you could use jalapeños with the seeds removed for a spicier version, but the sweet peppers give you that perfect mild, slightly sweet flavor that makes this recipe work.
Watch Out for These Mistakes While Baking
The biggest mistake when making stuffed mini peppers is using cold cream cheese straight from the fridge, which makes it nearly impossible to mix smoothly and creates lumpy filling – let it sit at room temperature for at least 30 minutes before you start.
Another common error is overfilling the peppers, which causes the cheese mixture to spill out and burn on the pan, so fill them just to the top without mounding.
To prevent watery peppers, make sure you thoroughly dry the insides after removing the seeds and membranes with a paper towel, and if your peppers are browning too quickly on top but the filling isn’t hot enough, tent them loosely with foil for the last few minutes of baking.
What to Serve With Cream Cheese Stuffed Mini Peppers?
These stuffed peppers make a great appetizer for parties, so I like to serve them alongside other finger foods like chicken wings, mozzarella sticks, or a big platter of veggies and dip. If you’re making them for dinner, they pair nicely with grilled chicken or steak since they’re on the lighter side and won’t fill you up too much. A simple side salad or some tortilla chips with salsa also works well to round out the meal. For game day or get-togethers, set them out with some ranch or blue cheese dressing for dipping, even though they’re already pretty rich and creamy on their own.
Storage Instructions
Store: Keep your stuffed peppers in an airtight container in the fridge for up to 3 days. They’re great to snack on straight from the refrigerator, or you can let them sit out for a few minutes to take the chill off before serving.
Make Ahead: These are perfect for prepping in advance! You can stuff the peppers up to a day before baking, then just cover them tightly with plastic wrap and keep them in the fridge. When you’re ready, pop them in the oven and bake as directed.
Freeze: Freeze the baked and cooled peppers in a single layer on a baking sheet first, then transfer to a freezer bag for up to 2 months. Reheat them in a 350°F oven for about 15 minutes until warmed through and the cheese gets melty again.
| Preparation Time | 10-15 minutes |
| Cooking Time | 15-20 minutes |
| Total Time | 25-35 minutes |
| Level of Difficulty | Easy |
| Servings | 28 pieces |
Estimated Nutrition
Estimated nutrition for the whole recipe (without optional ingredients):
- Calories: 1200-1350
- Protein: 35-45 g
- Fat: 105-115 g
- Carbohydrates: 35-45 g
Ingredients
For the base:
- 1 lb mini sweet peppers (halved lengthwise and seeds removed)
For the filling:
- 8 oz cream cheese (I use Philadelphia original for the best texture)
- 1 cup cheddar cheese (freshly shredded for better melting and flavor)
- 2 tbsp fresh chives
- 1/4 tsp salt
- 1/2 tsp pepper
- 1/2 tsp garlic powder
- 1/4 tsp smoked paprika
Step 1: Prepare the Peppers and Preheat the Oven
- 1 lb mini sweet peppers
Preheat your oven to 425°F and line a baking sheet with parchment paper.
While the oven heats, halve the mini sweet peppers lengthwise and carefully remove all seeds and membranes using a small spoon or knife.
Arrange the pepper halves cut-side up on the prepared baking sheet, making sure they sit flat and stable.
Step 2: Make the Cream Cheese Filling
- 8 oz cream cheese
- 1 cup cheddar cheese
- 2 tbsp fresh chives
- 1/4 tsp salt
- 1/2 tsp pepper
- 1/2 tsp garlic powder
- 1/4 tsp smoked paprika
In a medium bowl, combine the softened cream cheese, freshly shredded cheddar cheese, fresh chives, salt, pepper, garlic powder, and smoked paprika.
Mix thoroughly until the filling is smooth and evenly combined—I like to use a fork to break down the cream cheese completely, which ensures the filling spreads easily into the peppers without any lumps.
The smoked paprika adds a subtle depth that really complements the cheese.
Step 3: Stuff the Peppers
- cream cheese filling from Step 2
Spoon the cream cheese filling generously into each pepper half, filling them to about three-quarters full.
I find it’s easier to use a small spoon or piping bag to get the filling distributed evenly, which ensures consistent texture and flavor in every bite.
Don’t overstuff—leaving a little room allows the cheese to bubble slightly as it bakes without spilling over.
Step 4: Roast Until Golden and Bubbly
- stuffed peppers from Step 3
Place the filled pepper halves in the preheated 425°F oven and roast for 15 minutes, until the filling is golden brown and bubbly around the edges and the peppers are just tender.
The peppers should still have a slight firmness to them—you’re not trying to completely soften them, just warm them through while the cheese gets beautifully caramelized on top.
Step 5: Plate and Serve
- roasted stuffed peppers from Step 4
- fresh chives for garnish
Remove the peppers from the oven and let them rest for 1-2 minutes.
Transfer to a serving plate and garnish with a few fresh chives for a pop of color and brightness.
Serve warm—they’re best enjoyed right out of the oven when the cheese is still creamy and the peppers have that perfect tender-crisp texture.

Gluten-Free Cream Cheese Stuffed Mini Peppers
Ingredients
For the base
- 1 lb mini sweet peppers (halved lengthwise and seeds removed)
For the filling
- 8 oz cream cheese (I use Philadelphia original for the best texture)
- 1 cup cheddar cheese (freshly shredded for better melting and flavor)
- 2 tbsp fresh chives
- 1/4 tsp salt
- 1/2 tsp pepper
- 1/2 tsp garlic powder
- 1/4 tsp smoked paprika
Instructions
- Preheat your oven to 425°F and line a baking sheet with parchment paper. While the oven heats, halve the mini sweet peppers lengthwise and carefully remove all seeds and membranes using a small spoon or knife. Arrange the pepper halves cut-side up on the prepared baking sheet, making sure they sit flat and stable.
- In a medium bowl, combine the softened cream cheese, freshly shredded cheddar cheese, fresh chives, salt, pepper, garlic powder, and smoked paprika. Mix thoroughly until the filling is smooth and evenly combined—I like to use a fork to break down the cream cheese completely, which ensures the filling spreads easily into the peppers without any lumps. The smoked paprika adds a subtle depth that really complements the cheese.
- Spoon the cream cheese filling generously into each pepper half, filling them to about three-quarters full. I find it's easier to use a small spoon or piping bag to get the filling distributed evenly, which ensures consistent texture and flavor in every bite. Don't overstuff—leaving a little room allows the cheese to bubble slightly as it bakes without spilling over.
- Place the filled pepper halves in the preheated 425°F oven and roast for 15 minutes, until the filling is golden brown and bubbly around the edges and the peppers are just tender. The peppers should still have a slight firmness to them—you're not trying to completely soften them, just warm them through while the cheese gets beautifully caramelized on top.
- Remove the peppers from the oven and let them rest for 1-2 minutes. Transfer to a serving plate and garnish with a few fresh chives for a pop of color and brightness. Serve warm—they're best enjoyed right out of the oven when the cheese is still creamy and the peppers have that perfect tender-crisp texture.

