Finding a dessert that feels special but doesn’t require hours in the kitchen can be tough, especially when you’re juggling dinner prep and everything else that comes with a busy evening. And let’s be honest, most fruit desserts either end up too complicated or just don’t have that cozy, satisfying quality we’re all craving when the weather turns cool.
That’s where this pear and walnut crisp comes in: it’s simple enough for a weeknight, uses ingredients you probably already have, and delivers that perfect combination of tender fruit and crunchy, buttery topping without any fuss.
Why You’ll Love This Pear & Walnut Crisp
- Quick and easy dessert – Ready in under an hour, this crisp comes together with minimal effort and makes your kitchen smell amazing.
- Perfect fall flavors – The sweet pears paired with warm cinnamon and crunchy walnuts create a cozy dessert that’s ideal for cooler weather.
- Simple, wholesome ingredients – You probably have most of these pantry staples on hand already, and fresh pears are the star of the show.
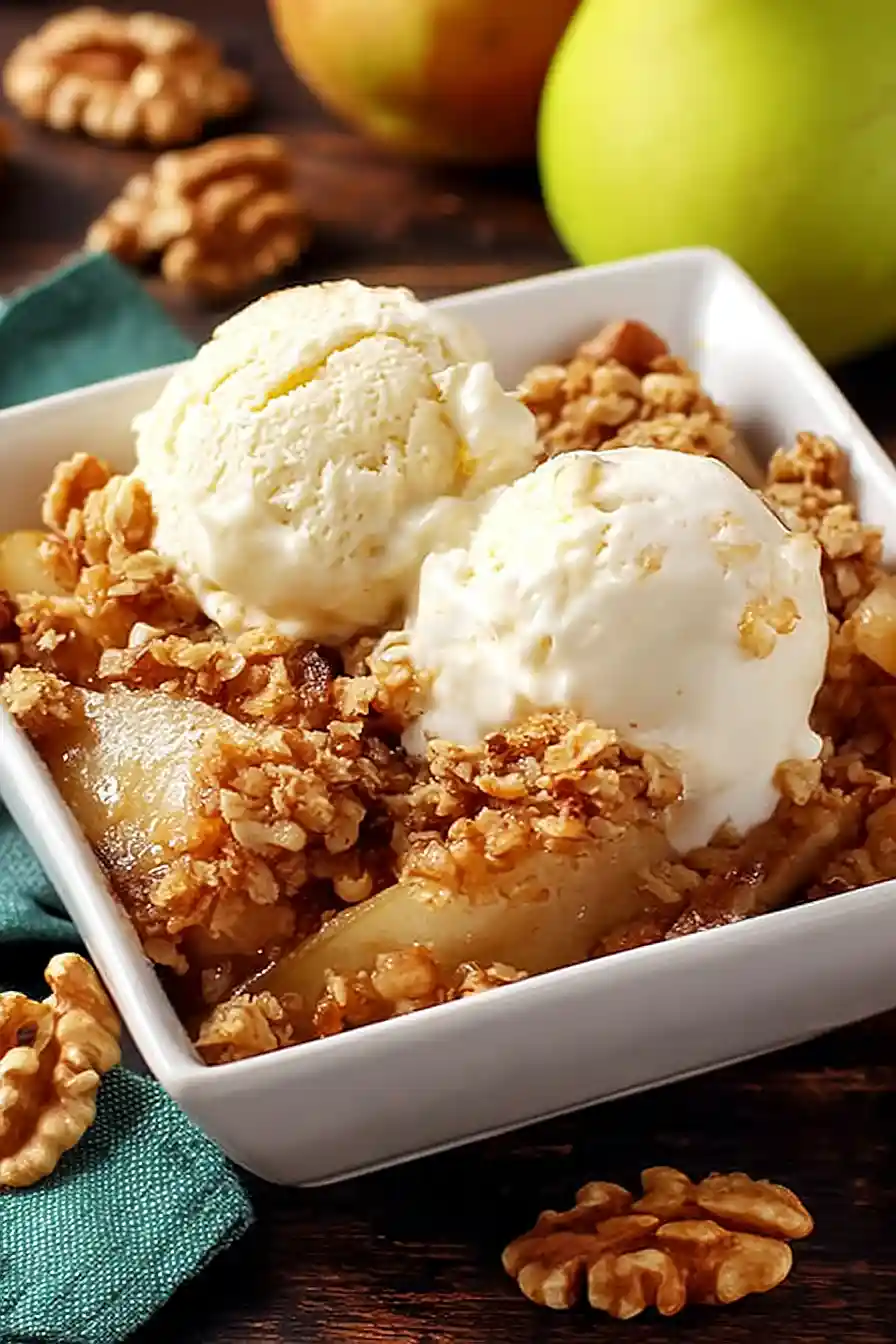
- Crowd-pleasing comfort food – Whether you’re serving it for a family dinner or bringing it to a potluck, this warm crisp with a scoop of vanilla ice cream never disappoints.
What Kind of Pears Should I Use?
You’ve got a few good options when it comes to picking pears for this crisp. Bartlett pears are a solid choice since they’re easy to find and have a nice sweet flavor that holds up well when baked. Bosc pears are another great option because they’re firmer and won’t turn to mush in the oven, plus they have a slightly spiced flavor that works perfectly with the cinnamon. If you can only find pears that are still pretty firm at the store, that’s actually ideal – you want them ripe but not overly soft, since they’ll continue to soften as they bake. Just avoid pears that are bruised or have any mushy spots, as those won’t give you the best texture in your finished crisp.
Options for Substitutions
This crisp is pretty forgiving when it comes to swapping ingredients:
- Pears: You can use apples instead of pears, or try a mix of both for a nice flavor combination. Firm varieties like Granny Smith or Honeycrisp work best since they hold their shape during baking.
- Walnuts: Not a fan of walnuts? Pecans, almonds, or hazelnuts make great substitutes. You can also leave the nuts out completely if you have allergies or just prefer a nut-free crisp.
- Old-fashioned oats: Quick oats can work in place of old-fashioned oats, though your topping will be slightly less chunky. Just don’t use instant oats as they’ll turn mushy.
- Butter: For a dairy-free version, coconut oil works well as a substitute. Use the same amount and make sure it’s solid and cold before cutting it into the topping.
- Cornstarch: If you’re out of cornstarch, use 2 tablespoons of all-purpose flour instead to thicken the fruit filling.
- Brown sugar: Regular granulated sugar works fine in the topping, though you’ll lose that slight molasses flavor that brown sugar provides.
Watch Out for These Mistakes While Baking
The biggest mistake when making fruit crisps is cutting your pears unevenly, which leads to some pieces turning mushy while others stay too firm – aim for slices about 1/4-inch thick for consistent cooking.
Many people also skip tossing the pears with lemon juice right away, but this step is important because it prevents browning and adds brightness to balance the sweetness.
Your topping can easily go from golden to burnt if you’re not careful, so if it’s browning too quickly, tent the dish loosely with foil for the last 15-20 minutes of baking.
Finally, resist the urge to dig in immediately – letting the crisp cool for at least 15 minutes allows the juices to thicken up properly, so you won’t end up with a watery mess on your plate.
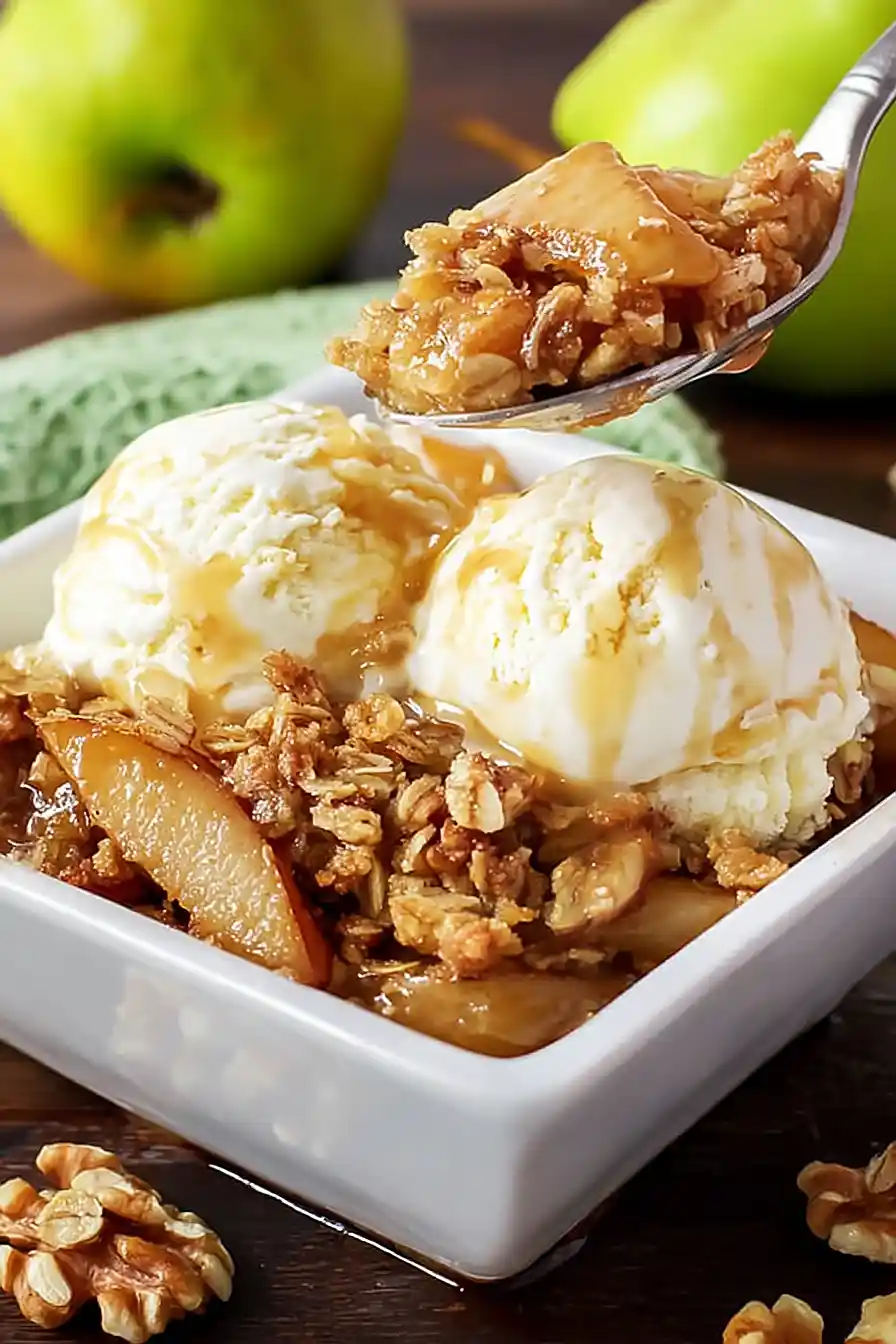
What to Serve With Pear & Walnut Crisp?
A warm pear crisp is begging for a scoop of vanilla ice cream on top – the cold, creamy ice cream melting into the warm fruit is absolutely perfect. If you want something a bit lighter, try a dollop of whipped cream or even some Greek yogurt for a tangy contrast to the sweet pears and crunchy topping. This dessert also pairs really well with a hot cup of coffee or tea, especially something like chai or Earl Grey that complements the cinnamon and walnut flavors. For a special brunch, serve it alongside some bacon or sausage for that sweet and savory combo that everyone loves.
Storage Instructions
Store: Keep your pear crisp covered with foil or plastic wrap in the fridge for up to 4 days. The topping might lose a bit of its crunch after the first day, but it still tastes great and the flavors actually get better as they sit together.
Freeze: You can freeze the whole crisp (after baking and cooling) wrapped tightly in foil and then in a freezer bag for up to 3 months. Or freeze it unbaked if you want to prep ahead – just add about 10 extra minutes to the baking time when you’re ready to make it.
Reheat: Warm individual portions in the microwave for about 30 seconds, or reheat the whole dish in a 350°F oven for 15-20 minutes until heated through. If you want to crisp up the topping again, pop it under the broiler for a minute or two at the end.
| Preparation Time | 15-20 minutes |
| Cooking Time | 40 minutes |
| Total Time | 55-60 minutes |
| Level of Difficulty | Easy |
Estimated Nutrition
Estimated nutrition for the whole recipe (without optional ingredients):
- Calories: 1400-1550
- Protein: 10-14 g
- Fat: 36-44 g
- Carbohydrates: 275-300 g
Ingredients
For the fruit layer:
- 6 cups pears, sliced (about 3 lb)
- 1 tbsp lemon juice, fresh
- 1/3 cup white sugar
- 1 tbsp cornstarch
- 1 tsp ground cinnamon
For the crisp topping:
- 1/3 cup all-purpose flour
- 1/2 cup packed brown sugar
- 1/2 tsp ground cinnamon
- 1/2 tsp salt
- 3 tbsp cold unsalted butter, diced
- 1/3 cup rolled oats
- 1/4 cup chopped walnuts, coarse
Step 1: Prepare and Slice the Pears
- 6 cups pears, sliced (about 3 lb)
Core the pears and cut them lengthwise into 1/2-inch thick slices.
You don’t need to peel them unless the skins are especially thick.
Step 2: Coat Pears and Toss with Sugar Mixture
- sliced pears from Step 1
- 1 tbsp lemon juice, fresh
- 1/3 cup white sugar
- 1 tbsp cornstarch
- 1 tsp ground cinnamon
Place the sliced pears into a 2-quart baking dish.
Drizzle the fresh lemon juice over the pears and gently toss to coat.
In a separate bowl, whisk together the white sugar, cornstarch, and 1 teaspoon ground cinnamon.
Add this mixture to the pears and toss well, ensuring the slices are evenly coated.
I like to make sure every pear slice is evenly covered for a perfectly thickened filling.
Step 3: Prepare the Crisp Topping
- 1/3 cup all-purpose flour
- 1/2 tsp ground cinnamon
- 1/2 cup packed brown sugar
- 1/2 tsp salt
- 3 tbsp cold unsalted butter, diced
- 1/3 cup rolled oats
- 1/4 cup chopped walnuts, coarse
In a medium bowl, combine the flour, 1/2 teaspoon ground cinnamon, packed brown sugar, and salt.
Add the cold diced butter.
Using a fork, pastry cutter, or your fingers, work the butter into the dry mixture until coarse, crumbly clumps form.
Stir in the rolled oats and chopped walnuts to complete the topping.
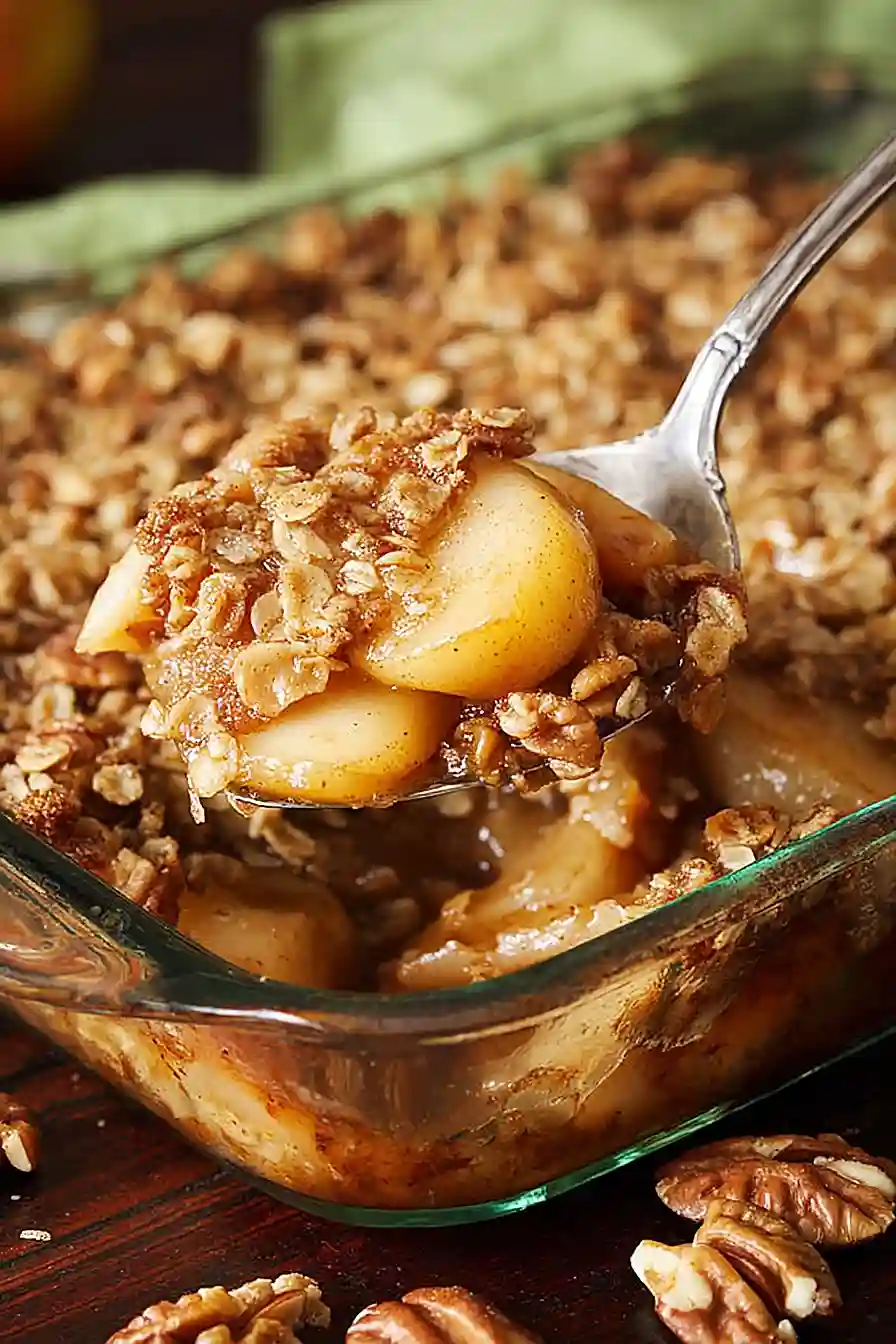
Step 4: Assemble and Bake the Crisp
- pear mixture from Step 2
- crisp topping from Step 3
Evenly sprinkle the crisp topping from Step 3 over the prepared pear mixture in the baking dish.
Bake at 375°F (190°C) for about 40 minutes, or until the pears are tender and the topping is golden brown.
I like to let the crisp cool for at least 10 minutes before serving to allow the juices to thicken slightly.
Step 5: Serve the Pear & Walnut Crisp
Serve the crisp warm, at room temperature, or chilled.
Enjoy it plain, or with a scoop of vanilla ice cream or a dollop of whipped cream for an extra treat.
Buttery Pear & Walnut Crisp
Ingredients
For the fruit layer:
- 6 cups pears, sliced (about 3 lb)
- 1 tbsp lemon juice, fresh
- 1/3 cup white sugar
- 1 tbsp cornstarch
- 1 tsp ground cinnamon
For the crisp topping:
- 1/3 cup all-purpose flour
- 1/2 cup packed brown sugar
- 1/2 tsp ground cinnamon
- 1/2 tsp salt
- 3 tbsp cold unsalted butter, diced
- 1/3 cup rolled oats
- 1/4 cup chopped walnuts, coarse
Instructions
- Core the pears and cut them lengthwise into 1/2-inch thick slices. You don't need to peel them unless the skins are especially thick.
- Place the sliced pears into a 2-quart baking dish. Drizzle the fresh lemon juice over the pears and gently toss to coat. In a separate bowl, whisk together the white sugar, cornstarch, and 1 teaspoon ground cinnamon. Add this mixture to the pears and toss well, ensuring the slices are evenly coated. I like to make sure every pear slice is evenly covered for a perfectly thickened filling.
- In a medium bowl, combine the flour, 1/2 teaspoon ground cinnamon, packed brown sugar, and salt. Add the cold diced butter. Using a fork, pastry cutter, or your fingers, work the butter into the dry mixture until coarse, crumbly clumps form. Stir in the rolled oats and chopped walnuts to complete the topping.
- Evenly sprinkle the crisp topping from Step 3 over the prepared pear mixture in the baking dish. Bake at 375°F (190°C) for about 40 minutes, or until the pears are tender and the topping is golden brown. I like to let the crisp cool for at least 10 minutes before serving to allow the juices to thicken slightly.
- Serve the crisp warm, at room temperature, or chilled. Enjoy it plain, or with a scoop of vanilla ice cream or a dollop of whipped cream for an extra treat.
