I have such a soft spot for peanut butter cookies. There’s something about that rich, nutty flavor that takes me right back to childhood. But let’s be honest – sometimes I want that classic Nutter Butter taste without having to run to the store.
That’s when homemade Nutter Butter cookies come to the rescue. These little sandwich cookies give you all the peanut butter goodness you’re craving, plus that satisfying crunch. I love making a big batch on Sunday afternoons when the kids are around to help press the fork marks into the dough.
The best part? You probably have most of the ingredients sitting in your pantry right now. No fancy equipment needed, just a couple of mixing bowls and your trusty cookie sheets. Once you try these, you might never go back to the store-bought version.
Why You’ll Love These Nutter Butter Cookies
- Super quick and easy – With just 15-25 minutes from start to finish, you can whip up these fun treats without spending hours in the kitchen.
- Only 4 ingredients – You probably already have most of what you need, and the rest can be picked up in one quick trip to the store.
- Perfect for kids – Little ones will love helping decorate these cute cookies with candy eyeballs and chocolate chips – it’s like a fun craft project you can eat!
- Great for parties – These adorable decorated cookies are perfect for birthday parties, school events, or any time you need a crowd-pleasing treat that looks way fancier than the effort you put in.
What Kind of Nutter Butter Cookies Should I Use?
Any standard Nutter Butter cookies from the grocery store will work perfectly for this recipe. You’ll want to stick with the original peanut-shaped ones rather than any specialty flavors or mini versions, since the classic size and shape are ideal for decorating. Make sure your cookies are fresh and not stale – they should have a nice crisp texture when you bite into them. If you can only find family-size packages, that’s totally fine since you’ll just have extras for snacking while you work on your decorated treats.
Options for Substitutions
This fun cookie recipe is pretty straightforward, but here are some swaps you can make:
- Nutter Butter cookies: These peanut-shaped cookies are really the star here, so I’d stick with them for the best look. But if you can’t find them, vanilla wafers or even homemade peanut butter cookies cut into oval shapes could work.
- White candy melts: White chocolate chips work great as a substitute – just melt them the same way. You can also use almond bark or even white chocolate bars chopped up.
- Candy eyeballs: No candy eyes? Make your own by piping small dots of melted white chocolate and adding mini chocolate chip pieces on top while wet. You could also use white chocolate chips with a tiny dab of chocolate frosting.
- Mini chocolate chips: Regular chocolate chips work fine – just break them into smaller pieces. You could also use chocolate sprinkles or even draw on features with melted chocolate in a piping bag.
Watch Out for These Mistakes While Cooking
The biggest mistake when melting candy melts is overheating them, which causes the chocolate to seize up and become thick and unusable – instead, melt them in 30-second intervals in the microwave, stirring between each round until smooth.
Another common error is trying to attach the candy eyeballs and chocolate chips while the melted coating is too hot, as they’ll just slide right off – wait about 2-3 minutes for the coating to cool slightly but still be tacky enough for decorations to stick.
To get clean, professional-looking dipped cookies, make sure to tap off excess melted candy before placing them on parchment paper, and work quickly since candy melts set faster than regular chocolate.
If your candy melts seem too thick for dipping, add a teaspoon of coconut oil or shortening to thin them out rather than adding more heat, which will give you a smoother finish.
What to Serve With Nutter Butter Cookies?
These decorated Nutter Butter cookies are perfect on their own as a fun treat, but they’re even better with a tall glass of cold milk for dunking. I love serving them at kids’ parties alongside other simple finger foods like fruit cups, cheese sticks, or mini sandwiches cut into fun shapes. They also make great additions to Halloween party spreads with other spooky treats like orange and black cupcakes or candy corn. For a cozy movie night, pair them with hot chocolate or apple cider – the peanut butter flavor goes surprisingly well with warm drinks.
Storage Instructions
Keep Fresh: These decorated Nutter Butter cookies stay best in an airtight container at room temperature for up to a week. Make sure the candy coating is completely set before stacking them, or they might stick together. I like to put a piece of parchment paper between layers just to be safe.
Freeze: You can freeze these cookies for up to 2 months in a freezer-safe container. Just let them thaw at room temperature for about 30 minutes before serving. The candy coating holds up really well in the freezer, so they taste just as good as fresh!
Make Ahead: These are perfect for making a day or two ahead of parties or events. The candy melts actually get firmer over time, which makes them easier to handle. Just keep them covered so the cookies don’t get stale, and they’ll be ready when you need them.
| Preparation Time | 10-15 minutes |
| Cooking Time | 5-10 minutes |
| Total Time | 15-25 minutes |
| Level of Difficulty | Easy |
Estimated Nutrition
Estimated nutrition for the whole recipe (without optional ingredients):
- Calories: 1100-1300
- Protein: 8-12 g
- Fat: 62-72 g
- Carbohydrates: 140-160 g
Ingredients
- 12 nutter butter sandwich cookies
- 1 cup white melting candies
- 24 decorative candy eyes
- 12 mini semi-sweet chocolate chips
Step 1: Prepare the Baking Sheet
Line a baking sheet with a piece of wax paper.
This will provide you with a surface to place the dipped cookies on so they can harden properly before serving.
Step 2: Melt the White Candy Coating
- 1 cup white melting candies
In a small microwave-safe bowl, melt the white melting candies.
Heat them in the microwave in 30-second intervals at 50% power, stirring between each interval to promote even melting.
This process should take about 4-5 minutes.
Be careful not to overheat or burn the candy melts.
I like to keep an eye on them and stir a little extra to ensure they stay silky smooth.
Step 3: Dip the Cookies
- 12 Nutter Butter sandwich cookies
- melted white candies from Step 2
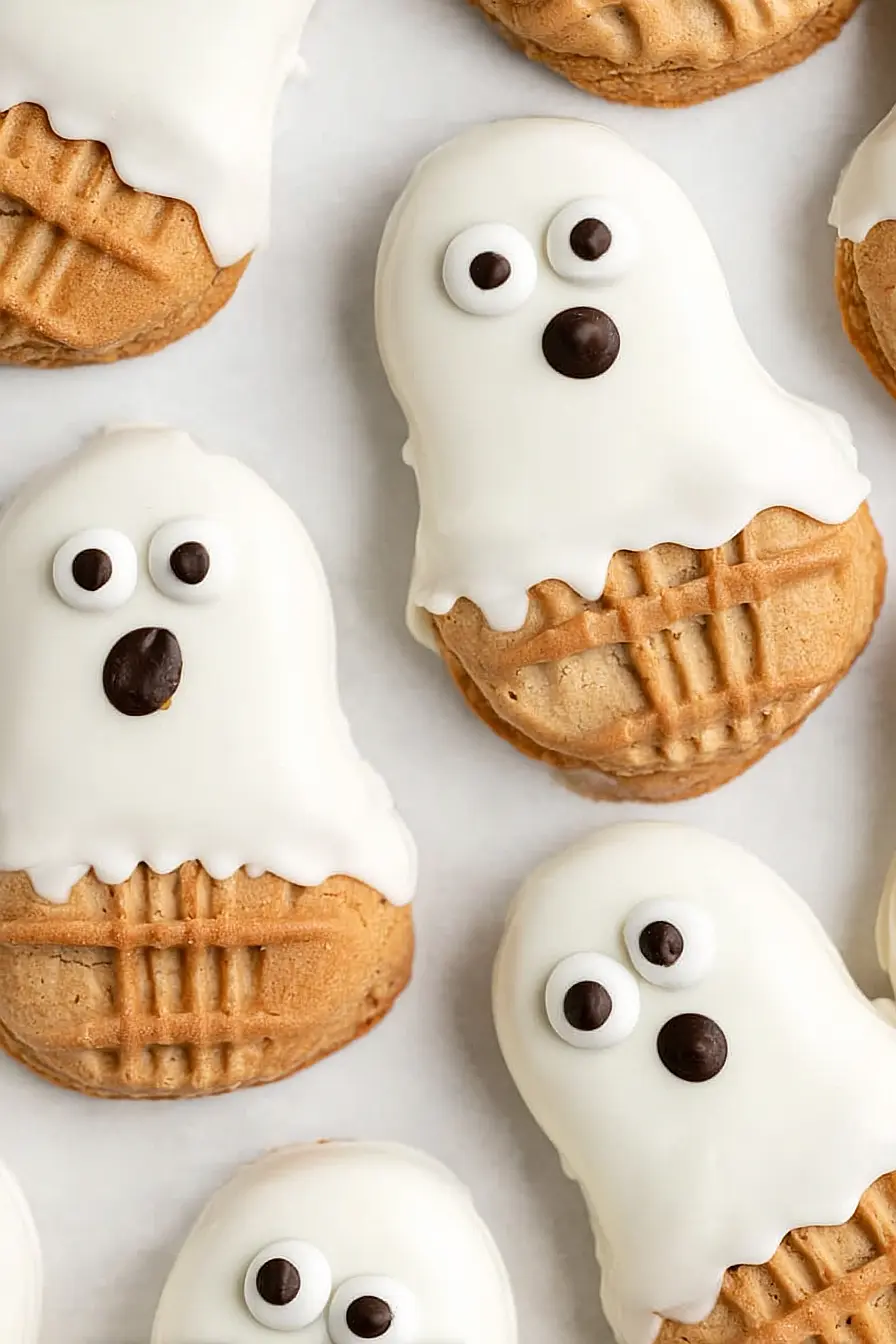
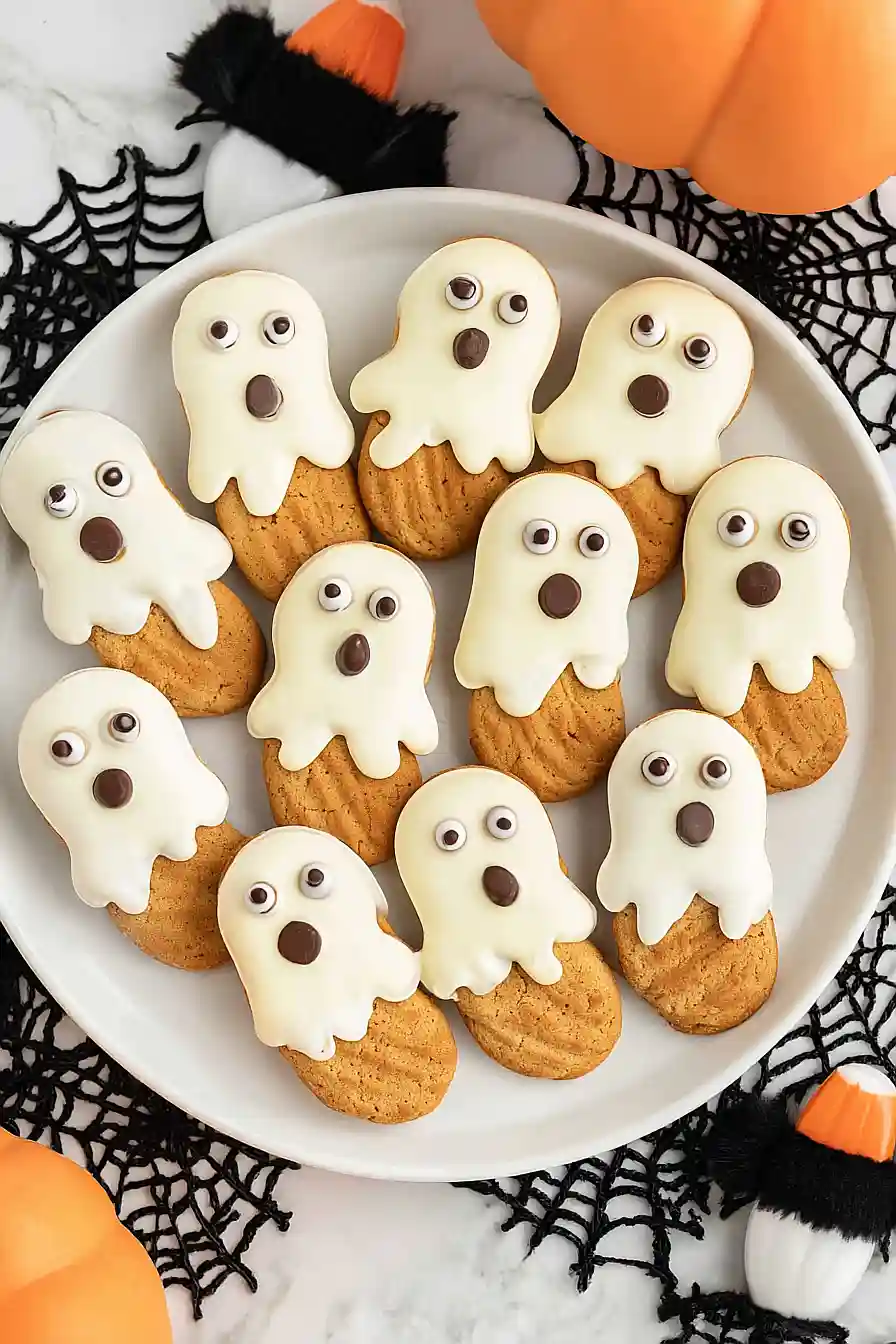
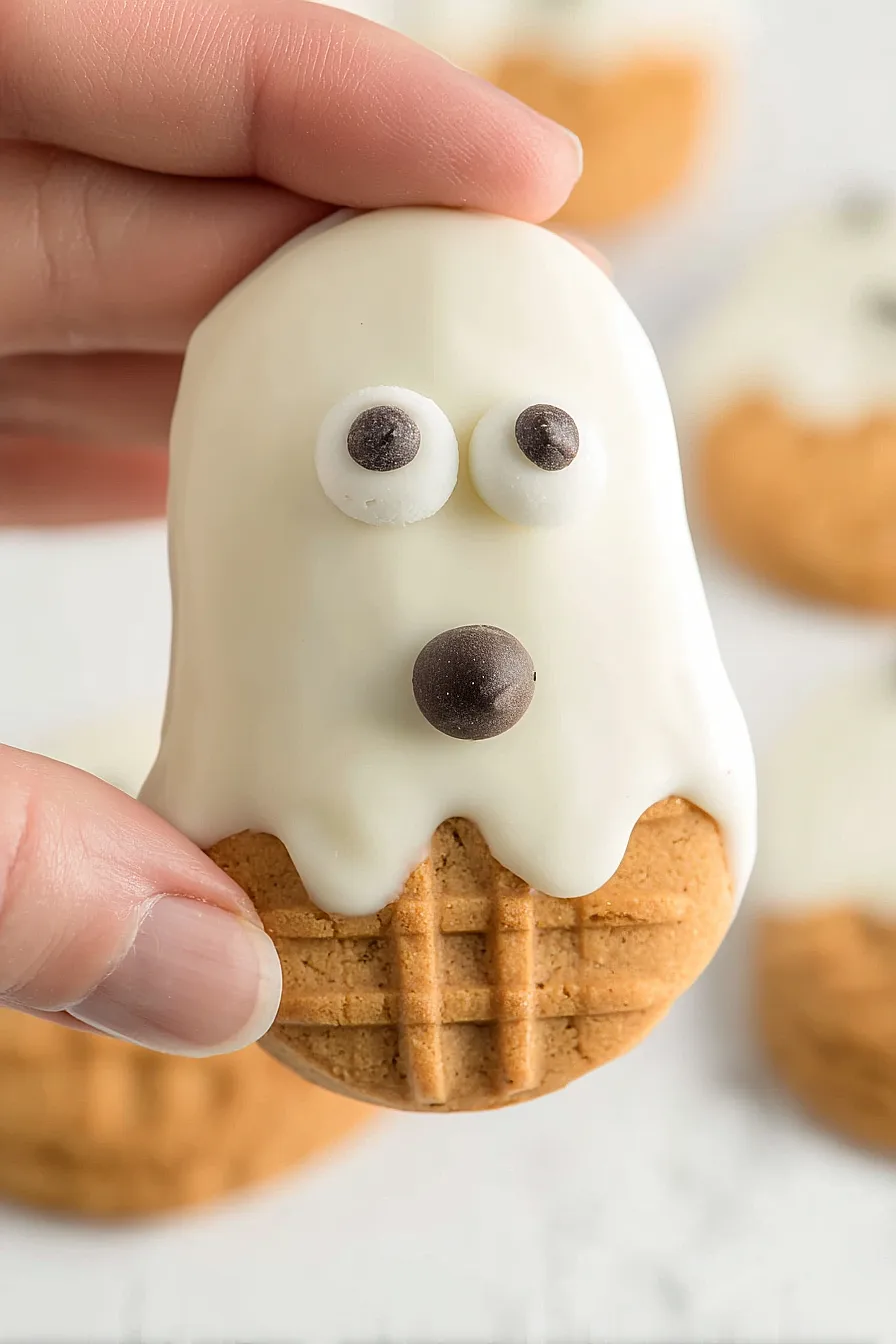
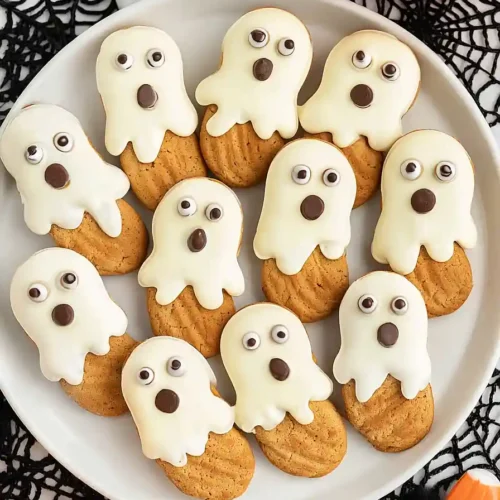
Hold each Nutter Butter sandwich cookie and dip it into the melted white candies, covering about 70-75% of the cookie so that the bottom remains exposed.
Allow excess candy coating to drip off, gently tapping the cookie against the side of the bowl if needed.
Step 4: Decorate the Ghost Cookies
- 24 decorative candy eyes
- 12 mini semi-sweet chocolate chips
- dipped cookies from Step 3
While the white candy coating is still wet, press two decorative candy eyes and one mini semi-sweet chocolate chip onto the upper coated part of each cookie to create a ghost face.
Step 5: Harden and Serve the Cookies
- decorated cookies from Step 4
Place each decorated cookie onto the wax-paper-lined baking sheet.
Let the cookies set for 5-10 minutes, allowing the candy coating to harden before serving.
This brief wait ensures the decorations stay in place and gives you perfectly set treats ready to enjoy!
Perfect Nutter Butter Cookies
Ingredients
- 12 Nutter Butter sandwich cookies
- 1 cup white melting candies
- 24 decorative candy eyes
- 12 mini semi-sweet chocolate chips
Instructions
- Line a baking sheet with a piece of wax paper. This will provide you with a surface to place the dipped cookies on so they can harden properly before serving.
- In a small microwave-safe bowl, melt the white melting candies. Heat them in the microwave in 30-second intervals at 50% power, stirring between each interval to promote even melting. This process should take about 4-5 minutes. Be careful not to overheat or burn the candy melts. I like to keep an eye on them and stir a little extra to ensure they stay silky smooth.
- Hold each Nutter Butter sandwich cookie and dip it into the melted white candies, covering about 70-75% of the cookie so that the bottom remains exposed. Allow excess candy coating to drip off, gently tapping the cookie against the side of the bowl if needed.
- While the white candy coating is still wet, press two decorative candy eyes and one mini semi-sweet chocolate chip onto the upper coated part of each cookie to create a ghost face.
- Place each decorated cookie onto the wax-paper-lined baking sheet. Let the cookies set for 5-10 minutes, allowing the candy coating to harden before serving. This brief wait ensures the decorations stay in place and gives you perfectly set treats ready to enjoy!
